

Where to photograph the Dent Parrachée from Aussois and Plan d'Amont?
Updated July 23, 2026
La Dent Parrachée is one of the most graphic subjects in the Vanoise National Park, on the Haute Maurienne side. From Aussois, Plan d’Amont, and Plan d’Aval, it photographs very differently from the Pralognan area: high-altitude dams, lakes, reflections, limestone ridges, golden light, autumn storms, and vast open landscapes.
This page is a detailed photo guide to prepare for a trip around Dent Parrachée from Aussois and Plan d’Amont. The goal is not just to reach a viewpoint, but to understand how to build a strong image: where to stand, when to wait for the light, how to compose with the dams, how to use reflections, and how to give Dent Parrachée presence without crushing it in too wide a panorama.
This area works particularly well when the water, dams, and ridges truly contribute to the composition. Dent Parrachée should not just appear in the background of the frame: its presence is enhanced when the lines of Plan d’Amont, reflections, or a changing sky structure the image. Our collection of Vanoise photo prints features several of these moods on matte Dibond aluminium.

The essentials in 30 seconds
- Best main subject: Dent Parrachée, especially in grazing light, at sunrise or sunset.
- Best foregrounds: Plan d’Amont, Plan d’Aval, dams, shorelines, high-altitude grasses, and reflections.
- Best atmosphere: autumn, storm, changing sky, fresh snow, or golden light on the ridges.
- Best light: sunset, sunrise, side light, and clearings after a disturbance.
- Useful focal length: 24–70 mm to balance lake and summit, 70–200 mm to isolate ridges and compress planes.
- Key tip: don't just photograph Dent Parrachée; use water, dams, or clouds to structure the image.
Explore photo guides around the Vanoise
This guide is part of the Vanoise mini-cluster. The main page presents the major areas of the massif, while the detailed guides help prepare each photo outing with a more precise angle.
- Where to photograph the Vanoise? Photo spots and field tips
- Where to photograph the Lac des Vaches, the Col, and the Vanoise Refuge?
- Where to photograph the Valette Refuge and the Grand Marchet?
- Where to photograph the Grande Casse from Courchevel, la Saulire, and la Dent de Burgin?
- Back to the Alps Photo Destinations hub
Table of Contents
- Why photograph Dent Parrachée from Aussois?
- Practical summary of the photo outing
- Access from Aussois and Plan d’Amont
- Photographing Plan d’Amont and Plan d’Aval
- Photographing Dent Parrachée
- Photographing the Dent Parrachée Refuge area
- Photographing autumn storms and light
- Dent Parrachée, Chasseforêt, and Mont Pelve
- Best times for light
- Photo composition ideas
- Recommended photo equipment
- Regulations and safety
- Photo prints related to Dent Parrachée
- FAQ
Why photograph Dent Parrachée from Aussois?
Dent Parrachée is a very interesting peak to photograph because it offers an immediately recognizable silhouette: marked ridges, couloirs, limestone slabs, snowfields, and powerful reliefs. From Aussois and Plan d’Amont, it can be integrated into very different compositions: wide landscape, reflection, golden light, storm, cold atmosphere, or a tighter telephoto shot.
This area is also distinguished by the presence of the Plan d’Amont and Plan d’Aval dams and lakes. These elements provide structure to the image. They allow for stronger compositions than a simple isolated peak: shoreline, dam diagonal, partial reflection, contrast between dark water and light rock face, or a succession of planes towards Dent Parrachée.
It is therefore an essential N4 in the Vanoise cluster: it changes valleys, changes ambiance, and brings a true Haute Maurienne perspective beyond the Pralognan itineraries.
Practical summary of the photo outing
| Area | Photo interest | Best light | Useful focal lengths | To prioritize |
|---|---|---|---|---|
| Plan d’Amont | Lake, dam, reflections, view towards the summits | Morning, late afternoon, overcast sky | 16–35 mm, 24–70 mm | Shorelines, water lines, wide compositions |
| Plan d’Aval | Lower perspective, water, reliefs, Haute Maurienne ambiance | Morning or late afternoon | 24–70 mm, 70–200 mm | Reflections, layers of planes, dam lines |
| Refuge de la Dent Parrachée | High point, view of dams, summit, human scale | Side light, sunset | 24–70 mm, 70–200 mm | Structured panorama and anchor point |
| Dent Parrachée | Graphic summit, ridges, couloirs, limestone slabs | Sunrise, sunset, clearings after storm | 70–200 mm | Compression, details, silhouette |
| Chasseforêt / Mont Pelve | Wider view of the heart of the Vanoise | Sunrise, cold light | 70–200 mm | Alignments of summits and alpine atmosphere |
Access from Aussois and Plan d’Amont
Access is from Aussois, climbing up the road to the Plan d’Aval and Plan d’Amont dams. The classic starting point is at the Plan d’Amont dam car park. The area is already interesting for photos even before starting the walk: water, dam, light on the reliefs, view towards the summits, and high valley atmosphere.
From Plan d’Amont, the Dent Parrachée refuge can be reached by a hike of about 500 m of elevation gain. In summer, the route is presented as accessible to all hikers, but it remains a real mountain outing: weather, fatigue, timings, residual snow, and terrain conditions must be checked before departure.
In season, access can also be facilitated by the Grand Jeu chairlift, depending on its opening. In winter, the area's logic changes completely: access by ski or snowshoe, nivological conditions, and appropriate equipment become essential.
Useful official links before the outing
Photographing Plan d’Amont and Plan d’Aval
Plan d’Amont and Plan d’Aval are essential for photographing Dent Parrachée because they offer strong foregrounds. Without them, the summit can quickly become just a mountain in the distance. With them, the image gains structure: shoreline, water, dam, reflection, diagonal, depth.
In the morning, the water can be calmer and reflections more interesting. In the late afternoon, the dams and shorelines can create graphic lines towards the summits. In cloudy weather, contrasts become softer, and partial reflections can give a more subdued atmosphere.
Photo tips around the lakes
- Look for a clear shoreline to guide the eye towards Dent Parrachée.
- Avoid cropping reflections too tightly if the water is calm.
- Use the lines of dams or paths to structure the image.
- In an empty sky, reduce its prominence and give more importance to the water or relief.
- Try an intermediate focal length to retain the summit's presence without losing context.
Photographing Dent Parrachée
Dent Parrachée works particularly well when the light reveals its lines. The summit is powerful, but it can become too massive if the light is flat. The best moments are therefore grazing light, clearings after a disturbance, storm skies, or sunsets that cut out the ridges.
The telephoto lens is often decisive. With a long focal length, you can isolate the ridges, couloirs, limestone slabs, and snowfields. The image becomes denser and more graphic than a too-wide panorama.

Photo tips for Dent Parrachée
- Wait for side light to reveal volumes.
- Use a 70–200 mm lens to isolate the ridges and avoid a summit that is too distant.
- Integrate a simple foreground: shoreline, lake, grasses, rocks, or dam.
- During a storm, look for contrasts between dark sky and illuminated rock face.
- Maintain a clear composition: too many summits in the frame can weaken the image.
Photographing the Dent Parrachée Refuge area
The Dent Parrachée refuge is interesting because it overlooks the Plan d’Amont and Plan d’Aval reservoirs. It allows you to gain some height, see the dams differently, and place Dent Parrachée in a broader landscape.
Photographhically, it's not just the refuge that matters, but the relationship between the refuge, the lakes, and the summits. The building can serve as an anchor point, but it doesn't necessarily have to become the main subject of every image.
Photo tips around the refuge
- Use the refuge as a scale reference if the composition becomes too mineral.
- Look for plunging views towards Plan d’Amont and Plan d’Aval.
- Work on panoramas if the shorelines are clear.
- In the late afternoon, observe the shadows that define the slopes.
- Don't overload the image: a lake, a refuge, a summit can be enough.
Photographing autumn storms and light
The Aussois / Plan d’Amont area can become very dramatic when the weather changes. Autumn storms, low clouds, or clearings after a disturbance often add more character than a uniform blue sky.
In mountain photography, imperfect weather can transform an image. Dent Parrachée gains presence when clouds cling to the ridges, when the sky darkens, or when a break in the light strikes the rock face for a few seconds.
Photo tips for unstable weather
- Stay cautious: mountain storms are dangerous and should never be underestimated.
- Anticipate clearings after a disturbance rather than staying exposed under the storm.
- Expose to retain details in the clouds and light rock faces.
- Use a long focal length to isolate areas of light.
- Prefer simple compositions, as the weather already brings a lot of intensity.
Dent Parrachée, Chasseforêt, and Mont Pelve
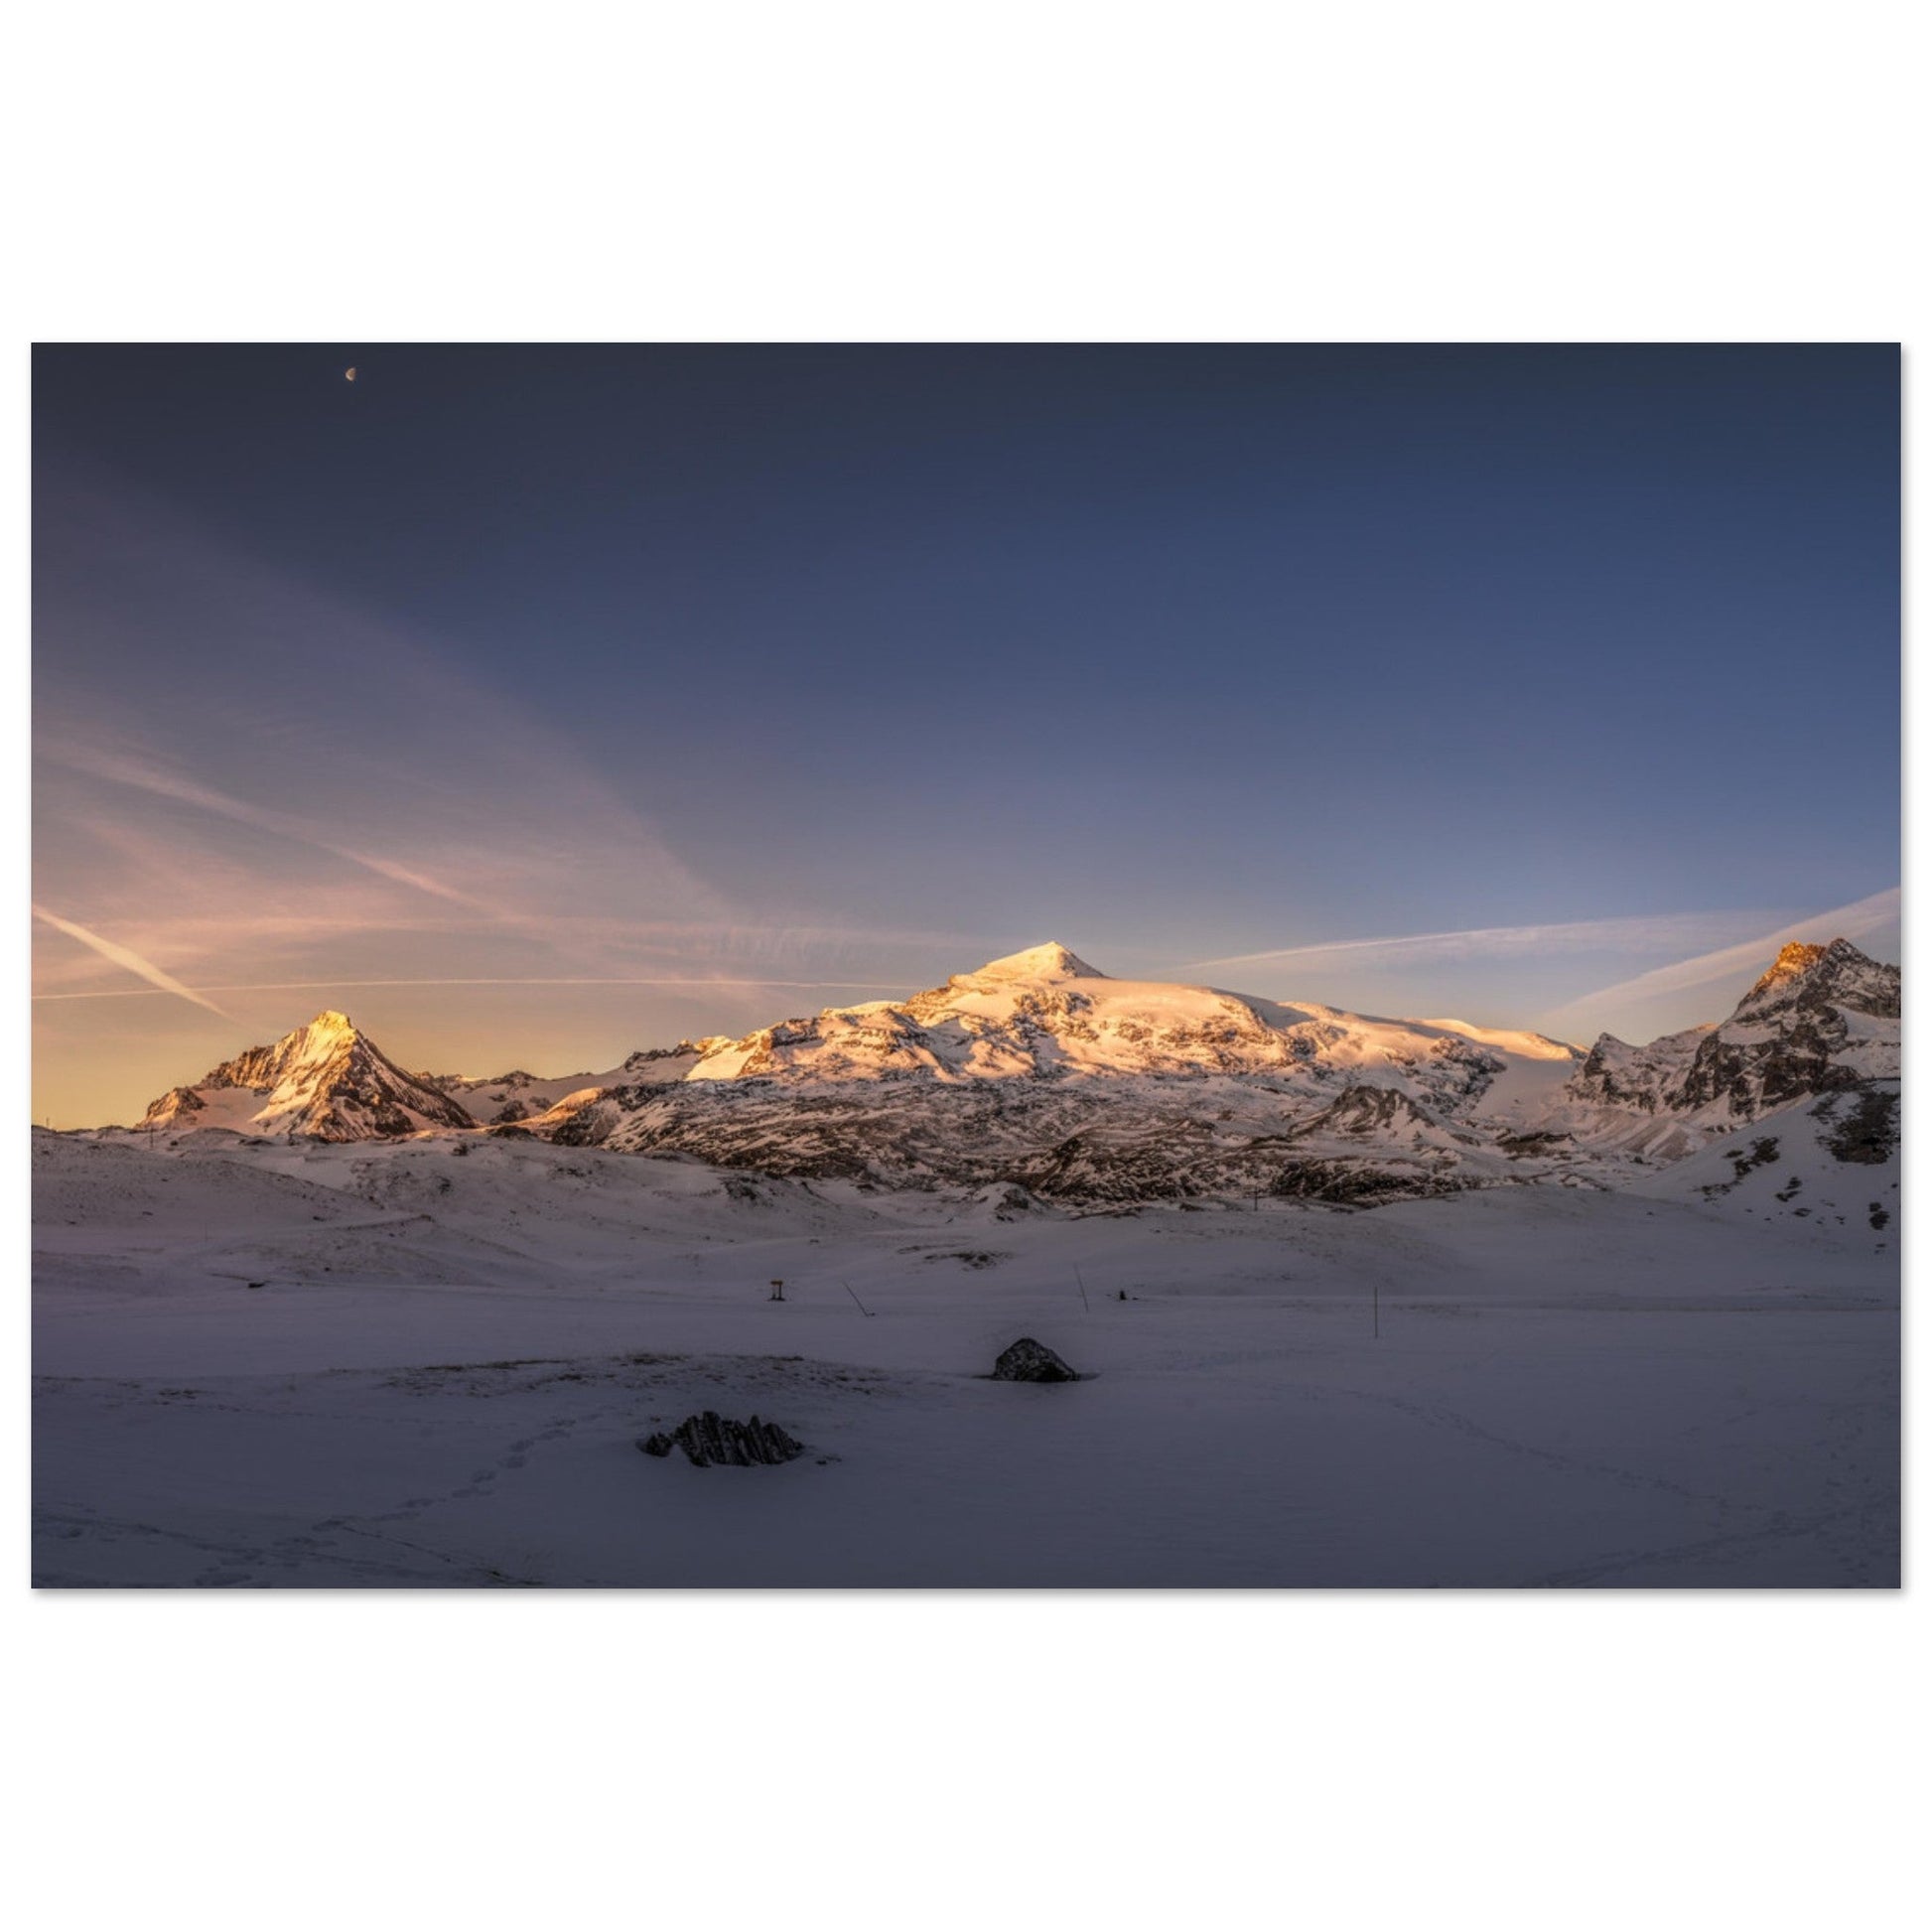
From certain points in the area, Dent Parrachée can interact with other summits in the heart of the Vanoise, such as the Dôme de Chasseforêt or Mont Pelve. This is a broader, more alpine approach that works very well at sunrise when the ridges are progressively illuminated.
This type of image is interesting for telling the story of the Vanoise beyond a single summit. You are no longer just photographing Dent Parrachée: you are building a massif narrative, with multiple planes, multiple snow lines, and a broader atmosphere.
Best times to photograph Dent Parrachée
Sunrise
Sunrise is interesting if you are already at altitude or sleeping in the area. The cold then golden light adds relief to the summits and allows for a calm, very alpine atmosphere.
Sunset
Sunset is often the most spectacular time for Dent Parrachée. The ridges gain volume, shadows lengthen, and the last light can transform the rock face into a very graphic subject.
Autumn
Autumn is a very good season for this area: warmer colors, lower light, more changeable sky, possible first snows at altitude. Storm or post-storm atmospheres can be particularly strong.
Winter
Winter provides a colder and more minimal perspective of the area, but access becomes more serious. Depending on conditions, it can be done on skis or snowshoes. Safety must then be prioritized over the image.
Photo composition ideas
1. Dent Parrachée + Plan d’Amont
Use the lake as a foreground and Dent Parrachée as the main subject. The goal is to create a clear progression: shoreline, water, relief, summit.
2. Dam line
Dams can be used as graphic lines. They provide a strong human structure, to be handled subtly so as not to make the image too documentary.
3. Partial reflection
An imperfect reflection can be more interesting than a perfect mirror. It provides an atmosphere without making the composition too obvious.
4. Ridges with a telephoto lens
With a long focal length, isolate the ridges, couloirs, and snowfields. Dent Parrachée then becomes more abstract and powerful.
5. Autumn storm
A dark sky, a clearing on the rock face, and a sober foreground can create a very strong image. The weather then becomes a compositional element.
6. Sunrise over the summits
If conditions are stable, look for a wider composition with Dent Parrachée, Chasseforêt, and Mont Pelve. This is ideal for an image of the massif rather than a simple portrait of a summit.
What photo equipment to bring?
- 16–35 mm: useful for integrating lakes, dams, and wide foregrounds.
- 24–70 mm: the most versatile focal length to balance water, reliefs, and summit.
- 70–200 mm: essential for isolating Dent Parrachée, ridges, couloirs, and plays of light.
Regulations and safety
The area is located in a mountain environment and at the gates of the Vanoise National Park. Conditions can change rapidly: thunderstorms, fog, residual snow, wet ground, wind, or cold at altitude.
Before you go, check official information: opening of the dams' road, weather, trail conditions, snow cover, refuge guarding, National Park rules, regulations on dogs, bivouacking, drones, and the protection of natural environments.
Pets are prohibited in the core of the Vanoise National Park. Even for a short photo outing, you must therefore carefully check the area you are crossing and respect local regulations.
The right photo reflex: prepare the shot, but accept to give up if conditions are not safe. A storm light can be magnificent, but it never justifies remaining exposed on a high point or near a body of water.
Photo prints related to Dent Parrachée, Aussois, and Plan d’Amont
This area is very strong for wall decor because it offers images that are both graphic and profound: identifiable summit, lakes, storms, golden light, snow, ridges, reflections, and the atmosphere of Haute Maurienne. The photographs below directly extend the ambiance of this outing.
See in the gallery
- Photo of a sunset on Dent Parrachée, Vanoise National Park — the image most directly linked to the Aussois / Plan d’Amont area, with golden light and limestone relief.
- Photo of Dent Parrachée — Autumn storm in Vanoise — perfect for a more dramatic atmosphere, with dark clouds and changing light.
- Photo of a sunrise on Dent Parrachée, Dôme de Chasseforêt, and Mont Pelve — a broader view of the heart of Vanoise at dawn.
You can also explore:
- Vanoise photo prints
- mountain lake photo prints
- mountain reflections photo prints
- mountain sunset photo prints
- the gallery's selection
- Alpine landscape photo prints for chalets
Continue your exploration of Vanoise
To prepare for other photo outings in the massif, you can continue with the other guides in the Vanoise mini-cluster:
- Where to photograph Vanoise? Photo spots and field tips
- Where to photograph Lac des Vaches, the Col and the Vanoise Refuge?
- Where to photograph the Valette Refuge and Grand Marchet?
- Where to photograph La Grande Casse from Courchevel, La Saulire and Dent de Burgin?
FAQ — Photographing Dent Parrachée from Aussois and Plan d’Amont
Where to photograph Dent Parrachée from Aussois?
The best areas are Plan d’Amont, Plan d’Aval, the surroundings of the dam, and the ascent to the Dent Parrachée Refuge. These points offer views of the summit, lakes, dams, and the reliefs of Haute Maurienne.
What is the best time to photograph Dent Parrachée?
Sunset and side lighting are often the most interesting. Sunrise also works very well for a colder, more alpine atmosphere.
Is Plan d’Amont interesting for photography?
Yes. Plan d’Amont allows for compositions with water, shores, the dam, reflections, and surrounding peaks. It's a very good foreground to give structure to images.
What focal length to use for photographing Dent Parrachée?
A 24–70 mm is useful for balancing lake and summit, while a 70–200 mm allows for isolating ridges, couloirs, and light details on Dent Parrachée.
Does Dent Parrachée photograph well during a thunderstorm?
Yes, storm skies can create very strong images, with contrast between dark clouds and an illuminated face. But safety comes before the photo: avoid exposed areas and give up if conditions become dangerous.
Is the Dent Parrachée Refuge easily accessible?
From Plan d’Amont, access requires about 500 m of elevation gain. In summer, the route is indicated as accessible to all hikers, but it remains a mountain outing to be prepared seriously.
What is the best season to photograph this area?
Autumn is very interesting for its colors, low light, and stormy atmospheres. Summer makes access easier, while winter offers colder and more minimalist images but requires more experience.
Are dogs allowed in this area?
Pets are prohibited in the core of the Vanoise National Park. You must carefully check the area you are crossing before you go and respect official regulations.