Where to photograph the volcanoes of Auvergne? Photo spots and field tips
Updated July 31, 2026
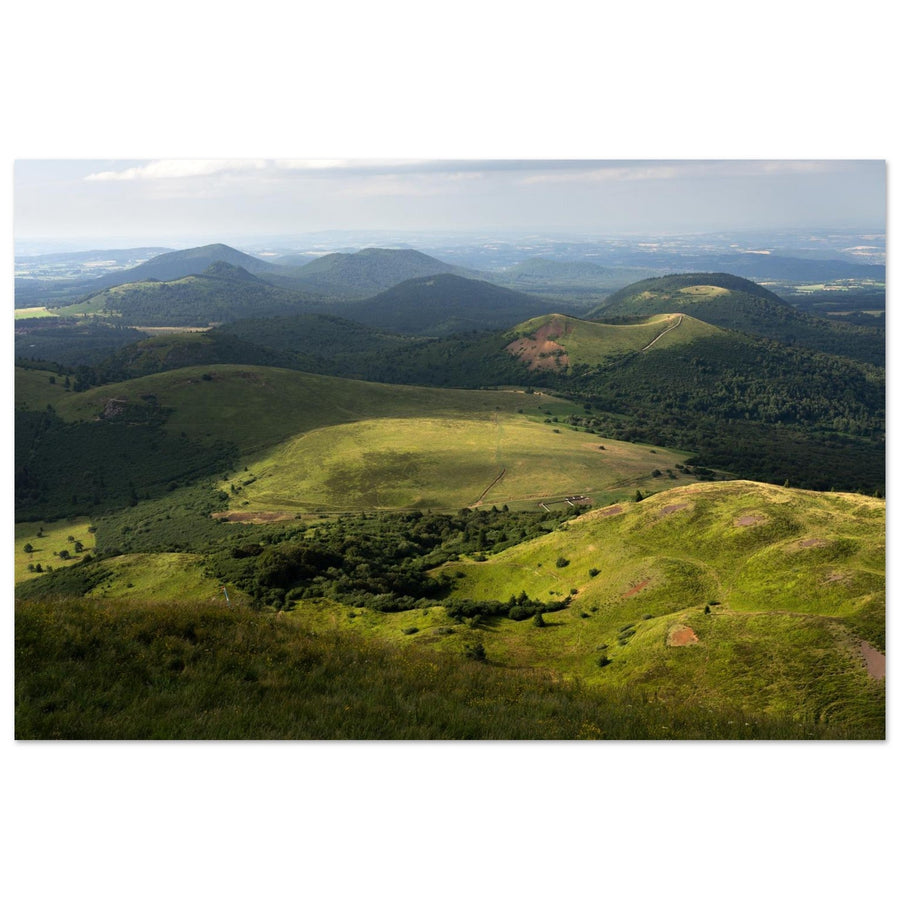
Photographing the volcanoes of Auvergne requires a different perspective than that used for the Alps. Here, the image relies less on verticality and more on the repetition of shapes, the curves of craters, the lines of ridges, volcanic lakes, pastures, and successive planes. The Chaîne des Puys offers instantly recognizable silhouettes; the Monts Dore and the Sancy massif become more mountainous; the Cézallier opens up vast horizons; and the Monts du Cantal reveal deeper valleys around the Puy Mary.
This guide addresses a specific intention: where to photograph the volcanoes of Auvergne and how to choose the right area according to light, season, and the type of image sought. It connects the main locations in Puy-de-Dôme and Cantal, field tips, and useful technical guides. Available works are grouped in the collections of Auvergne and Massif central photo prints and Puy-de-Dôme photo prints, without confusing this purchase intention with the preparation of a photo outing.

The essentials in 30 seconds
- Most emblematic spot: Puy de Dôme and Puy de Pariou, to combine crater, summit, and a succession of volcanoes.
- Best area for volcanic alignments: open views from Puy de Dôme towards Puy de Côme, Pariou, and the northern part of the Chaîne des Puys.
- Best area for ridges: the Sancy massif and the Monts Dore.
- Best lakes: Lac Pavin for its geometry and Lac de Guéry for its more open landscape.
- Best area for minimalism: the Cézallier, with its plateaus, roads, and pastures.
- Most spectacular relief: Puy Mary and the Monts du Cantal.
- Most structuring light: a raking light at the beginning or end of the day, separating cones and revealing valleys.
- Useful focal lengths: 24–70 mm for context, 70–200 mm to compress planes, ultra wide-angle only when a strong foreground justifies it.
- Point of vigilance: wind, fog, snow, access to ridges, and local regulations must be checked before each outing.
Why are the Auvergne volcanoes so interesting to photograph?
The diversity of the territory lies in the juxtaposition of very different volcanic landscapes. The Chaîne des Puys aligns over eighty edifices with often clear shapes. The Monts Dore concentrate more rugged ridges around the Puy de Sancy, the highest point of the Massif central. The Cézallier presents itself as an open high plateau. Further south, the Monts du Cantal correspond to an ancient volcano deeply incised by valleys.
Simple shapes that require precise composition
A volcanic cone seems obvious to photograph, but a descriptive image quickly becomes flat. Composition must organise curves, give direction to the eye, and create a relationship between several reliefs. The principles detailed in the guide on mountain photography composition are particularly useful: foreground, leading lines, successive planes, and scale.
Raking light more important than altitude
When the sun is high, rounded reliefs lose some of their volume. Conversely, a lateral light produces cast shadows, separates the "puys" (volcanic hills), and gives depth to the pastures. Preparing a mountain sunrise, mastering the golden hour, or working a sunset changes the image more than systematically seeking the highest point.
A territory conducive to coherent series
The relative proximity of cones, ridges, lakes, and plateaus allows for building a complete series: panoramic view, telephoto detail, landscape with water, mist, forest, and volcanic shapes. This variety is ideal for moving beyond a simple accumulation of spots and producing a coherent visual narrative.
Which area to choose based on the desired image?
| Area | Main subject | Interesting light | Useful focal length | Image style |
|---|---|---|---|---|
| Chaîne des Puys | Cones, craters, alignments | Raking light, mist | 35–200 mm | Graphic and panoramic |
| Puy de Dôme | Panorama of the puys | Morning or late afternoon | 24–200 mm | Successive planes |
| Sancy Massif | Ridges, valleys, more mountainous relief | Lateral light, moving clouds | 24–200 mm | Panorama and hiking |
| Lac Pavin | Circular shape, forest, dark water | Calm morning, autumn | 24–100 mm | Graphic and aerial |
| Lac de Guéry | Water, meadows, volcanic reliefs | Soft light, mist | 24–100 mm | Open landscape |
| Cézallier | Plateaus, roads, pastures | Mist, raking light | 50–200 mm | Minimalist |
| Monts du Cantal | Ridges, radiating valleys | Morning and late afternoon | 24–200 mm | Ample and spectacular |
This table provides a logical choice, but no guarantee of conditions. Overcast weather can magnify lakes and valleys, while a perfectly clear sky is better suited for distant alignments. The goal is to match the area to the type of image desired.
1. Photographing the Puy de Dôme from the Puy de Pariou
The interplay between the Puy de Pariou and the Puy de Dôme forms one of Auvergne's strongest visual signatures. The Pariou brings the geometry of the crater and its slopes; the Puy de Dôme, culminating at 1,465 metres, provides a more massive anchor point. The challenge is to avoid a simple superposition of two summits.
Building the image with multiple planes
A vegetated foreground, a curve in a path, or the edge of the crater can provide an entry point into the image. Then, enough space must be left between the reliefs for them to remain legible. An intermediate focal length preserves context; a telephoto lens brings the Puy de Dôme closer and amplifies the succession of planes.
Seeking mist and first light
Low mist can simplify the landscape and isolate silhouettes. It works particularly well with warm light that remains localized on the slopes. The guide on sharpness and depth of field helps choose the focus area without excessively closing the aperture.
2. Photographing the Chaîne des Puys from the Puy de Dôme
From the heights of the Puy de Dôme, the main interest is not solely the extent of the panorama. The true strength comes from the repetition of cones: Puy de Côme, Puy Pariou, Puy des Goules, Grand Sarcoui, and other reliefs echo each other above the forests. The Chaîne des Puys–Limagne fault is a UNESCO World Heritage site; photographically, it offers a rare demonstration of aligned and immediately legible volcanic forms.
The telephoto lens as a composition tool
A 70–200 mm lens is often more useful than an ultra wide-angle. It allows you to select three or four volcanoes, eliminate uninteresting areas, and compress distances. The scene becomes more structured, and intermediate mists enhance depth.
Wide panorama or tight frame?
The panorama works when light varies from one landform to another or a line of cloud follows the alignment. Otherwise, a tighter frame is often stronger. For a stitched panorama, locking exposure, white balance and focus prevents differences between frames. The settings for stitching a mountain panorama remain the best checklist.

3. Reading Puy de Pariou as a graphic shape
Puy de Pariou is often photographed as a simple centred crater. This approach describes the place but limits its depth. A stronger image uses the curve of the crater as a line, shows the relationship between Pariou and Puy de Dôme, or contrasts grassy slopes with dark forests.
Working with diagonals and proportions
Placing the crater slightly off-centre and maintaining a mass of landscape around it helps understand its scale. An elevated or aerial view accentuates geometry, but it must respect local flight rules, temporary restrictions, and the tranquility of the site. No authorization should be presumed: regulations must be checked for the specific day and area.
Avoiding the generic postcard effect
The best way to differentiate the image is to wait for light that reveals a single slope, partial mist, or a seasonal transition. The rule of thirds can serve as a starting point, but the crater's symmetry can also justify a more centred composition if intentional.

4. Photographing the panorama from the summit of Puy de Sancy
Puy de Sancy, which reaches approximately 1,885 metres, is the highest point of the Massif central. The landscape there becomes more mountainous: ridges, glacial valleys, slope breaks, and interlocking reliefs replace the regular cones of the Chaîne des Puys.
Giving direction to the panorama
From a summit, the temptation is to include everything. A more legible image relies on a ridge that guides the eye, a cloud that extends the relief, or a valley that organizes depth. Human silhouettes can provide scale, provided they remain secondary.
Managing wind and light variations
Wind sometimes requires a higher shutter speed than expected, even with a tripod. Moving clouds also create strong exposure differences. Controlling the histogram, protecting highlights, and taking multiple shots helps preserve the best distribution of shadows and bright areas.

5. Photographing the Sancy ridges and Monts Dore
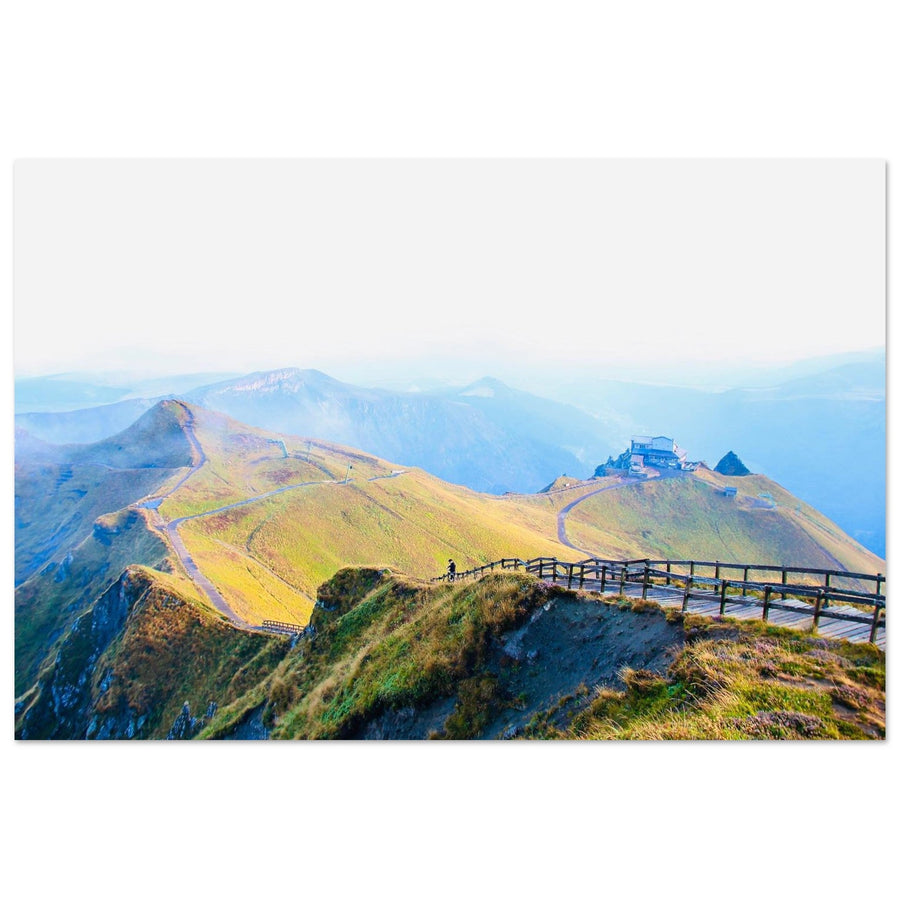
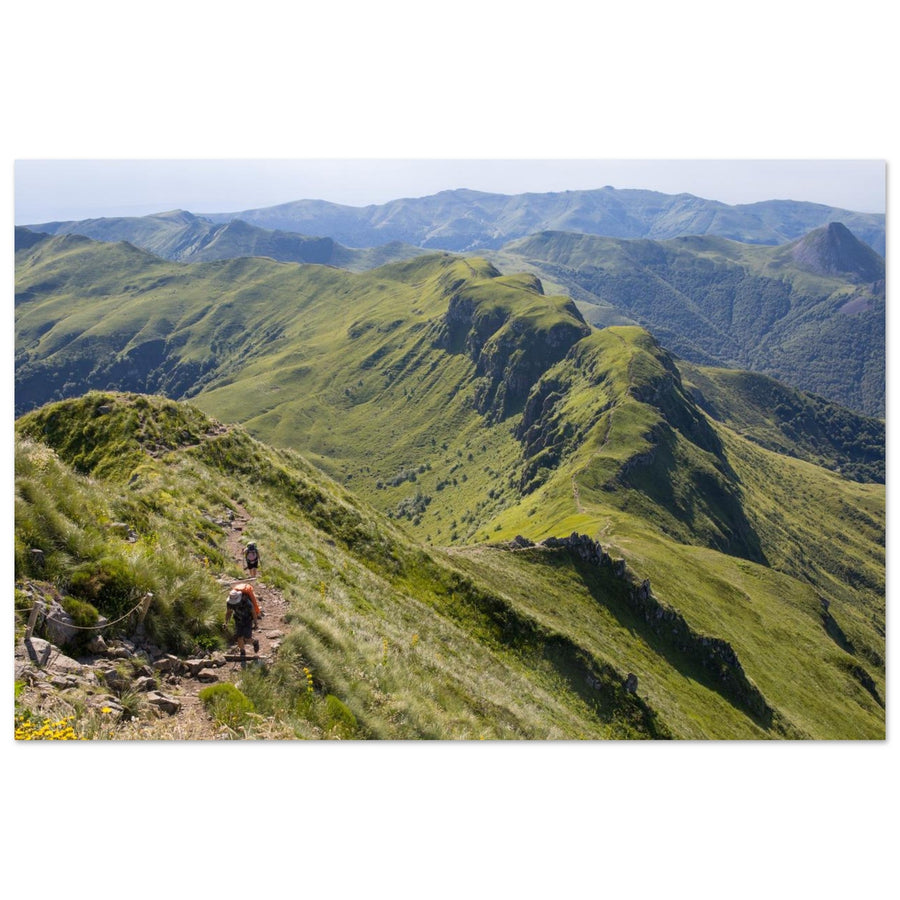
The Sancy ridges allow for telling the landscape story differently than from a summit view. A path, a succession of volcanic hillocks, or a change in slope naturally construct the image. This area is particularly suited for horizontal panoramas and photographs where walking is part of the narrative.
Using the path without making it the sole subject
A path functions as a leading line when it leads to an identifiable ridge or summit. If it crosses the image without a visual destination, it becomes a disruption. Waiting for a hiker or slightly shifting the framing can be enough to give it a role.
Combining standard zoom and telephoto lens
The standard zoom maintains the relationship between ridge and valley. The telephoto lens isolates curves, shadows, and relief details. Alternating between the two prevents returning with a series composed solely of panoramic views.

6. Photographing Lac Pavin and its forest setting
Lac Pavin is an almost circular crater lake surrounded by forest. This geometry is its main asset, but also its trap: at water level, the shape becomes less obvious. One must then use the shore, reflections, tree trunks, or forest slopes to create an autonomous composition.
Choosing between geometry and atmosphere
An elevated view highlights the lake's circle. A lower view, on the other hand, conveys the atmosphere: dark water, dense forest, mist, or autumn colours. Both approaches serve different intentions and can coexist within the same series.
Working with Reflections Without Relying on a Perfect Mirror
A crisp reflection requires little wind, but slightly textured water can be more interesting than total symmetry. The guide dedicated to reflections and compositions around lakes details camera height, polarizing filters, and the balance between shore and reflection.

7. Photographing Lac de Guéry in the Monts Dore
Lac de Guéry offers a more open landscape than Lac Pavin. The water is nestled between meadows, pastures, and volcanic reliefs, with the Tuilière and Sanadoire rocks in its environment. The scene works well when the sky and terrain interact, rather than when the lake mechanically occupies half the frame.
Building a Simple Foreground
A shore, a clump of grass, a rock, or a line of pasture suffice. The goal is not to fill the bottom of the image, but to create a transition to the lake. A slightly higher framing can also emphasise the reliefs and atmospheric conditions.
Preferring Diffused Light
Guéry handles mist, low clouds, and subdued colours well. Spectacular light is not essential. The blue hour can produce a cool and coherent palette, provided you ensure a safe return and do not underestimate the exposure.

8. Photographing the Chaudefour Valley, Tuilière and Sanadoire
The Chaudefour Valley offers a more enclosed setting: cliffs, waterfalls, forest, volcanic reliefs, and valley depth. The Tuilière and Sanadoire rocks also allow for working with more vertical rock silhouettes than the cones of the Chaîne des Puys.
When Overcast Weather Becomes an Advantage
Diffused light facilitates forest scenes, waterfalls, and rock details. It avoids harsh light spots and allows for a homogeneous palette. After a disturbance, clouds can also cling to the reliefs and enhance the sense of depth.
Protecting Water Highlights
For waterfalls and streams, monitor white areas rather than systematically aiming for a very long exposure. A moderate speed retains texture. The tripod must remain stable without obstructing passage or leaving authorized areas in protected spaces.
9. Photographing the Cézallier: Plateaus, Roads, and Minimalism
The Cézallier is located between the Monts Dore and the Monts du Cantal. Its high plateaus, pastures, and open horizons produce images that are less immediately spectacular but often more unique. The territory lends itself to minimalist compositions: a road, an isolated tree, a herd, a silhouette, or a strip of light can suffice.
Reducing the Number of Elements
The main task is to remove anything that hinders readability. A long focal length helps simplify the frame, layer the undulations of the terrain, and isolate a detail. Misty days are particularly interesting because they erase backgrounds and create successive planes.
Photographing the Inhabited Landscape with Discretion
Roads, fences, burons (traditional stone shelters), and herds are part of the landscape. They can provide scale and tell the story of plateau use, without turning the image into an overloaded documentary photograph. The choice of moment and framing remains more important than multiplying subjects.
10. Photographing the Puy Mary and the Monts du Cantal
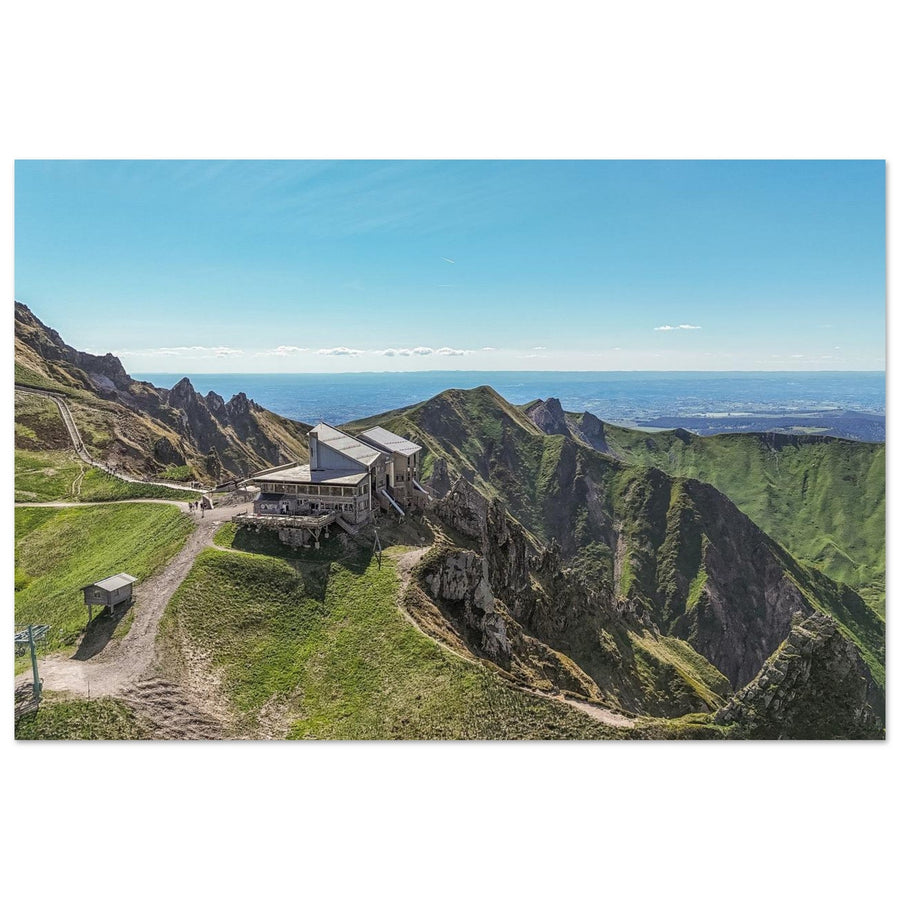
Puy Mary culminates at 1,787 metres in the heart of the Monts du Cantal. The relief here is deeply cut: ridges, passes, and valleys radiate around the ancient volcano. The image gains intensity when the composition shows this organization rather than an isolated peak.
Using Ridges as Guide Lines
From the Brèche de Roland area, the ridges can lead the eye towards Puy Mary. The framing must retain enough ground to explain the relief, while avoiding the ridge from abruptly cutting off the image.
Comparing Panorama and Detail
The panorama shows the scale of the valleys. The telephoto lens extracts a succession of ridges, light on a pasture, or a pass. Both approaches are complementary and allow for building a richer series than a single iconic view.


Which season to choose for photographing Auvergne?
Spring: Contrasts, Water, and Vegetation
Spring is suitable for waterfalls, fresh green foliage, and contrasts between valleys and heights. Conditions can remain cold or wintry on the ridges: actual access must be verified, and equipment adapted.
Summer: Broad Access and Long Days
Summer facilitates itineraries, but midday light flattens reliefs. Starting early, staying late, and using clouds as compositional elements yield better results. High visitor numbers also require respecting other visitors and not blocking trails.
Autumn: Forests, Mists, and Colours
Autumn is particularly interesting around the lakes, the Pavin forests, and the valleys. Colours are best photographed under soft light rather than direct sunlight. Partial mist can separate planes and prevent an overly busy image.
Winter: Graphic Qualities and Constraints
Snow simplifies the curves, reveals shadows and transforms the plateaus. In return, roads, trails, wind and visibility can become problematic. Advice in the guide to photographing snowy landscapes must be supplemented with current local information.
Sunrise, Sunset, Mist, and Weather: What Conditions to Look For?
Sunrise
Sunrise is relevant when light hits the volcanoes laterally or when mists remain in the valleys. It requires rigorous preparation: orientation, timing, route in the dark, and a safety margin.
Sunset
Sunset favors silhouettes and warm colours, but the return journey must remain simple. A successful image does not depend on a red sky: a lateral clearing on a single relief can be stronger than an explosion of colours without structure.
Mist and Sea of Clouds
Mist is particularly effective in the Chaîne des Puys and the Cézallier. It reduces the number of visible elements and creates levels of depth. However, one should avoid venturing onto a ridge when visibility, wind, or orientation become insufficient.
Storms and Unstable Conditions
Storms can produce spectacular light, but safety remains the priority. The guide for photographing storms in the mountains emphasizes anticipation, retreating, and avoiding unnecessary exposure on high points.
What Camera Equipment to Bring to the Auvergne Volcanoes?
A Standard Zoom for Context
A 24–70 mm covers most situations: ridges, lakes, landscapes with foregrounds, and general views. It allows for quick reactions when the weather changes.
A Telephoto Lens for Organising Volcanoes
The 70–200 mm is central in the Chaîne des Puys, Sancy, and Cantal. It compresses planes, isolates reliefs, and avoids including uninteresting areas. It is also useful for photographing from a distance without leaving the trails.
An Ultra-Wide-Angle to Be Used Discerningly
A very wide focal length is only relevant if the foreground is strong: shore, rock, path, or vegetation. Without this, the volcanoes become small, and the image loses its subject.
Tripod, Polarizing Filter, and Protection
A tripod helps during blue hour, around waterfalls, and for stitched panoramas. A polarizing filter can reduce some reflections and enhance the readability of water, but its effect becomes irregular on a very wide sky. Rain protection, a cloth, and a spare battery are often more useful than an additional accessory.
How to Organise a Photo Trip to Auvergne?
One Day: Chaîne des Puys
Focus the outing on the Puy de Dôme, the Pariou, and nearby alignments. Choose one strong light moment and plan a fallback framing if the heights remain foggy.
Two Days: Chaîne des Puys and Sancy
Dedicate one day to the cones and one day to the ridges. This combination already shows two very different faces of Auvergne volcanism.
Three Days: Add Pavin and Guéry
The lakes bring water, forest, and calmer compositions. They also serve as a backup solution when wind or clouds make the ridges less interesting.
Four Days or More: Cézallier or Cantal
Add the Cézallier for a minimalist register or the Monts du Cantal for deeper valleys. It is better to explore one area in depth than to multiply trips and photograph each location at an unfavourable time.
Safety, Site Protection, and Responsible Photography
- Check the weather, wind, visibility, and condition of roads and trails before departure.
- Adapt the itinerary to snow cover, the actual group level, and the return time.
- Stay on authorized routes where environments are fragile or heavily visited.
- Do not move stones, trample sensitive areas, or cross a fence to improve a shot.
- Respect livestock, pastoral activities, private property, and wildlife tranquility.
- Check drone rules for the area, date, and type of flight; never infer authorization from an image seen online.
- Give up when conditions make access or return uncertain.
Most Common Mistakes
- Photographing everything with a wide-angle lens: volcanoes become tiny, and the composition lacks hierarchy.
- Limiting yourself to Puy de Dôme: Sancy, the lakes, Cézallier, and Cantal offer complementary registers.
- Arriving only at midday: rounded reliefs need lateral shadows to regain volume.
- Confusing breadth with strength: a very wide panorama is only useful if the elements are organised.
- Using a foreground without function: it should lead the eye, give scale, or reinforce the atmosphere.
- Waiting for a spectacular sky instead of reading the terrain: curves, ridges, and mist can be enough to create a strong image.
- Overloading the schedule: the best results often come from a single area worked with multiple focal lengths.
- Neglecting the return: late light does not justify an ill-prepared itinerary.
Discover Auvergne Landscapes as Photo Prints
The photographs included in this guide are available on matte Dibond aluminium, made to order. To compare views of the Chaîne des Puys, Sancy, volcanic lakes, and Cantal, consult the complete selection of Auvergne and Massif central photo prints. To focus solely on the department and its iconic volcanoes, discover the Puy-de-Dôme photo prints.
A panoramic format is particularly suitable for the alignments of the Chaîne des Puys, the Sancy ridges, and the Cantal valleys. The guide for choosing a photo print according to the room and format helps adapt the proportions to the available wall space.
Deepening Landscape Photography Skills
- Composing with Depth, Lines, and Foregrounds
- Choosing Aperture, ISO, Shutter Speed, and Reading the Histogram
- Achieving Sharp Landscape Photography
- Preparing for a Sunrise
- Photographing a Sunset
- Mastering the Golden Hour
- Mastering the Blue Hour
- Photographing Reflections and Lakes
- Extending Inspiration with the Most Beautiful Alpine Lakes
- Explore other photography destinations in the Alps
Frequently Asked Questions About Photographing the Auvergne Volcanoes
What are the best places to photograph the Auvergne volcanoes?
The Chaîne des Puys around Puy de Dôme and Pariou is the most immediately identifiable. The Sancy massif is better for ridges, Pavin and Guéry for landscapes with water, Cézallier for minimalist images, and Puy Mary for more spectacular valleys.
Where to photograph Puy de Dôme?
The area around Puy de Pariou allows it to be associated with a crater and volcanic slopes. From Puy de Dôme, the viewpoint reverses and opens onto the alignment of other puys. The best choice therefore depends on the main subject sought.
What is the best season to photograph Auvergne?
There is no single best season. Autumn favors forests and mist, winter simplifies the relief, spring brings water and contrasts, while summer offers the widest access but requires prioritizing the first and last light of the day.
Which focal length should you use to photograph the Chaîne des Puys?
A 24–70 mm preserves the context, but a 70–200 mm is often more effective for bringing the cones closer, eliminating empty areas, and creating successive planes. An ultra-wide-angle should be reserved for compositions with a truly useful foreground.
Where to photograph the volcanic lakes of Auvergne?
Lac Pavin offers an almost circular geometry and a forest setting. Lac de Guéry produces more open compositions with meadows and the relief of the Monts Dore. Their photographic interest is complementary.
Can you photograph volcanoes without a long hike?
Some landscapes are accessible with limited effort, while ridges and high points require more walking. Conditions, restrictions, opening hours, and access can change: you must check local information before choosing your itinerary.
Can you use a drone in the Auvergne volcanoes?
The answer depends on the precise area, protected spaces, air restrictions, and temporary rules. You must check the official regulations for the location and date of the flight, then respect people, wildlife, and current activities.
How to avoid a flat photo of the volcanoes?
Favor side lighting, use a telephoto lens to superimpose planes, include a leading line, and wait for mist or shadow to separate the relief. Better light and more selective framing are often more effective than a higher vantage point.