Where to photograph the Bauges Massif? Lakes, summits, and viewpoints
Between Lake Annecy and Lake Bourget, the Bauges massif offers surprisingly varied landscapes within a relatively compact area: open viewpoints, limestone cliffs, alpine pastures, forests, passes, piedmont lakes, and more challenging peaks in the Hautes-Bauges. This diversity allows for the creation of a coherent photographic series without repeating the same type of image.
To know where to photograph the Bauges, one must first choose the desired visual language. Mont Revard and Croix du Nivolet favor wide horizons. Semnoz and Margériaz highlight plateaus, ridges, and limestone geology. La Féclaz becomes particularly interesting under snow, when forests create graphic compositions. Lower down, Lake Carouge establishes a direct relationship between the water and the Dent d’Arclusaz.
This guide organizes the main sectors by subject, light, and season. It does not replace a hiking map or local information: road conditions, access, restrictions, and mountain conditions should always be checked with the official Rando’Bauges website before departure.
The Bauges in 30 seconds
- For a grand panorama: Mont Revard, Croix du Nivolet, and Semnoz.
- For photographing Lake Bourget: Revard sector.
- For limestone relief and karst: Margériaz and Hautes-Bauges.
- For reflections: Lake Carouge facing the Dent d’Arclusaz.
- For snow and forests: La Féclaz, Revard, Margériaz, and Col des Prés.
- For a nocturnal atmosphere: sectors already identified during the day, with easy return and controlled regulations.
Why the Bauges are a unique photographic territory
The massif does not have the altitude of large glacial ensembles, but this difference is precisely one of its interests. The landscapes combine wooded plateaus, inhabited valleys, cliffs, limestone ridges, and openings towards neighboring large reliefs. Photography can thus move from an intimate forest scene to a panorama spanning several tens of kilometers without leaving the same massif.
Geology explains a large part of this identity. The Bauges Geopark presents a relief formed from sedimentary, largely limestone, rocks, deformed during the formation of the Alps. In the field, this history appears in the cliffs, folds, lapies, sinkholes, gorges, and resurgences. For the photographer, these forms provide particularly legible lines, textures, and scale breaks.
The Bauges also work by contrast. The forests of the Revard plateau do not have the same rhythm as the alpine pastures of the Hautes-Bauges. The shores of Lake Carouge offer a calm and horizontal image, while Margériaz provides more graphic ridges and karstic surfaces. The Tour des Bauges presented by the Park summarizes this succession of forests, alpine pastures, cliffs, and views towards the lakes.
This variety dictates a method: do not try to cover the entire massif in a single outing. Choose a sector, a light, and two or three compositional intentions. You will achieve a more coherent series than by rapidly accumulating viewpoints.
Which sector to choose based on the desired image?
| Sector | Dominant subjects | Interesting light | Useful focal length | Vigilance |
|---|---|---|---|---|
| Mont Revard | Lake Bourget, horizons, mist, foregrounds | Sunrise, end of day, diffused light | Wide-angle and telephoto lens | Visibility and wind |
| Croix du Nivolet | Cross, cliffs, Chambéry, Chartreuse | Morning, side light, sunset depending on the frame | Standard zoom and telephoto lens | Cliffs and return |
| Semnoz | Alpine pastures, ridges, distant massifs, snow | Sunrise, sunset, autumn mist | Standard zoom and telephoto lens | Roads and winter weather |
| Margériaz | Karst, lapies, ridges, snow, night | Grazing light, sunset, blue hour | Moderate wide-angle and telephoto lens | Limestone terrain and orientation |
| La Féclaz | Forests, fir trees, snow, clearings | Overcast weather, snowfall, mist | Standard and small telephoto lens | Winter activities and slopes |
| Col des Prés | Meadows, groves, roads, gentle relief | Cold morning, diffused snow, end of day | Standard | Traffic and parking |
| Lake Carouge | Reflections, Dent d’Arclusaz, shores | Calm morning, overcast sky, side light | Standard and telephoto lens | Wind and crowds |
| Hautes-Bauges | Arcalod, Trélod, Chaurionde, cliffs | Grazing light, autumn, long outings | Standard and telephoto lens | Mountain terrain and protected areas |
This table does not replace local preparation. It helps to avoid a poor choice of intention: going to Revard to photograph an intimate undergrowth or choosing a long outing in the Hautes-Bauges when the objective is simply to work with an end-of-day light.
Mont Revard: photographing Lake Bourget and vast horizons
Mont Revard is one of the most legible sectors for discovering the Bauges through photography. The relief dominates Lake Bourget and opens the frame towards the surrounding mountains. Depending on visibility, the landscape can be treated as a very descriptive panorama or, conversely, as a succession of almost abstract planes in the mist.
Building the panorama with a foreground
A viewpoint does not automatically become a good photograph. If the lake and the horizon alone occupy the image, the frame may lack depth. Look for an edge, a rock line, a forest mass, or a discrete architectural element to anchor the foreground. The wide-angle should remain measured: too wide, it reduces the lake and disperses the subjects.
Using the telephoto lens to isolate the atmosphere
The telephoto lens allows separating a shoreline, a strip of light, a relief, or a layer of mist. This approach is often more personal than a general view. Days of imperfect visibility then become interesting: the planes simplify, colors gradually lose their saturation, and distance becomes visible.
Choosing between sunrise and end of day
The best time depends on the specific setting and season. The morning can bring layers of mist and a colder atmosphere. The end of the day sometimes creates side light on the reliefs. In both cases, observe the sun's orientation on a map, but keep a margin: clouds and local relief quickly alter the real balance.
Two works show how the same sector can produce an open panorama or a composition built around a specific landmark.
The Mont Revard viewpoint The viewpoint opens up a vast landscape above Lake Bourget. The succession between foreground, lake, and distant reliefs illustrates the interest of Revard for panoramic compositions. Photography: Pierre Thiaville View photo print →
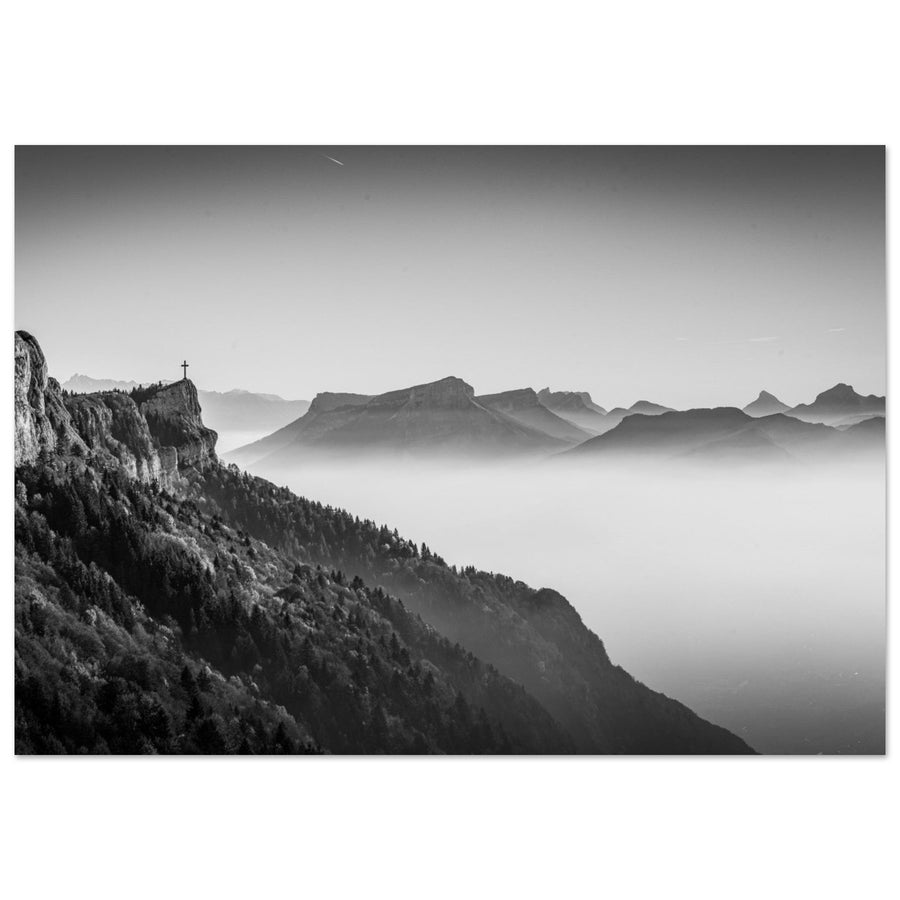
The Croix du Nivolet facing the Chartreuse from Revard The Croix du Nivolet serves as a landmark in the foreground, while the Chartreuse closes the horizon. This superposition allows for the creation of an immediately legible image without reducing the subject to a simple panorama. Photography: Pierre Thiaville View photo print → Croix du Nivolet: giving scale to the landscape
The Croix du Nivolet overlooks the Chambéry basin and is one of the most identifiable landmarks of the massif. It allows for the addition of a clear subject to a very wide landscape. Depending on the viewpoint, the cross can become the center of the image, a secondary element on a ridge, or a foreground in front of the Chartreuse.
Avoiding systematically centering the cross
A strong symbol immediately attracts the eye. Placing it always in the center, however, produces repetitive images. Try to use it as an entry point, then let the ridge lines lead to the background. A longer focal length allows for visually bringing the cross and the distant mountains closer; a wider frame places the monument back into the cliff and plateau.
Photographing the relationship between Bauges and Chartreuse
From several openings, the Chartreuse can form the background. This geographical relationship gives more depth than an isolated view of the cross. It also creates a natural link with the guide dedicated to photography in Chartreuse.
Remaining cautious near steep drops
The search for a foreground never justifies approaching a cliff or leaving a safe route. Edges, snow, fog, and wind can greatly alter the perception of the terrain. Prepare the framing from a stable area and accept that an angle may not be achievable.
Semnoz: alpine pastures, snow, and successive horizons
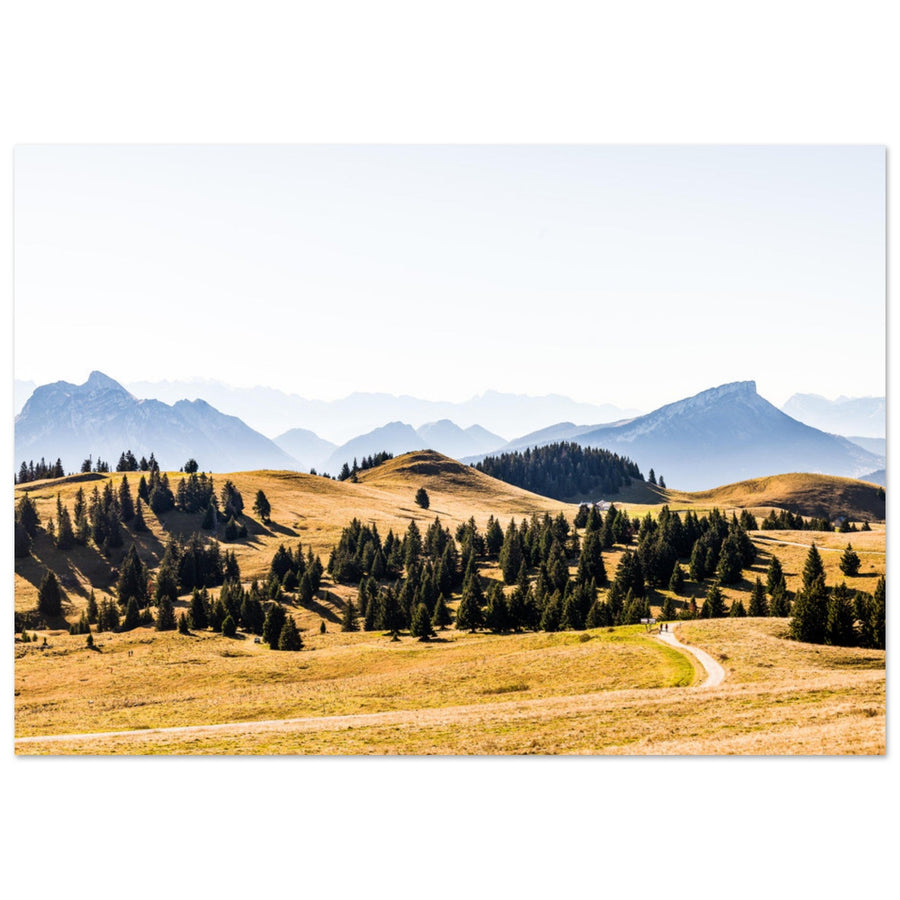
Semnoz forms a northern gateway to the massif and offers a different perspective than Revard. The open spaces, alpine pastures, and views towards several mountain ranges allow for working with atmospheric depth. The subject is not just the summit or the plateau: it is often the layers of relief that give the image its strength.
Using distant massifs without cluttering the frame
With a telephoto lens, the planes get closer and the silhouettes become more graphic. However, a clear hierarchy must be maintained. Choose a main relief and let the others play a transitional role. Slightly misty days can separate the planes better than a perfectly clear sky.
Working the alpine pastures as a foreground
A fence, a line of grass, a track, or a change in slope can guide the eye towards the horizon. Avoid overly massive foregrounds that obscure the reading of the reliefs. In winter, snow simplifies these elements and reinforces the lines; in summer, variations of green and shadows provide more texture.
Connecting Semnoz to the Annecy basin
The sector can complement work around the lake and the city. The guide dedicated to Annecy landscapes allows for extending this relationship between the lake, the reliefs, and the surrounding viewpoints without transforming this article into a guide to the Annecy basin.
Margériaz and La Féclaz: karstic relief, forests, and winter photography
Margériaz particularly well demonstrates the limestone character of the Bauges. Ridges, lapies, hollows, and surface breaks become visible under grazing light. La Féclaz offers a complementary, more forested approach: fir trees, clearings, tracks, and snow create images based on rhythm rather than an isolated summit.
Margériaz: photographing the material of the relief
A spectacular sky is not enough. On Margériaz, the primary subject can be the rock itself: fissures, limestone blades, short shadows, or snow held in hollows. A standard focal length allows for balancing landscape and texture. A very wide wide-angle risks distancing the details that give the terrain its identity.
Taking advantage of grazing light
When the sun sets, slight variations in level acquire relief. Shadows highlight the karst, and snow reveals forms that vegetation conceals in summer. Expose to preserve bright areas, then check the histogram. The guide on mountain sunsets complements this preparation.
La Féclaz: accepting an overcast sky
In the forest, a uniform sky can be an advantage. Diffuse light reduces the differences between snow and tree trunks, avoids cluttered shadows, and facilitates the reading of branches. Look for a repetition interrupted by a tree, a clearing, or a track. The strongest images do not necessarily show the entire forest: a tighter framing can suffice.
Margériaz lends itself to two opposing interpretations: relief revealed by warm light or landscape reduced to its nocturnal lines.
Snowy Margériaz at sunset The last lights highlight the snowy slopes, ridges, and karstic forms of Margériaz. The warm light preserves the mineral reading of the relief while adding contrast to the snow. Photography: Pierre Thiaville View photo print →
Margériaz at night Night reduces the landscape to its essential lines: ridge, sky, and dark masses. This approach is suitable for working with the blue hour, stars, and silhouettes, provided the return is precisely prepared. Photography: Pierre Thiaville View photo print → Lake Carouge and Dent d’Arclusaz: photographing water at the foot of the Bauges
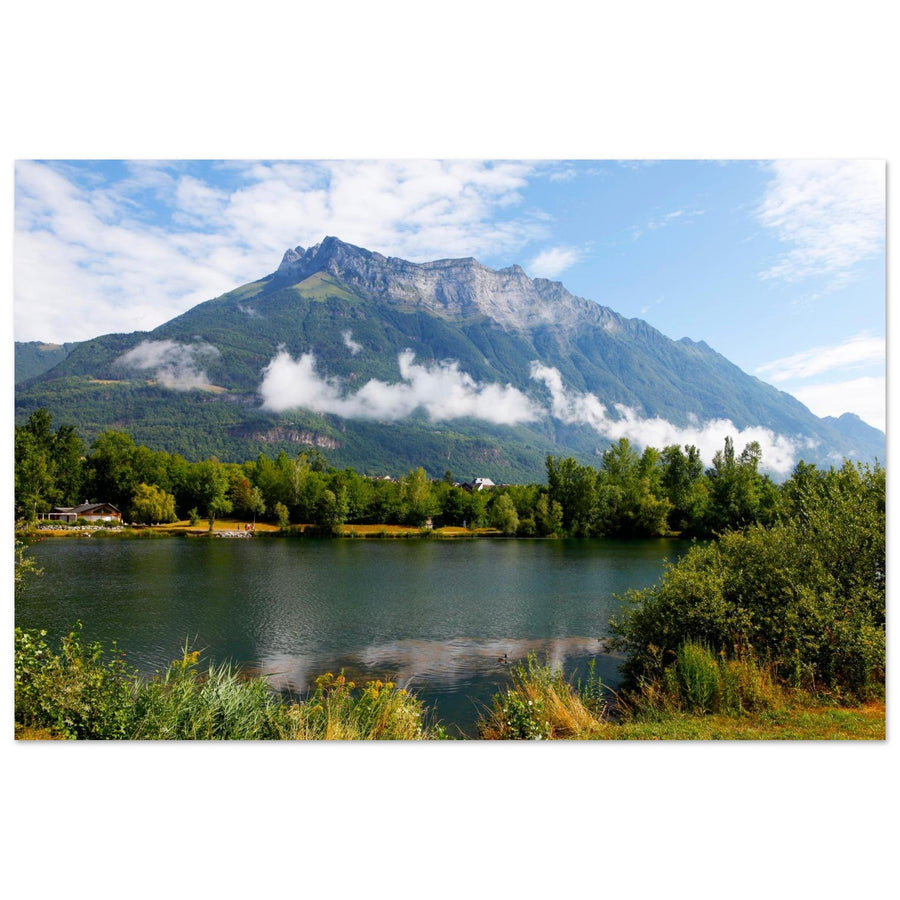
In Saint-Pierre-d’Albigny, Lake Carouge offers a direct viewpoint towards the Dent d’Arclusaz. The site differs from viewpoints: the gaze starts from a calm body of water, crosses the shores, then reaches the mountain. This three-plane construction works equally well in a wide frame as in a tighter composition.
Waiting for a legible water surface
A perfect reflection is not essential. A slight texture can add substance, but strong winds fragment lines and reduce symmetry. Morning often offers a calmer atmosphere, though it's not a guarantee. Arrive with two intentions: one composition based on reflection and another simply using the water as breathing space.
Avoid automatic symmetry
A waterline placed in the center is suitable when the reflection becomes the main subject. If the Dent d’Arclusaz or the sky carries more of the image, shift the horizon. The guide on photographing alpine reflections details these choices.
Use the banks to frame the landscape
Vegetation, shoreline curves, and color changes in the water can lead the eye towards the summit. Watch out for branches that cut across the silhouette of the Dent d’Arclusaz and very bright elements at the edge of the frame. Moving a few meters is often enough to simplify the composition.
This pair contrasts two accessible landscapes from the foothills and the heart of the Bauges: reflections on Lac de Carouge and winter lines of Col des Prés.
Lac de Carouge facing Dent d’Arclusaz In Saint-Pierre-d’Albigny, the horizontality of the lake mirrors the limestone silhouette of the Dent d’Arclusaz. The site allows for working with reflections, shorelines, and the relationship between the Combe de Savoie and the massif. Photography: Laurens Jobse View photo print →
Col des Prés under snow White meadows, groves, and rolling terrain offer a softer visual than high cliffs. The area lends itself to minimalist compositions and contrasts between snow and vegetation. Photography: Pierre Thiaville View photo print → Hautes-Bauges: Arcalod, Trélod, and wilder terrains
The eastern part of the massif features more prominent peaks, notably Arcalod, the highest point of the Bauges at 2,217 meters, Trélod, Chaurionde, and Colombier. Here, photography generally requires more commitment, time, and preparation than on roadside viewpoints or plateau areas.
Photographing summits from valleys and alpine pastures
It's not necessary to reach a ridge to build a strong image. Villages, meadows, forests, and alpine pastures allow for placing the cliffs within their environment. A long focal length helps isolate a rock face or bring an agricultural foreground closer to the summit. This approach often produces a more descriptive image of the territory than a purely mineral view taken at high altitude.
Using clouds to reveal volumes
Limestone cliffs gain relief when light alternates between sun and shadow. A uniform overcast sky can flatten the rock, while a brief break creates a precise contrast. Prepare your exposure in advance and observe cloud movement rather than continuously changing your framing.
Respecting the National Game and Wildlife Reserve
Part of the Hautes-Bauges is within or near protected areas subject to specific regulations. Off-trail access, dogs, bivouac, lighting devices, or overflight may be prohibited depending on the zone. Consult the official page on the protected areas of the Bauges massif and updated mapping before any outing.
The pursuit of an original photograph should never lead to circumventing a quiet zone, following an animal, or improvising an itinerary. In these areas, discreet movement is part of photographic practice.
Which season to choose for photographing the Bauges?
Spring: Water, new greens, and changing weather
Spring emphasizes streams, wetlands, and young foliage. Summits may retain snow while valleys turn green again, multiplying seasonal contrasts within the same image. The weather remains unstable: plan protection for your equipment and avoid areas where residual snow makes the terrain uncertain.
Summer: Alpine pastures and long light
Alpine pastures, villages, and mid-mountain routes become more accessible. The harsh midday light can flatten limestone reliefs; favor the first and last hours or use clouds to structure the landscape. During pastoral periods, respect herds, fences, and local guidelines.
Autumn: Forests, mist, and atmospheric planes
Autumn is particularly suitable for Revard, Semnoz, La Féclaz, and the valleys. Deciduous trees bring warm colors, while mist separates the ridges. A telephoto lens allows for utilizing successive planes without relying on a spectacular sky. However, watch out for the rapid drop in light at the end of the day.
Winter: Snow, minimalism, and strong constraints
Snow simplifies slopes, transforms forests, and makes tracks very visible. La Féclaz, Margériaz, Revard, and Col des Prés offer varied subjects, but winter requires stricter preparation: road conditions, ice, cold, resort opening hours, terrain risks, and battery life.
At La Féclaz, the snowy forest can be treated from the ground or as a graphical motif seen from the sky. The latter case requires full regulatory control before any flight.
Snow-covered fir trees of La Féclaz The repetition of snow-laden trunks and branches transforms the forest into a graphic motif. La Féclaz thus allows for producing more intimate images, without relying on a perfectly clear summit. Photography: Pierre Thiaville View photo print →
Snow-covered fir trees of La Féclaz from the sky The vertical view reveals the spacing, alignments, and breaks in the forest. This work illustrates an abstract reading of the landscape; however, any aerial photography must respect local restrictions and wildlife tranquility. Photography: Pierre Thiaville View photo print → Light and composition: exploiting the character of the Bauges
Building depth with multiple massifs
Revard, Semnoz, and Croix du Nivolet often offer access to several mountain planes. To avoid a cluttered image, assign a role to each level: dark foreground, main subject, then lighter horizon. Atmospheric mist is not a defect; it naturally separates distances.
Showing geology without turning the image into an inventory
On Margériaz or in the Hautes-Bauges, choose a main form: fold, cliff, lapiaz, or ridge line. Other elements should reinforce it. A frame that tries to show all the peculiarities of the terrain generally loses its hierarchy.
Using the forest as a motif
At La Féclaz or on the Revard plateau, the repetition of trees creates a rhythm. Look for the irregularity that will provide an entry point: isolated tree, clearing, track, or height difference. In winter, expose the snow sufficiently without blowing out the brightest areas.
Integrating roads, passes, and villages with moderation
The Bauges are an inhabited massif. A road, a roof, or a fence can tell the story of the relationship between the landscape and human activities. However, these elements must remain intentional. Watch out for signs, vehicles, and brightly colored objects that attract the eye without adding meaning.
Preparing for transition hours
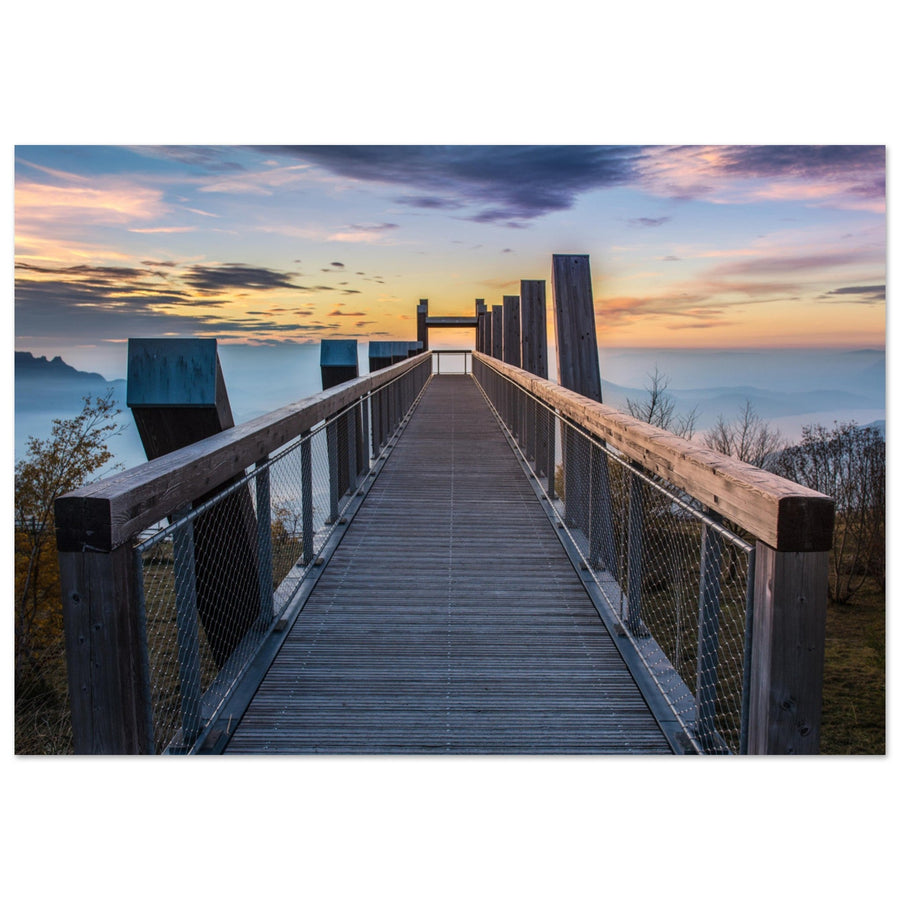
Sunrise, sunset, and blue hour require anticipating your return. Scout locations during the day, record the path, keep a headlamp where its use is permitted, and check local regulations. The guide Photographing the Blue Hour in the Mountains complements this method.
What equipment to bring for photographing the Bauges massif?
A standard zoom for most situations
A standard zoom covers viewpoints, lakes, alpine pastures, forests, and villages. It allows for quickly changing the position of the foreground without multiplying lenses. In windy or snowy areas, limiting changes also reduces the sensor's exposure to moisture and dust.
A telephoto lens for distant shots
The telephoto lens becomes valuable at Revard, Semnoz, Croix du Nivolet, and facing large cliffs. It brings massifs closer, isolates light, and simplifies compositions. It also serves to photograph wildlife from a distance, without approaching the animals.
A tripod depending on the light, not as a matter of principle
A tripod is useful for the blue hour, night, dark undergrowth, or reflections with a slow shutter speed. During the day, it can unnecessarily slow down shooting. In sensitive areas, set it up without expanding your footprint or blocking a passage.
Polarizing filter: useful but to be controlled
A polarizing filter can reduce some reflections on water and enhance sky readability. On a wide-angle lens, its effect can sometimes be uneven. At Lac de Carouge, it can also eliminate the reflection you were trying to photograph. Turn it while observing the actual effect rather than using it systematically.
Starting settings
For a static landscape, favor low sensitivity when stability allows, a medium aperture, and focus placed according to the depth of the frame. In a forest or under changing light, automatic ISO can maintain a sufficient shutter speed. The guide Mountain photo settings: aperture, ISO, shutter speed, and histogram details these trade-offs.
Preparing your outing and respecting protected areas
Check for changeable information
Before you go, check the weather, road conditions, seasonal closures, parking, snow cover, and local restrictions. Hiking guides and the Park's mapping are more reliable than an old itinerary published on a blog or social network.
Distinguishing the Park from regulated zones
Membership in the Regional Natural Park does not lead to a general prohibition of practices. However, several reserves, protection orders, and sensitive areas have their own rules. The official Park page reminds us that common law applies outside regulated zones, while protected areas may restrict access, bivouac, dogs, lighting devices, or overflight.
Drone: Never infer authorization from the landscape alone
An open space is not automatically flyable. The National Game and Wildlife Reserve and other protected areas impose strong restrictions. The Park also advises against flying over the rest of the massif to limit disturbance. Check official mapping and aeronautical rules before any flight.
Wildlife: Distance takes precedence over the image
An animal that stops its activity, stares at the photographer for a long time, or moves away already shows disturbance. Stay on authorized routes, use a long focal length, and give up on framing when the animal changes its behavior. To learn more about this approach, consult the guide Photographing Mountain Animals.
Building a short and coherent series
In each area, look for four complementary images: a wide shot for context, a tighter crop, a material detail, and a transition image. This method avoids returning with fifty variations of the same panorama and adds more depth to the photographic narrative.
Frequently asked questions about photography in the Bauges
Where to photograph the Bauges without planning a long hike?
Mont Revard, certain areas of Semnoz, Col des Prés, and Lac de Carouge allow for quickly working with varied landscapes. However, actual accessibility depends on the season, road conditions, parking, and any restrictions. Official information must be consulted before each outing.
Which viewpoint to choose for photographing Lac du Bourget?
The Mont Revard area is the main landmark for opening the frame to Lac du Bourget. A wide-angle allows for integrating the foreground, while a longer focal length isolates the banks, reliefs, or atmospheric effects. Visibility varies greatly with mist and cloud cover.
Which area of the Bauges to favor at sunset?
Revard, Croix du Nivolet, Semnoz, and Margériaz offer very different orientations and foregrounds. The best choice depends on the sun's position, clouds, the desired subject, and the return journey. Daytime scouting is preferable before a session that ends at night.
Where to photograph the Bauges in winter?
La Féclaz, the Revard plateau, Margériaz, and Col des Prés allow for working with snow, forests, and the gentle lines of the mid-mountains. Conditions can change rapidly: roads, ice, snow cover, and station activity hours must be checked on the day itself.
Can animals be photographed in the Bauges Reserve?
Observation must respect authorized routes, quiet zones, and the specific regulations of the National Game and Wildlife Reserve. One should never leave an authorized route, follow an animal, or cause it to move to get a shot.
Can a drone be used in the Bauges massif?
The Regional Natural Park is not subject to a uniform ban, but several protected areas have strict overflight rules, and the Park strongly advises against flying over the rest of the massif to preserve wildlife. Official restriction mapping and aeronautical regulations must be checked before any takeoff.
Choosing your area before choosing your framing
The Bauges massif is not just one viewpoint. Revard and Croix du Nivolet give grandeur to the landscape; Semnoz organizes the massifs into successive planes; Margériaz reveals the limestone and karst; La Féclaz transforms the forest into a winter motif; Lac de Carouge connects reflections to Dent d’Arclusaz; the Hautes-Bauges require a more mountaineering approach and greater attention to protected areas.
To succeed in an outing, first define the subject, then the light, and finally the area. Consult official information, limit the number of locations, and work on a coherent series. This method produces stronger images than rushing between several spots.