Where to photograph the Aiguilles Rouges? Photo spots and field tips
Updated July 24, 2026
Photographing the Aiguilles Rouges means positioning yourself on one of the most beautiful natural balconies facing the Mont-Blanc massif. Here, high-altitude lakes, granite slabs, ridges, ibex, balcony trails, and views of the Chamonix glaciers create powerful, legible, iconic, and deeply alpine images.
In this guide, we share the best places to photograph the Aiguilles Rouges, with a field-based approach: access, estimated time, ideal light, season, composition, recommended equipment, regulations, mistakes to avoid, and links to our technical guides. The goal is not just to photograph Mont-Blanc from a beautiful viewpoint, but to construct a balanced image that includes foreground, reflection, ridge, light, and depth.
In the Aiguilles Rouges, we prioritize scenes that retain their power when printed in large format: Mont-Blanc reflected in Lac Blanc, pink light on the Chéserys, ridges seen from La Flégère, winter snow facing the glaciers, ibex on the slabs, and high-altitude atmospheres above Chamonix. You can find some of this work in our collection of photo prints of the Aiguilles Rouges, printed on Alu Dibond.
Delve deeper into the Aiguilles Rouges with our four field guides
The massif encompasses landscapes too diverse to be treated as a single spot. We have organized four complementary guides, from the iconic balcony of Lac Blanc to the forests of the Vallon de Bérard.
- Lac Blanc, Lacs des Chéserys, and Flégère: reflections, foregrounds, access, light, and bivouac rules.
- Brévent, Planpraz, and Lac du Brévent: frontal panoramas, telephoto, lifts, and blue hour.
- Aiguillette des Houches, Chailloux, and Carlaveyron: alpine pastures, Bossons glacier, wildlife, and nature reserve.
- Col des Montets, Vallon de Bérard, and Vallorcine: forest, stream, waterfall, larches, and wilder atmosphere.
The essentials in 30 seconds
- Most iconic spot: Lac Blanc, for its frontal view of the Mont-Blanc massif.
- Best spot for reflections: Lacs des Chéserys, especially at sunrise or in calm weather.
- Most accessible spot: La Flégère, thanks to the ski lifts from Les Praz.
- Best photo balcony: The Grand Balcon Sud, between Flégère, Chéserys, Tête aux Vents, and Brévent.
- Most graphic spot: L'Index and the ridges above La Flégère.
- Best winter spot: Brévent-Flégère, for snow lines, skiers, and views of Mont-Blanc.
- Best season: Autumn for low light and clear air; summer for the lakes; winter for graphic lines.
- Key tip: In the Aiguilles Rouges, the foreground is as important as Mont-Blanc.
Summary
- Our four field guides to the Aiguilles Rouges
- Why the Aiguilles Rouges are an exceptional photographic terrain
- Table of the best photo spots in the Aiguilles Rouges
- 1. Lac Blanc
- 2. Lacs des Chéserys
- 3. La Flégère
- 4. L'Index
- 5. Grand Balcon Sud
- 6. Planpraz and Brévent
- 7. Col des Montets and Tré-le-Champ
- 8. Tête aux Vents
- 9. Wildlife, ibex, and nature reserve
- 10. The Aiguilles Rouges in winter
- Which season to choose?
- What photo equipment to bring?
- Regulations and safety
- Mistakes to avoid
- Our photographer's advice
- Discover our photo prints of the Aiguilles Rouges
- FAQ
Why the Aiguilles Rouges are an exceptional photographic terrain
The Aiguilles Rouges are one of the best massifs in the Alps for photographing Mont-Blanc without being at the foot of Mont-Blanc. Their strength comes from their position: a balcony facing the glaciers, the Aiguilles de Chamonix, the Aiguille Verte, the Drus, and the summit of Mont-Blanc.
Unlike an isolated viewpoint, the Aiguilles Rouges offer a true variety of compositions: lakes and reflections, granite slabs, balcony trails, ridges, ibex, winter snow, wide views from Brévent, more intimate atmospheres at Chéserys, and very graphic scenes around L'Index.
However, this massif requires finesse. The risk is to photograph only Mont-Blanc, without constructing a foreground. A good image of the Aiguilles Rouges often relies on a balance: a lake, a shore, a slab, a ridge, an animal, a path, or a light that gives true structure to the scene.
To prepare for an outing, we recommend complementing this guide with our articles on alpine reflections, mountain photography at sunrise, mountain photography at sunset, the blue hour, and the rule of thirds.
In the Alpine Photo Destinations hub, the Aiguilles Rouges naturally complement the guide on the best Mont-Blanc photo spots. Mont-Blanc is the main subject there, but the Aiguilles Rouges provide the foregrounds, reflections, lakes, and balconies that allow for more complete images.
The best photo spots in the Aiguilles Rouges
| Spot | Access | Estimated time | Best light | Ideal season | Ideal for |
|---|---|---|---|---|---|
| Lac Blanc | From La Flégère, L'Index, Tré-le-Champ or Col des Montets depending on conditions | Approximately 2h from La Flégère depending on the itinerary | Sunrise or sunset | Summer, autumn | Iconic view of Mont-Blanc |
| Lacs des Chéserys | Balcony hike in the Aiguilles Rouges | 2h to 3h30 depending on starting point | Sunrise, calm weather | Summer, autumn | Reflections, composition, alpine atmosphere |
| La Flégère | Gondola from Les Praz | Quick access then variable walk | Morning or late afternoon | Summer, autumn, winter depending on opening | Balcony over Chamonix and Mont-Blanc |
| L'Index | Lift from La Flégère then trails | Quick access depending on opening then variable walk | Clear morning or sunset | Summer, autumn, winter depending on opening | Ridges, graphic lines, high altitude |
| Grand Balcon Sud | Trail between Flégère, Chéserys, Tête aux Vents, Brévent | Variable depending on section | Late afternoon, golden hour | Summer, autumn | Trails, wide views, depth |
| Planpraz / Brévent | Lifts from Chamonix | Quick access then variable walk | Sunset | Summer, autumn, winter depending on opening | Frontal view, telephoto, panoramas |
| Col des Montets | Road access then trails towards Chéserys / Lac Blanc | 2h to 4h depending on objective | Morning or autumn | Summer, autumn | Reserve entrance, wildlife, strenuous access |
| Tête aux Vents | From Col des Montets, Tré-le-Champ or Grand Balcon Sud | Variable depending on starting point | Sunrise or sunset | Summer, autumn | Clear view, Mont-Blanc, ridges |
| Nature Reserve | Depending on authorized itinerary and conditions | Variable | Morning, soft light | Summer, autumn | Ibex, slabs, alpine environments |
| Brévent-Flégère in winter | Lifts, skiing, snowshoeing or authorized trails depending on conditions | Variable | Cold morning, blue hour, sunset | Winter | Snow, skiing, lines, Mont-Blanc |
1. Lac Blanc: the most iconic spot in the Aiguilles Rouges
Access: from La Flégère, L'Index, Tré-le-Champ or Col des Montets depending on season, conditions and skill level. Estimated time: approximately 2 hours from the top of the La Flégère gondola via the classic route. Best light: sunrise or sunset. Ideal season: summer and autumn, excluding persistent snow.
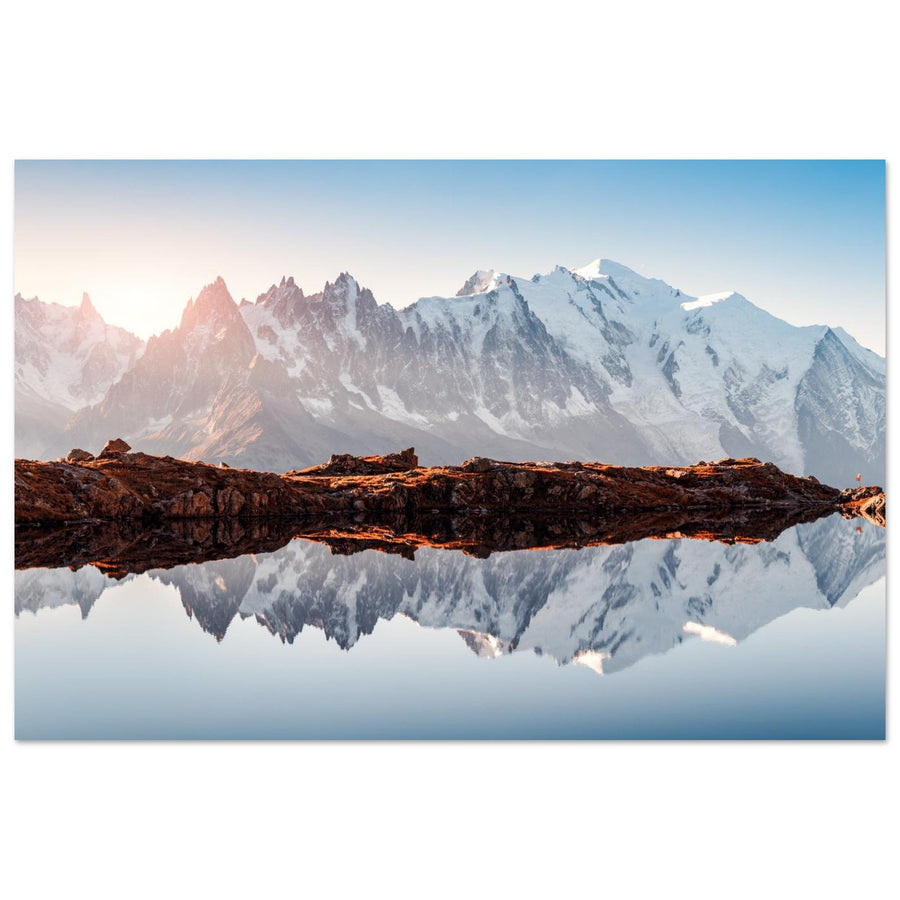
Lac Blanc is the most famous spot in the Aiguilles Rouges. It encapsulates almost everything that makes the massif photogenic: an alpine lake, granite slabs, a mineral foreground, and a direct view of the Mont-Blanc massif.
The risk here is to replicate exactly the same image as everyone else. To avoid this, try variations: a lower shore, a partial reflection, a telephoto shot of the glaciers, a rocky foreground, the cold morning light, a cloudy sky, or a tighter vertical crop on the lake and peaks.
Photo tips for Lac Blanc
- Arrive very early or very late to enjoy softer light.
- Use the slabs as compositional lines towards Mont-Blanc.
- Don't just look for the perfect reflection: a partial reflection can be more subtle.
- Experiment with a telephoto lens to isolate the Aiguilles de Chamonix and the glaciers.
- Strictly respect the banks and fragile areas around the lake.
To delve deeper into this type of image, consult the guide on alpine reflections in mountain lakes.
Useful official link: consult the Lac Blanc page on the Chamonix Tourist Office website before planning your outing.
2. Lacs des Chéserys: the most elegant reflections
Access: balcony hike in the Aiguilles Rouges, often combined with Lac Blanc. Estimated time: approximately 2 to 3.5 hours depending on departure point and itinerary. Best light: sunrise in calm weather. Ideal season: summer and autumn.
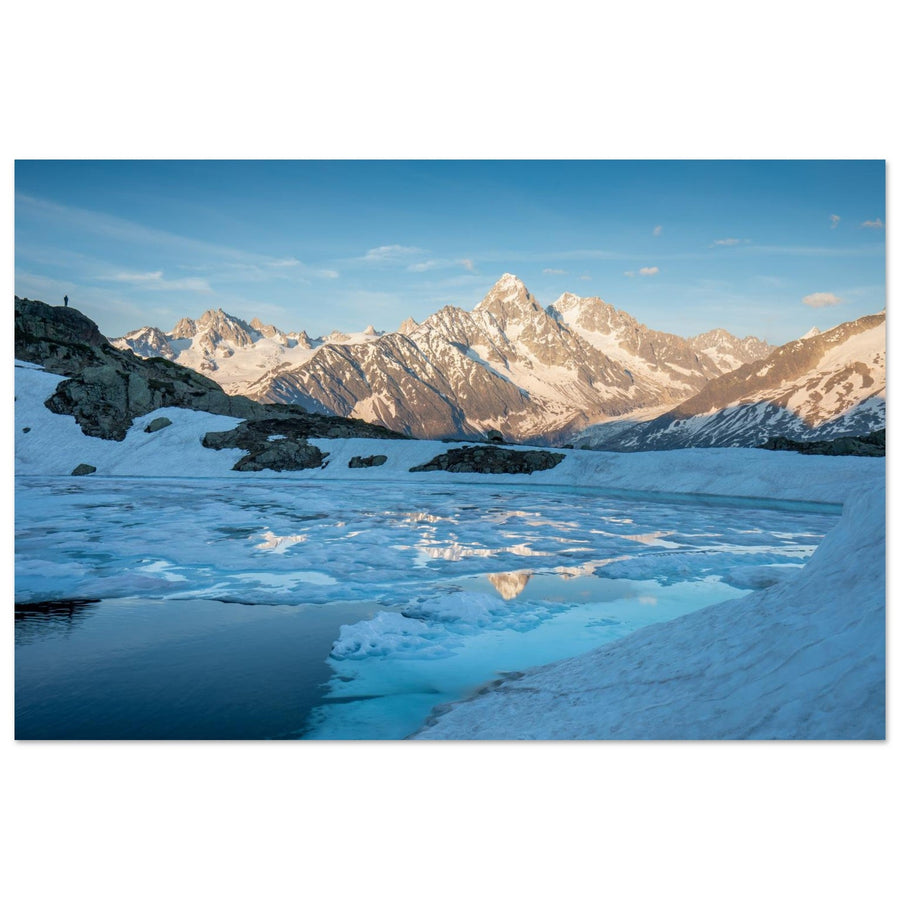
The Lacs des Chéserys are often photographically more interesting than Lac Blanc if you are looking for a more personal image. The area offers several small bodies of water, varied shores, rocks, alpine grasses, and reflections of the Mont-Blanc massif.
At sunrise, the Chéserys can become exceptional if the wind drops. The foreground remains in cool light while the summits begin to receive the first colors. This is a perfect situation for working on the separation between shadow, reflection, and light.
Photo tips for the Chéserys
- Scout several small lakes: the best framing is not always the most obvious.
- Position yourself low to enhance reflections.
- Leave space around the reflection to avoid a too-tight image.
- Use a tripod before sunrise or during the blue hour.
- If the wind breaks the reflection, switch to a telephoto lens for the summits.
See in the gallery: sunset on Mont-Blanc from the Lacs des Chéserys.
3. La Flégère: the accessible balcony over Chamonix
Access: gondola from Les Praz de Chamonix. Estimated time: quick access by lift then variable walk. Best light: morning or late afternoon. Ideal season: summer, autumn, and winter depending on opening.
La Flégère is one of the most convenient access points to the Aiguilles Rouges. It allows quick entry into a balcony landscape facing Mont-Blanc, with trails, grassy slopes, boulders, views of the valley, and starting points for Lac Blanc, the Chéserys, or L'Index.
Photographically, La Flégère works very well if you are looking to build a progressive image: a trail foreground, a slope line, the Chamonix valley, glaciers, and peaks in the background. It is also a good area if the weather is uncertain, as clouds over Mont-Blanc can create very strong shafts of light.
Photo tips for La Flégère
- Use the balcony trails as leading lines.
- Work with intermediate focal lengths to balance foreground and massif.
- In the late afternoon, watch for the valley in shadow and the still-lit peaks.
- Avoid overly wide framing if the foreground offers nothing.
- Check lift operating hours if you depend on the gondola.
Useful official link: consult information for the La Flégère gondola and L'Index chairlift.
4. L'Index: ridges, graphic lines, and altitude
Access: from La Flégère, via the L'Index chairlift depending on opening, then high-altitude trails. Estimated time: quick access by lifts then variable walk. Best light: clear morning or sunset. Ideal season: summer, autumn, and winter depending on opening.
L'Index offers a higher and more graphic perspective of the Aiguilles Rouges. The ridges, mineral slopes, and frontal views of the Mont-Blanc massif allow for creating more taut, simpler, and more alpine images.
It's a good area for telephoto work. The glaciers and Aiguilles de Chamonix gain more presence, ridge lines overlap, and the valley becomes a secondary element. In winter, snow lines and skiers can add a dynamic dimension to the image.
Photo tips for L'Index
- Use a long focal length to isolate the ridges and glaciers of Mont-Blanc.
- Work with slope and snow lines as the main structure.
- In harsh light, try black and white to enhance contrasts.
- In winter, include a skier or a track to provide scale.
- Remain attentive to wind, visibility, and altitude conditions.
5. Grand Balcon Sud: composing with depth
Access: Balcony trail between Flégère, Chéserys, Tête aux Vents, and Brévent depending on the route. Estimated time: Varies depending on the chosen section. Best light: Late afternoon and golden hour. Ideal season: Summer and autumn.
The Grand Balcon Sud is one of the best routes to understand the Aiguilles Rouges as a whole. You don't just photograph one spot: you move through a succession of viewpoints, trail lines, plateaus, rocks, views of Chamonix, and perspectives towards Mont Blanc.
This sector is perfect for creating an image with depth. A trail crossing the frame, a hiker's silhouette, a ridge line, or a grassy slope can help guide the eye towards the opposite massif.
Photo tips for the Grand Balcon Sud
- Use the curves of the trail to guide the eye.
- Integrate a silhouette if it provides scale without overshadowing the subject.
- Work with focal lengths between 35 mm and 100 mm to avoid the "tiny Mont Blanc" effect.
- Watch the clouds on the glaciers: they add a lot of relief.
- Allow extra time if you're waiting for the sunset.
6. Planpraz and Brévent: the most powerful frontal view
Access: Lifts from Chamonix to Planpraz then Brévent, depending on opening. Estimated time: Quick access then variable walking. Best light: Sunset. Ideal season: Summer, autumn, and winter, depending on opening.
Planpraz and Brévent offer a very frontal view of the Mont Blanc massif. This is an ideal area for working with perspective compression: with a telephoto lens, glaciers, ridges, and peaks gain a much stronger presence.
Brévent is particularly interesting when the Chamonix valley falls into shadow while the summits remain illuminated. This contrast creates a clear, powerful, and very suitable image for large formats.
Photo tips from Planpraz / Brévent
- Use a 70–200 mm lens to compress perspectives.
- Wait for side lighting to reveal the volumes of the glaciers.
- Crop tightly if the sky is empty.
- Try panoramas if the clouds structure the sky.
- Check descent times if you are using the lifts.
To delve deeper into this light, consult the guide on mountain photography at sunset.
7. Col des Montets and Tré-le-Champ: wilder access
Access: Via the valley, from Col des Montets or Tré-le-Champ depending on the chosen route. Estimated time: Approximately 2 to 4 hours depending on objective and level. Best light: Morning, autumn, or changing light. Ideal season: Summer and autumn.
Col des Montets and Tré-le-Champ allow a more athletic approach to the Aiguilles Rouges. The routes to Chéserys, Lac Blanc, or Tête aux Vents are more demanding than access via La Flégère, but they offer a photographically richer progression: forest, boulders, slopes, gradually opening views, nature reserve, and a wilder atmosphere.
This sector is interesting if you want to tell the story of the ascent as much as the final viewpoint. The images can be less "postcard-like" and more narrative: trail, rock, fog, ibexes, silhouettes, valley, light appearing between trees or on ridges.
Photo tips from Col des Montets
- Don't keep your camera in your bag during the ascent: the trail already offers subjects.
- Use boulders and trees as foreground elements.
- In mist or clouds, look for atmospheres rather than the perfect panorama.
- Save energy for the return: the route can be technical depending on conditions.
- Stay on marked trails to preserve fragile environments.
Useful official link: The Chamonix page on the Tour des Aiguilles Rouges provides useful landmarks around Col des Montets, Chéserys, and Lac Blanc.
8. Tête aux Vents: the balanced viewpoint
Access: From Col des Montets, Tré-le-Champ, Chéserys, or the Grand Balcon Sud depending on the route. Estimated time: Varies depending on departure point. Best light: Sunrise or sunset. Ideal season: Summer and autumn.
Tête aux Vents is an excellent viewpoint for photographing the Mont Blanc massif with a sense of space. The location offers elevation without necessarily requiring an image centered on a lake or a refuge.
It's an interesting spot for more minimalist compositions: a ridge, a cairn, a silhouette, a trail, a cloud on the glaciers. It allows you to move beyond the well-known images of Lac Blanc and Chéserys while retaining the power of the panorama.
Photo tips at Tête aux Vents
- Use cairns, trails, or rocks as anchoring points.
- Frame with a telephoto lens to isolate Mont Blanc or Les Drus.
- At sunset, watch for contrasts between dark valley and illuminated summits.
- In strong winds, avoid long exposures and secure your tripod.
- Prepare for the return if you're photographing late.
9. Wildlife, ibexes and nature reserve: photographing without disturbing
Access: According to authorized trails in the nature reserve. Estimated time: Varies depending on the route. Best light: Morning and soft light. Ideal season: Summer and autumn, strictly respecting regulations.
The Aiguilles Rouges are also interesting for their wildlife, especially ibexes. Photographing an animal in this setting can create a very powerful image: silhouette on slabs, ridge in the background, soft light and glacial massif in the distance.
However, the absolute priority remains respect for the animal. A good photo never justifies getting too close, going off the trail, causing a movement, or blocking a passage. A telephoto lens is your best ally: it allows you to maintain a correct distance while obtaining a clear image.
Wildlife photo tips
- Use a long focal length to avoid getting too close.
- Stay calm, quiet, and predictable in your movements.
- Never feed the animals.
- Do not encircle an ibex or a family of animals.
- Integrate the landscape: the interest lies as much in the animal as in its environment.
See in the gallery: photo of an ibex family in the Aiguilles Rouges.
10. The Aiguilles Rouges in winter: snow, skiing, and graphic lines
Access: Depending on conditions, open areas, authorized routes, and skill level. Estimated time: Variable. Best light: Cold morning, sunset, or blue hour. Ideal season: Winter.
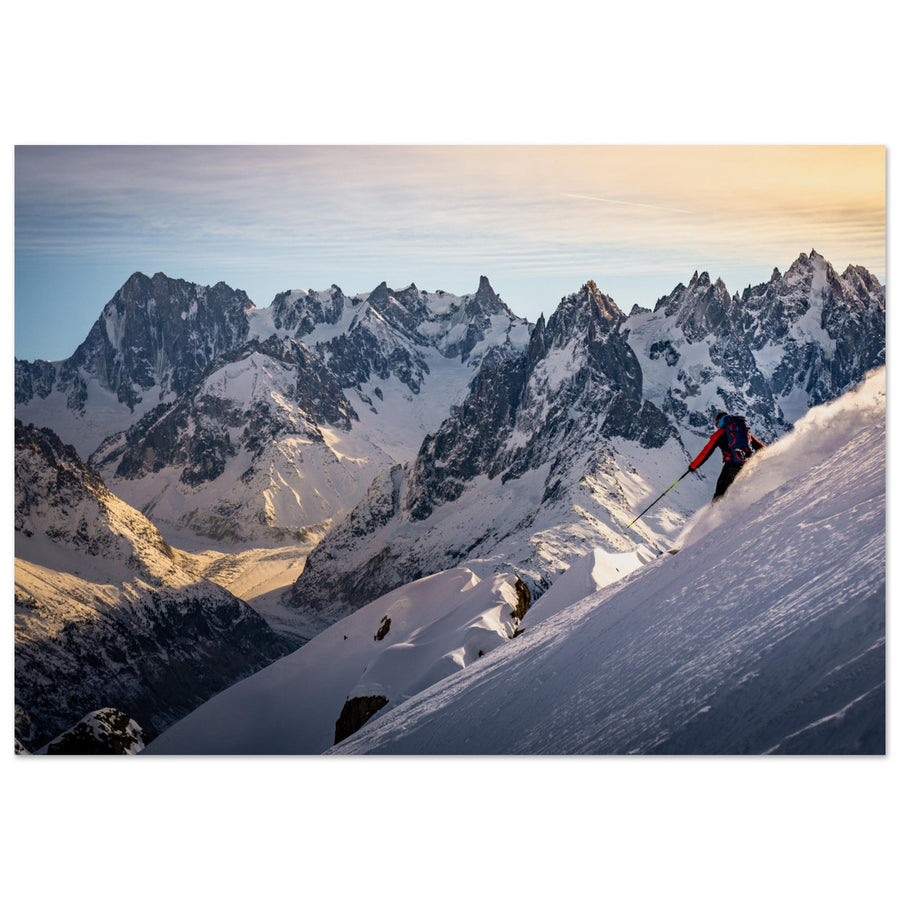
Winter transforms the Aiguilles Rouges into a very graphic terrain. Snow slopes, ski lines, dark ridges, and the Mont Blanc glaciers opposite create more refined, almost abstract images.
The main difficulty is managing safety and exposure. Snow reflects a lot of light, conditions change quickly, and some routes can be exposed. In photography, keep a simple composition: a track, a slope, a skier, a glacier, a ridge.
Winter photo tips
- Monitor exposure to maintain detail in the snow.
- Use ski tracks as leading lines.
- Only include a skier if it enhances scale and dynamism.
- Favor grazing light to reveal relief.
- Check weather, avalanche risk, visibility, and open routes before any outing.
See in the gallery: photo of skiing in the Aiguilles Rouges facing Mont Blanc.
Which season to choose for photographing the Aiguilles Rouges?
Spring
Spring can offer beautiful transitions, but access to high-altitude lakes can remain difficult due to snow. It's a season to approach with caution, especially if you're aiming for the Chéserys, Lac Blanc, or balcony trails.
Summer
Summer is the most practical season to access lakes, trails, and classic viewpoints. It's also a busy period. To avoid overly ordinary images, favor sunrise, sunset, blue hour, or moments just after a thunderstorm.
Autumn
Autumn is often the most interesting season for photography. The light is lower, the air can be clearer, crowds diminish, and the first snows can redraw the summits. The Chéserys, La Flégère, and the Grand Balcon Sud then become very strong photographically.
Winter
Winter simplifies compositions: snow, ridges, tracks, skiers, contrasts, and cold skies. Access is more limited, but images can become very graphic around Brévent-Flégère, depending on conditions and authorized routes.
What photo equipment to bring to the Aiguilles Rouges?
The Aiguilles Rouges require versatile equipment. The landscapes are vast, but the best images often come from a precise foreground: lake shore, slab, animal, trail, ridge, snow, or reflection.
- 16–35 mm: Useful for lakes, slabs, and wide foregrounds.
- 24–70 mm: Ideal for balanced compositions between foreground and Mont Blanc.
- 70–200 mm: Essential for isolating glaciers, ridges, ibexes, and light details.
- Tripod: Recommended for sunrise, blue hour, reflections, and long exposures.
- Polarizing filter: Useful on some lakes, but to be used with caution with wide-angle lenses.
- Extra batteries: Important at altitude and in cold weather.
- Headlamp: Essential if you leave before dawn or return after sunset.
- Warm and windproof clothing: Necessary even in summer if you wait long for the light.
Regulations and safety in the Aiguilles Rouges nature reserve
A large part of the most beautiful sectors of the Aiguilles Rouges is located within or near the nature reserve. The regulations protect the alpine environments, lakes, wildlife, flora, and tranquility of the site.
In the Aiguilles Rouges nature reserve, dogs are prohibited, as are fires, waste, camping, picking flowers, overflying, sound devices, and swimming in the lakes. Before going, always check official rules and current decrees, as some points may change depending on periods and sectors.
To photograph the sunrise at Lac Blanc or Chéserys, do not assume that bivouacking is free. From June 1st to September 30th, bivouacking is regulated in the nature reserves of the Aiguilles Rouges massif: it is tolerated between 7 PM and 9 AM only in certain designated areas, with mandatory reservation. The safest solutions remain: refuge, very early departure, more accessible spot, or guided outing.
Useful official links before an outing
- Chamonix Tourist Office — Lac Blanc
- Chamonix Tourist Office — Aiguilles Rouges nature reserve
- CEN Haute-Savoie — Aiguilles Rouges nature reserve
- Préfecture de Haute-Savoie — regulated bivouacking and swimming
- Chamonix — La Flégère gondola and Index chairlift
- Chamonix — Tour des Aiguilles Rouges
Mistakes to avoid when photographing the Aiguilles Rouges
1. Only photographing Mont Blanc
Mont Blanc is the obvious subject, but a good photo of the Aiguilles Rouges should also tell the story of the place from which it is taken: lake, slab, shore, ridge, ibex, or trail.
2. Only looking for Lac Blanc
Lac Blanc is iconic, but Chéserys, Flégère, Index, the Grand Balcon Sud, and Brévent often offer more personal compositions.
3. Doing everything with a wide-angle lens
A wide-angle lens gives space, but it can make Mont Blanc look too small. A medium or long focal length is often essential to give presence to the glaciers.
4. Neglecting regulations
The Aiguilles Rouges is a protected area. Dogs, fire, bivouacking, swimming, drones, picking, or leaving the trail can be problematic depending on the area. Check the rules before you go.
5. Underestimating late returns
The best light often arrives late or very early. A headlamp, warm clothes, extra time, and knowledge of the route are essential.
Our photographer's advice
In the Aiguilles Rouges, we look less for the perfect view of Mont Blanc than for the right foreground. This massif is already spectacular; the difference lies in the image's construction. A slab, a reflection, a shore, a silhouette, or an ibex can transform a well-known panorama into a personal photograph.
The best approach is to slow down: observe the wind on the lake, wait for a break in the light on the glaciers, try a longer focal length, slightly shift the foreground. It is this patience that allows one to move beyond a simple postcard and create a powerful large-format image.
Discover our photo prints of the Aiguilles Rouges
Part of our work around the Aiguilles Rouges is available as large-format photo prints on Alu Dibond. We select images that retain their strength once printed: Lac Blanc, Chéserys, Flégère, Index, Brévent, ibexes, skiing, Mont Blanc reflections, and Chamonix lights.
Discover photo prints of the Aiguilles Rouges
To incorporate a photograph of the Aiguilles Rouges into your interior, you can also consult:
- Photo prints of the Alps for living rooms & large walls
- Gallery selection
- Photo prints of the Alps for chalets
- What size to choose for an Alps photo print?
- Request a wall simulation
You can also explore the Mont-Blanc massif collection, the Chamonix photos collection, the broader collection of Haute-Savoie photo prints, as well as the Alps photo prints collection.
Some prints related to the Aiguilles Rouges
- Photo of Lac Blanc facing the Mont-Blanc massif
- Photo of a sunset over Mont-Blanc from the Chéserys Lakes
- Photo of a family of ibex in the Aiguilles Rouges
- Ski photo in the Aiguilles Rouges facing Mont-Blanc
FAQ — Where to photograph the Aiguilles Rouges?
What is the best place to photograph the Aiguilles Rouges?
Lac Blanc is the most iconic spot, but the Chéserys Lakes are often more interesting for reflections and personal compositions. La Flégère, l'Index, the Grand Balcon Sud, and Le Brévent also offer very beautiful viewpoints.
Where to photograph Mont-Blanc from the Aiguilles Rouges?
Lac Blanc, the Chéserys Lakes, La Flégère, l'Index, Le Brévent, Planpraz, and Tête aux Vents allow you to photograph Mont-Blanc from the Aiguilles Rouges with very different angles.
Where to photograph the reflections of Mont-Blanc?
The best spots for reflections are Lac Blanc and the Chéserys Lakes. Sunrise is often the most interesting time, especially if the wind is light.
What is the best season to photograph the Aiguilles Rouges?
Autumn is often excellent due to the low light, clearer air, and first snows. Summer makes it easier to access the lakes, while winter provides more graphic images around Brévent-Flégère.
Can you photograph the Aiguilles Rouges without a long hike?
Yes. La Flégère, l'Index, Planpraz, and Le Brévent provide quick access to beautiful viewpoints depending on the opening of the lifts. However, the lakes and some trails require a real walk.
Is bivouacking allowed at Lac Blanc or Chéserys?
Bivouacking is regulated in the nature reserves of the Aiguilles Rouges massif. From June 1st to September 30th, it is tolerated between 7 PM and 9 AM only in designated areas, with mandatory reservation. Before any outing, check official information.
Are dogs allowed in the Aiguilles Rouges nature reserve?
No. Dogs are prohibited in the Aiguilles Rouges nature reserve. Before you go, always check if your itinerary crosses the reserve or a protected area.
What focal length should be used to photograph the Aiguilles Rouges?
A wide-angle is useful for lakes and foregrounds, but a telephoto lens is often essential to isolate glaciers, ridges, ibex, and light details. A 24–70 mm and a 70–200 mm already cover many situations.
Is a tripod necessary in the Aiguilles Rouges?
It is not essential during the day, but it becomes very useful at sunrise, during the blue hour, for reflections, long exposures, and low light scenes.
What article should be read before a photo outing in the Aiguilles Rouges?
Before you go, we recommend reading the guides on alpine reflections, sunrise, sunset, blue hour, and the rule of thirds. These are the most useful basics for a successful photo outing in the Aiguilles Rouges.