Light | Photographing sunrise
Photographing sunrise in the mountains is not about aiming for a time displayed in an app. Morning is a sequence: the sky brightens, the terrain can remain without direct Sun for quite a while, a first ridge changes state, a face lights up, then the boundary between light and shadow moves and quickly transforms the hierarchy of the image.
The photographer’s job is therefore to be ready before the phase they actually want to photograph, understand what the local terrain is still hiding, then follow the evolution of the subject rather than passively waiting for “sunrise”. A scene can be strong before the disc appears, during the first touches of direct light or a few minutes later, when more of the terrain becomes readable.
This guide covers that morning sequence. The general principles of direction, Sun height, direct or diffuse light, colour, atmosphere and topographic shadows belong to the parent guide on light. Blue hour, golden hour, general exposure and composition also have their own guides; here, we use them only to make the right decision at the right moment.
A ridge can hide the Sun after the calculated time, while a higher summit is already receiving direct light.
The first touch of Sun may be brief or abruptly change the hierarchy. Your main composition and an alternative should already be thought through.
Observe where it appears, which way it is moving and which faces will change state next.
Composition and exposure can become obsolete within minutes. Every major change in the scene deserves a fresh check.
1. Read sunrise as a sequence, not as a minute
The sunrise time given by an ephemeris follows an astronomical convention calculated for an ideal horizon. In the mountains, your real horizon may be a ridge much higher than the geometric horizon. The solar disc can therefore remain hidden from your position after the official time has passed. Conversely, a distant or higher summit may already receive direct Sun while you, a valley or a foreground remain in shadow.
This is the first distinction to lock in: sunrise time, appearance of the disc from your position and first direct light on your subject can be three different moments. An app can give you the Sun’s azimuth and elevation; on its own, it cannot guarantee the moment when each face of the terrain will actually receive light.
The useful phase depends on the subject
Before the Sun reaches the terrain, the sky and landscape are already changing. A ridge silhouette, a sky gradient, a mass of clouds or a still-cool valley can all work photographically. If this diffuse phase is your main subject, the guide dedicated to blue hour develops its own logic. Here, simply remember that it is part of the sequence: the cool, diffuse reading you are looking for can evolve or lose its interest before the first direct light reaches the mountain, with no universal minute marking the transition.
Then come the first lit areas: a summit, a ridge, a strip of snow, sometimes an entire face. Light then progresses, topographic shadows move and the scene may enter a phase of low, warm light. From that point, if the golden quality itself becomes the real subject, continue with the dedicated golden-hour guide rather than turning the sunrise guide into a duplicate.
The appearance of the disc does not end the session. As long as the progression of light continues to create a useful relationship between lit faces, shadows and sky, the scene can still produce strong images. The right moment to change intention comes from what the light is doing to the subject, not from an automatic boundary immediately after the official time.
| State of the scene | What to observe | Photographic decision |
|---|---|---|
| Before direct light | Sky, silhouette, separation of layers, position of the local horizon, contrast still low or diffuse. | Photograph if this atmosphere serves the subject, while preparing the frame for the next phase. |
| First touch of Sun | The exact area that lights up, its size, the orientation of the face, movement of the shadow–light boundary. | Decide whether this small area becomes the subject or unbalances the original frame. |
| Progression across the terrain | New ridges or faces changing state, shadows retreating, contrast between lit parts and those still dark. | Wait, tighten, widen or change hierarchy according to the visible transformation. |
| Established low light | Direction, colour, texture and shadows becoming more stable in the image. | If the golden quality becomes the subject, switch to the logic of the golden-hour guide. |
2. Be ready before the first direct light
Sunrise becomes much easier to photograph when the first composition is already resolved before the light arrives. If you wait for the first orange ridge before starting to look for your subject, change lens, move the tripod and understand where the Sun will emerge, the phase you wanted may be over before you are ready.
Prepare a frame that already has a reason to exist in shadow
First build an image that is readable without relying on the future lit area to save everything. Identify the subject, the main masses, the share of sky and the edges. A composition that exists only because you imagine an entire face will soon light up is fragile: if only a small tip finally receives the Sun, the whole hierarchy can collapse.
Then ask what the first light is likely to change. A small, very bright area in the middle of dark terrain can immediately become the main entry point. That may be exactly your intention. But if the subject was meant to be a valley, a succession of ridges or a structured sky, that bright patch can instead draw all attention toward a secondary area.
Prepare one alternative, not twenty micro-compositions
Before the Sun arrives, prepare, if possible, two genuinely different readings: for example, a wide frame telling the sky–terrain relationship and a tighter frame isolating the first face likely to light up. The point is not to shoot everywhere. It is to avoid having to invent a new composition during the fastest part of the transition.
If a telephoto or narrower field lets you isolate a strip of light, that simply concerns what you choose to include in the frame. How focal length, distance and perspective alter the overall geometry belongs to Choosing focal lengths and managing perspective.
Recognise when waiting will not fix the geometry
A common mistake is to interpret every absence of light as a simple delay. But if the visible face is turned away from the solar direction, if a ridge will keep hiding the Sun throughout the phase you care about or if the subject sits behind another mass of terrain, waiting a few minutes will not necessarily create the effect you imagined.
The diagnosis is visual: look at where the light appears on neighbouring terrain and which way the boundary is moving. If everything suggests it will bypass your face or arrive only when the Sun is already much higher, the problem is no longer timing. Change subject, change composition or accept that this scene will not produce the planned image.
3. Follow the progression of light across the terrain
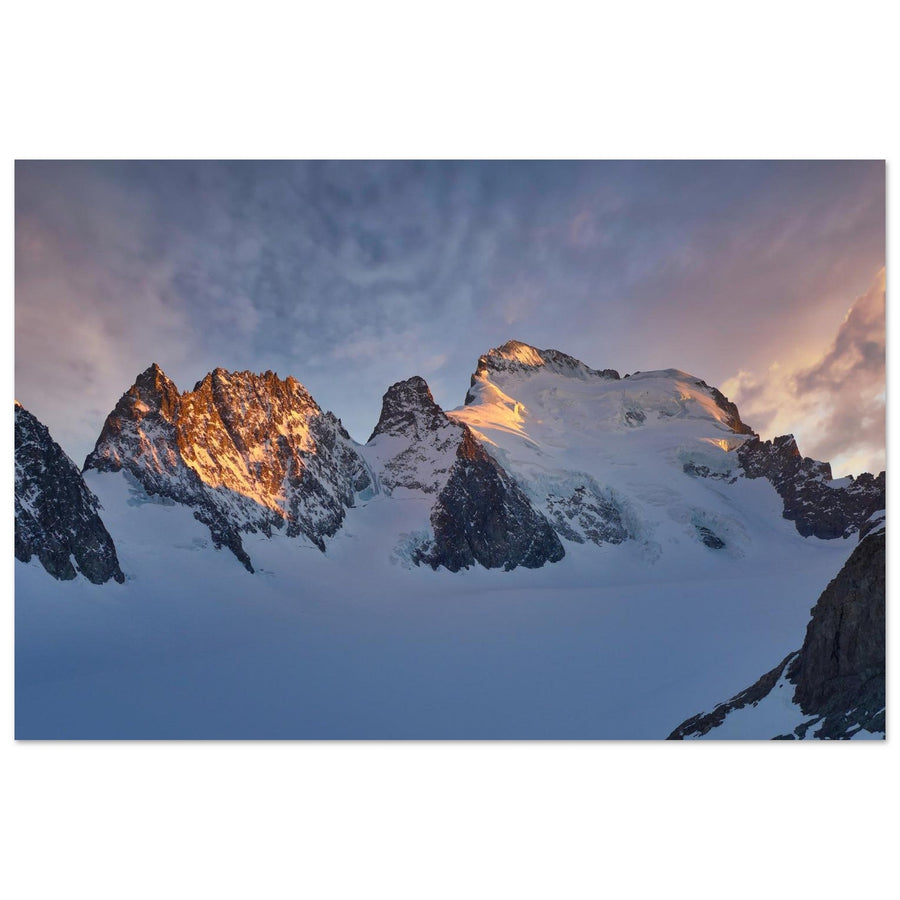
The first direct light is interesting because it often reaches only a small part of the landscape. It then creates a strong asymmetry between a lit area and surroundings still dominated by diffuse skylight. This asymmetry can reveal a ridge, isolate a summit or, conversely, unbalance the frame.
Read the shadow–light boundary as an indicator of what comes next
Do not look only at the bright area. Observe the boundary between direct Sun and topographic shadow: where is it, what shape does it take and where is it moving? A band of light descending a face or gaining a ridge tells you which structures will appear next.
This is where a few seconds or minutes can transform the scene. A first illuminated tip may seem lost; a little later, the light may meet a ridge and create a continuous line. Conversely, waiting can erase the exceptional character of a small isolated touch once the whole face becomes evenly lit.
A lit summit does not mean the visible face is the right one
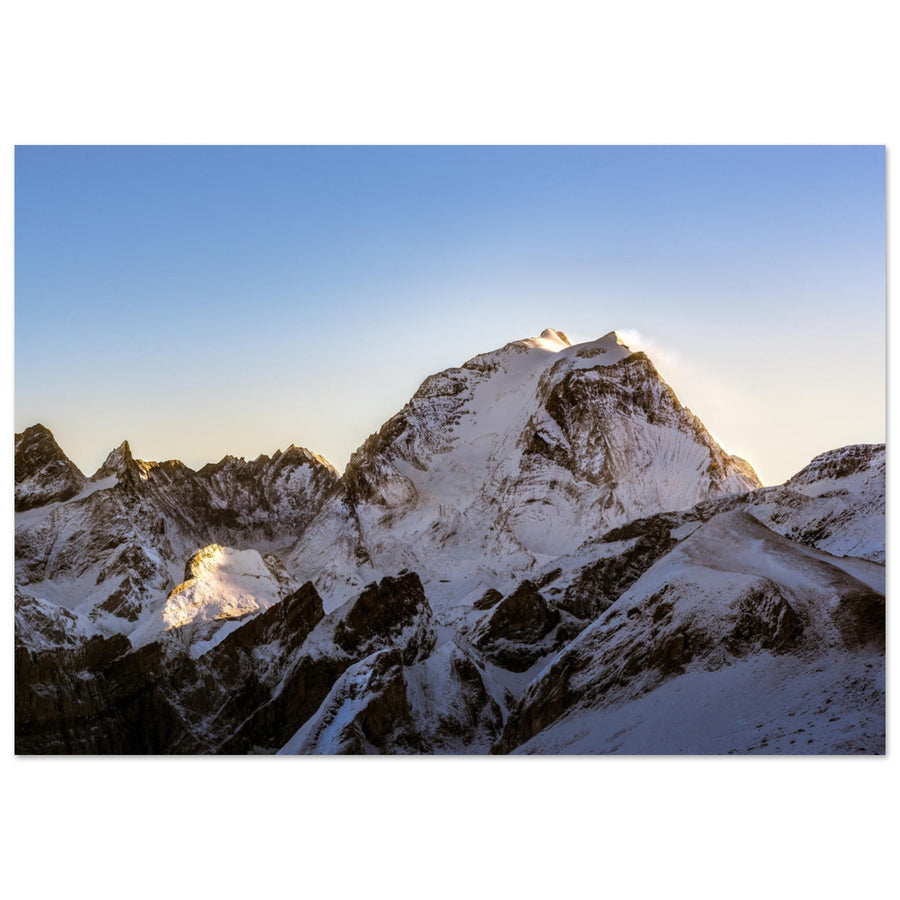
A summit can receive the Sun on the opposite side while still looking dark from your viewpoint. Another mountain with a better orientation may light up clearly at the same moment. You therefore need to distinguish “the summit receives the Sun” from “the surface I am photographing receives useful direct light from this angle”.
If the light arrives on the wrong side, do not try to compensate for the problem only through exposure or processing. The visible orientation is part of the real geometry of the scene. You can use silhouette, rim light or backlight if that becomes the intention, but you cannot turn an unlit face into real side light.
Wait
The light–shadow boundary is moving toward a structure that will clearly strengthen the subject, and the phase will still be interesting when it reaches it.
Typical failure: waiting mechanically while the light is moving elsewhere or the face will remain hidden.
Shoot now
The small illuminated area already creates a strong hierarchy, rare separation or tension that may disappear when more terrain lights up.
Typical failure: waiting “for it to get better” and losing precisely the localized character that made the image.
Change the reading
The geometry or clouds show that the expected light will not arrive as planned. The sky, a silhouette, another face or a more graphic structure becomes the new subject.
Typical failure: remaining attached to the original scenario until the whole sequence is over.
4. Let the composition evolve with the scene
A frame built in low light is under no obligation to remain the best one once direct Sun is present. Light changes visual weight: a previously secondary face can become the brightest area in the image, a shadow can cut a valley in two, an interesting sky can lose importance beside a suddenly luminous ridge.
Keep the frame if the light strengthens the intended hierarchy
If the first light falls exactly on the main subject and the other masses remain in place, do not change simply for the sake of changing. The relationship between a version before the light and a version after it can even be very interesting: same structure, two states of the landscape.
Recompose if the light creates a new subject
If a small bright tip becomes the only place the eye sees, ask a simple question: is it now the subject? If so, give it a frame that embraces that role. If not, reduce its weight through another organization of the frame or wait until a more important area lights up.
The same logic applies to the sky. A very colourful sky can carry much of the frame before direct light. A few minutes later, if the terrain becomes structured and the sky loses its role, automatically keeping the same proportion of sky can dilute the new image.
Deliberate silhouette or terrain that is simply too dark?
A silhouette works when the outline is readable and the bright background carries the image. The dark terrain is then not a defect to “recover”. On the other hand, if your intention depends on the material, textures or layers of that mountain, accidentally turning it into a black mass means the contrast or timing does not match the intended image.
General composition — hierarchy, masses, negative space, edges and separation of layers — is developed in Composition in mountain photography. Here, use it to reread the frame whenever the light changes the hierarchy.
5. Reassess exposure during the transition
Sunrise has no special aperture–shutter speed–ISO trio. What is specific is that the scene can change quickly enough to make an exposure that was correct a few minutes earlier obsolete. The sky gains luminance, areas of terrain suddenly move into direct light and the difference between lit and shaded parts can increase or decrease depending on the phase.
Make a fresh test file when the state of the scene changes
After a first touch of Sun, a newly lit face or the disc entering the frame, do not assume that your previous settings remain correct. Make a test exposure and check the important highlights, histogram and readability of the areas you genuinely want to preserve.
The histogram does not need to keep the same shape throughout the sequence. A mostly dark scene with one lit summit has no reason to look like the image made later when half the massif receives the Sun. What matters is recognising unwanted clipping in useful areas, not maintaining a stable curve.
Bright sky and dark terrain: real contrast or a problem to solve?
A large difference between sky and terrain is not automatically a defect. It can produce a very strong silhouette. If, instead, you want to retain both terrain detail and important sky highlights, first make a test exposure: a single frame may already contain what you need.
Bracketing becomes relevant only if protecting the highlights leaves important shadows insufficient for the intended result, and if the scene remains stable enough for multiple frames to be merged. Fast clouds, moving vegetation or the light itself progressing between frames can make the sequence less consistent.
The full mechanics of aperture, shutter speed, ISO, histogram and bracketing belong to Exposure in mountain photography.
Do not manufacture after the fact a colour the morning never produced
Sunrise can be warm, pink, almost neutral or barely colourful depending on atmosphere and clouds. White balance or RAW processing can interpret the file, but they should not become a way to force every morning into the same orange palette. If colour is not what makes the image, let structure, localized light or silhouette carry the photograph.
The general development method remains covered in Developing mountain photos from RAW files.
6. Decide whether the Sun belongs in the frame
The solar disc immediately draws the eye. Its relevance is therefore not “this is sunrise, the Sun has to be visible”, but the function it plays in the image: focal point, visible source of backlight, graphic element at the edge of a ridge or deliberate relationship with a silhouette.
The disc can strengthen the image — or overwhelm it
A small distant mountain, a relatively empty sky and a very bright disc can create an image where the Sun becomes the only subject, even if your intention was the terrain. If the disc adds neither relationship, structure nor useful tension, leave it outside the frame and photograph what its light is doing to the landscape.
Conversely, if its position relative to a ridge or silhouette creates precisely the relationship you are looking for, embrace its visual weight and compose around it. Having it partly hidden by the terrain can reduce the visible bright area and alter the shape, without turning this section into a lesson on focal length or perspective.
Flare, ghosting and loss of contrast: diagnose before correcting
A very bright source in or near the frame can cause internal reflections: haze, loss of contrast or ghost images. A lens hood mainly helps with some off-axis light; it cannot eliminate all flare when the Sun is directly in the frame.
Before treating the effect as a defect, ask whether it serves the atmosphere. If it hides the subject, test a very small change of composition, temporarily shade an off-frame source when possible without entering the image, or compare a version with and without the disc. Do not infer a universal fix: lenses, coatings and geometries respond differently.
Sunstar: a possible effect, not a stage of sunrise
A small aperture can emphasise a star around a bright point source through diffraction at the diaphragm. The number and shape of rays depend in particular on the lens and its aperture blades. Stopping down further is therefore not compulsory: it also changes exposure time and can increase diffraction that reduces fine detail.
7. Adapt the sequence when clouds change the scenario
Weather does not only change the colour of sunrise; it can change the order of the sequence itself. A cloud layer on the horizon can hide the Sun after its astronomical rise and delay or remove the first direct light on the terrain. A gap can instead let through a highly localized band of light for a short time.
Blocked horizon: do not wait for light that no longer has a direct path
If an opaque layer blocks the direction of the Sun and no opening is forming, the expected first direct light may never arrive during your window. The right decision is not necessarily to leave: diffuse light, silhouettes, sky colours or cloud structure can still produce an image. But you need to change intention instead of continuing to compose for a face that remains dark.
Gap in the clouds: be ready for highly localized light
An opening in the clouds can light part of the terrain while the rest remains dark. The phenomenon can create a very strong hierarchy, but nothing guarantees its duration or exact location. If the light appears, reread the composition and exposure immediately rather than assuming the scene will stabilize.
Veil: a less spectacular transition may remain more coherent
An atmospheric or cloud veil can reduce contrast, diffuse the light and make the transition more gradual. The result may seem less “spectacular” than an orange ridge against a black background, but it can better serve a scene built on layers, mist or soft colours.
Forecasting, cloud structure, fog, storms and other phenomena belong to the specialist weather guides. This guide keeps only their operational consequence here: the expected lighting sequence can be delayed, localized, softened or removed.
8. Diagnose a sunrise that is not working
“The sunrise was a failure” is too vague to help you improve. Separate timing, geometry, composition, exposure and conditions. The correction will not be the same.
| Symptom | Likely cause | What to check | Decision |
|---|---|---|---|
| “I arrived at sunrise, but missed the best phase” | The session was planned around the official time rather than the first desired phase. | When did the sky, silhouette or first interesting light actually begin? | Next time, calculate arrival from that phase; detailed logistics remain in the preparation guide. |
| “The app said the Sun was up, but nothing is lighting up” | Local horizon or cloud layer still in front of the Sun. | Which ridge or cloud is blocking the solar direction? Are neighbouring landforms already lit? | Wait if the boundary is progressing toward the subject; otherwise change the reading. |
| “The summit is in Sun, but my face stays dark” | The light is reaching another orientation of the terrain. | Where is the actually lit area relative to your viewing axis? | Embrace silhouette/backlight or change subject; exposure cannot recreate a lit face. |
| “The light is already too high” | The phase you wanted has passed, or the local horizon delayed illumination until a higher solar elevation. | Do the shadows and direction still serve the subject? | Continue if the image works; otherwise move to another intention instead of forcing “sunrise light”. |
| “The sky is superb but the terrain never receives light” | The sky and subject are not evolving through the same useful sequence. | Can the sky become the subject with a readable silhouette or dark mass? | Recompose around that relationship or abandon the idea of first light on the terrain. |
| “The scene is too contrasty” | Very bright sky/disc and terrain still dark. | Is a silhouette acceptable? Does one exposure retain what matters? Is the scene stable? | Choose the rendering; bracket only if the useful dynamic range requires it and the sequence remains mergeable. |
| “The first light is tiny and attracts all the attention” | The new bright area has more visual weight than the original subject. | Does that area deserve to become the subject? | Tighten/reframe to embrace it, wait for it to expand or change the frame. |
| “My composition worked before the Sun, but not after” | The visual hierarchy changed with the arrival of light. | Which element has become dominant? Does the sky still have the same role? | Recompose; do not keep the frame only for continuity. |
| “I have been waiting a long time and the light is not moving toward my subject” | The expected geometry does not match the real orientation or obstruction. | Which way are neighbouring lit areas moving? | Stop waiting mechanically and change subject or intention. |
| “The Sun in the frame destroys the terrain” | Too much visual weight, flare or excessive contrast. | Does the disc genuinely add something to the image? | Remove it, partly hide it with terrain or embrace a more graphic silhouette. |
Discover this first light in our photo prints of sunrises in the Alps.