Photographing Reflections in the Mountains
A mountain reflection does not need to be a perfect mirror to work. Depending on the surface and the light, it can clearly reproduce a peak, merely repeat a colour, break shapes into ripples or become almost abstract. The real question is therefore not “how do I get the most perfect reflection?”, but what role do you want to give it in the image.
From there, composition becomes much clearer: decide whether the real subject or its reflection should dominate, choose symmetry or a break from it, give the waterline a function, control the shore and edges, then adapt your decision to a surface that can change from one minute to the next.
This guide is dedicated to that specific way of reading reflections in the mountains. General principles of composition, perspective, exposure and filters are covered in their own guides; here, they are used only when they directly change the way a reflection is composed.
A reflection can be the subject, a double, a counterpoint, an area of colour or a texture. Its function determines the framing.
Smooth water preserves shapes; ripples locally change their direction and gradually turn the mirror into texture.
A centred waterline is strong when the double is genuinely the subject. If one half tells more, the balance can deliberately become asymmetrical.
Reducing reflections can reveal the bottom of the water, but it can also remove exactly what you came to photograph.
Read the reflection before framing
A reflection is an image produced by light reflected from the surface of the water. On a very smooth surface, reflection directions remain coherent enough for the outlines of a mountain, tree or cloud to remain recognizable. When the surface develops many small slopes, each patch of water reflects light in a slightly different direction: shapes fragment, stretch and mix together.
This transition does not separate a “successful” reflection from a “failed” one. It creates several possible families of images. The first task is to identify which one is actually present, then frame for that version instead of pursuing an idealized version of the scene.
| Type of reflection | What you see | When it works | Common mistake |
|---|---|---|---|
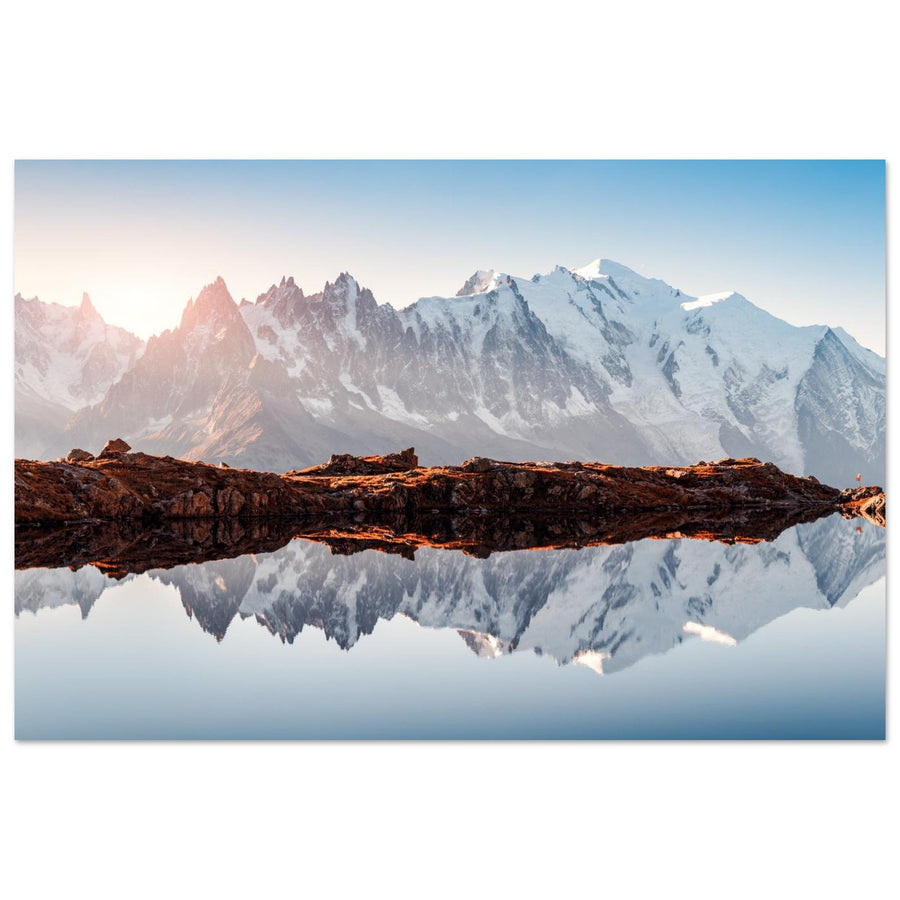
| Mirror | The main shapes of the subject remain clearly identifiable and echo each other on either side of the water. | When repetition, calmness or the geometry of the double genuinely carries the image. | Adding elements that break the symmetry without providing a counterweight. |
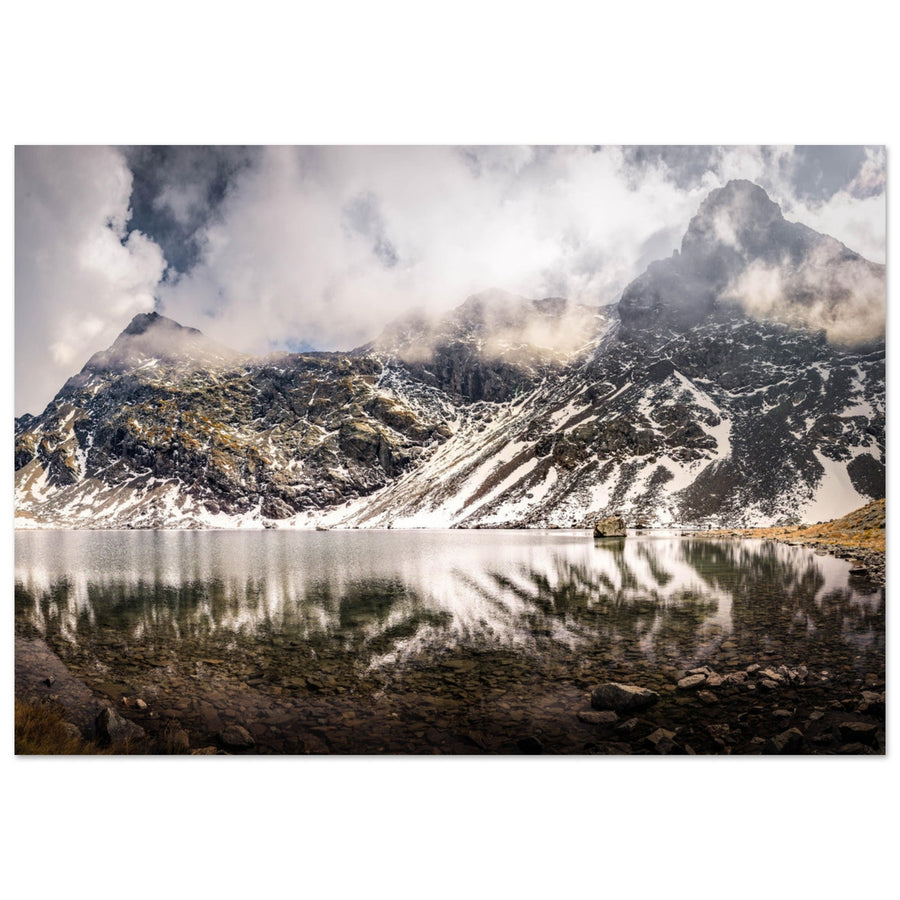
| Textured | Ripples preserve the colours and general direction of the subject but transform its detail into bands, curves or vibrations. | When the texture of the water creates rhythm or a sense of movement. | Waiting stubbornly for a mirror when the existing texture is more interesting. |
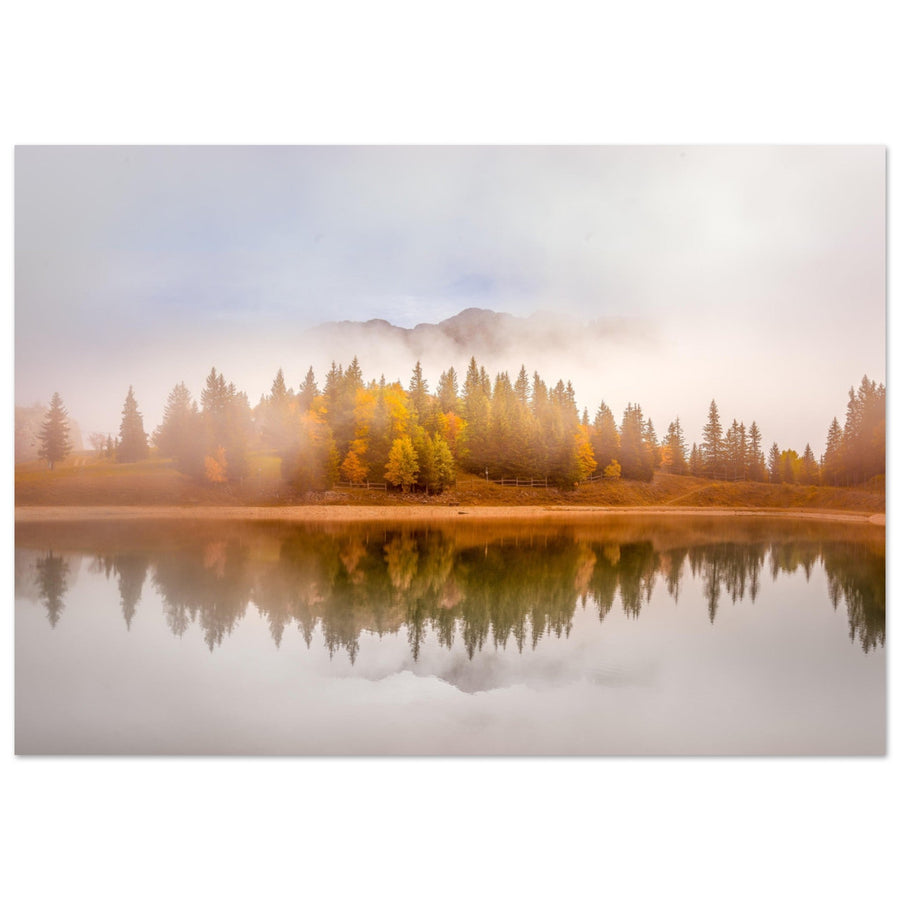
| Partial | A small pool, calm opening or part of a lake repeats only a colour, a peak or a silhouette. | When that repetition is enough to connect two areas of the frame without requiring complete symmetry. | Giving too much space to an unexpressive surface simply because it contains a reflection. |
| Abstract | The real subject is no longer immediately recognizable; what remains are mainly colours, lines and distortions. | When the reflection itself becomes the graphic subject. | Keeping too much real-world context and preventing the image from fully embracing abstraction. |
A reflection is not a simple vertical copy-and-paste
Even with perfectly smooth water, the real subject and its reflected image do not necessarily show exactly the same details. For a flat, smooth surface, the mirror model places the virtual image symmetrically on the other side of the water plane: branches, rocks, the facades of a hut or mountain slopes can then hide one another differently in the direct and reflected views. A near-symmetry can therefore be physically coherent without being an identical duplication.
This nuance avoids a trap: trying to “correct” a difference that actually belongs to the scene. If the main masses echo one another but a secondary detail disappears in the reflection, first ask whether that difference genuinely harms the reading.
Choose symmetry, near-symmetry or a deliberate break
Symmetry is particularly powerful with a reflection because the subject and its double naturally create repetition. But centring the image is not an automatic reward for every calm body of water. Symmetry works when the two halves of the frame genuinely benefit from echoing one another.
Deliberate symmetry
It works when the mountain, sky or silhouette has a sufficiently complete double and repetition is the main idea. The waterline can then sit close to the centre because that centre becomes the axis of the image.
Typical failure: an isolated rock, a very strong shore or a bright patch breaks the balance without creating a new relationship. The image looks almost symmetrical, but not enough for that promise to feel convincing.
Near-symmetry
It keeps strong repetition while accepting differences: vegetation, mist, water texture, a cloud or a small foreground. It works if those differences enrich the image instead of looking accidental.
Diagnosis: mentally hide the element that breaks the axis. If something is then missing from the frame, the break probably has a function. If the image becomes cleaner, that element is mostly a distraction.
Deliberate break
If the sky is spectacular but the reflection is weak, if the foreground tells more than the double, or if the ripples create a texture more interesting than the real mountain, clearly give more weight to the stronger half.
Limit: a slightly off-centre distribution with no clear hierarchy can feel hesitant. It is often better to embrace asymmetry than remain halfway between two intentions.
Decide what dominates: reality, the reflection or their relationship
In a reflection composition, two versions of the same subject can compete for attention. The solution is not always to make them equivalent. If the real mountain has the strongest light, detail or contrast, the reflection can remain secondary and simply extend the shape. If, on the other hand, the water holds richer colours or an exceptional texture, it can become the dominant part.
The strictest case is near-equal balance: it requires both halves to have masses, contrasts and edges coherent enough for the eye to accept them as one structure. A small bright patch in the water or a heavy foreground can then carry far more weight than it would in a landscape without a reflection.
Give the waterline a function
The waterline is often the axis around which the relationship between subject and reflection is built. Its position depends neither on a mandatory rule of thirds, nor on a 40/60 ratio, nor on an instruction to centre it. It depends on one question: is the image about repetition or about hierarchy between two halves?
If repetition is the subject, a line close to the centre gives both parts comparable space and makes the symmetry immediately readable. If the sky, real mountain, shore or reflected texture is more interesting, shifting that line gives more space to what should dominate.
Do not confuse the waterline, shore and horizon
In a mountain lake, the visible boundary between the water and the opposite shore is not necessarily a geometric horizon. A shore can rise, fall, curve or be interrupted by rocks and trees. Artificially straightening it as though it must always be horizontal can distort the reading of the scene.
However, when a composition relies on calm symmetry and the visual axis is meant to appear horizontal, accidental camera roll becomes very obvious. Check the camera level and use genuinely horizontal elements in the scene when they exist. The aim is to avoid accidental tilt, not to force every shore to become straight.
Cropping a reflection can be stronger than showing it in full
An incomplete reflection is not automatically a mistake. You can deliberately crop part of the double to strengthen a shape, favour the real subject or create a tighter vertical composition. What is most distracting is an indecisive crop: the reflected tip of a peak cut by a few pixels, a silhouette cut at the edge for no reason, or a cloud and its reflection cropped differently while symmetry is supposed to dominate.
Treat the edges as decisions. If an important shape touches the frame, ask whether that tension is intentional. If not, give it breathing room or crop it more decisively.
Horizontal or vertical: follow the structure of the double
Horizontal format naturally suits scenes where the reflection extends a mountain range, shoreline or sky across the width. Vertical becomes interesting when subject and double form a tall column, when a ridge continues deeply into the water, or when the top–bottom relationship is stronger than the lateral spread. The reflection therefore does not dictate the format: the dominant direction of the structure does.
Compose with wind, ripples and calm areas
Wind is one of the most visible causes of change in a reflection, but “it is windy” remains too crude a diagnosis. On the same lake, a bay, locally sheltered area or small pool may remain relatively smooth while another part develops ripples. Conversely, even a light breeze can erase fine detail from a reflected ridge.
Look at the surface inside the frame, not only at the trees or what you feel on your face. Examine the size of the ripples, their direction, regularity and, above all, what they do to important shapes. A small vibration that turns the reflection into coloured bands can be more interesting than a clinical mirror.
Wait, or compose with what is there?
- The reflection must remain readable: if the subject’s outlines are essential and they dissolve, waiting for a lull or finding a more sheltered area makes sense.
- Colour and rhythm are enough: if the ripples create coherent patterns, compose with them instead of waiting for them to disappear.
- A small calm area exists: concentrate attention on that part instead of giving the entire frame to agitated water.
- The surface no longer serves the idea: abandon the reflection as the main subject and rebuild the image around something else.
Time of day is not a guarantee of calm
Early hours are often recommended because some bodies of water are calmer then. That is a planning reference, not a law. In the mountains, terrain channels and shelters wind, lakes react differently, and an overcast day can remain stable longer. The only decisive information when framing is the actual state of the water.
A longer exposure does not recreate still water
A longer exposure can average out the movement of ripples and produce a smoother surface. This changes how movement is rendered; it cannot recreate the fine outlines of a true mirror reflection that were not stable during the exposure. If shutter speed becomes a central creative choice, the long-exposure guide explores that decision in detail.
Calm water alone does not guarantee a strong reflection
The surface can be perfectly smooth and still reflect little of the subject you expected, or mainly show sky, shore or another element. What the camera sees in the water also depends on viewing position and the light being reflected toward the lens. The practical response here is simple: check what actually appears in the reflected area before building your symmetry. The general explanation of viewpoint geometry belongs to the guide on focal lengths and perspective.
Manage the shore, foreground, sky and edges
The shore is often the element that makes or breaks a reflection composition. It can cleanly separate subject from double, create a dark base, add a diagonal or provide scale. But it can also become a functionless band that cuts the relationship in two.
The foreground must earn its place
Rocks, a tuft of grass, a branch or part of the shore can anchor the image and break symmetry that feels too static. They become problematic when they hide the most readable part of the reflection, awkwardly touch a reflected silhouette or attract more attention than the main subject.
The diagnosis is the same as in any composition, but reflections double some collision possibilities: a rock can merge with a reflected cloud, a blade of grass can cross the inverted tip of a peak, a bright shore can cut exactly through the area where the eye should move between reality and reflection. Check these contacts when shooting.
Check the edges twice
A symmetrical composition can crop an element in the real half and its double in the reflected half. Look separately at the top, bottom, left and right: peak, cloud, tree, reflected cloud, end of a shoreline. A coherent crop can strengthen a tight frame; a series of small accidental amputations instead makes the image feel too narrow.
Bright distractions are especially sensitive near the edges: foam, a light-coloured stone, wet branch, leaf or a patch of sky in the water. Because they can sometimes have more contrast than the main reflection, they may become the first entry point without you intending it.
The sky is sometimes doubled… and so is empty space
A strong sky can become spectacular when repeated in the water: clouds, twilight colour or a break in the light then create a very clear top–bottom structure. But a uniform sky already occupies a lot of space; if its reflection repeats the same empty area, the image can lose density. In that case, reducing both the real sky and its repetition is often more effective than trying to fill the bottom with an artificial foreground.
Here, viewpoint solves a specific relationship
Changing height or position slightly can alter the amount of visible water, the position of the shore and the contacts between subject, reflection and nearby elements. Use that movement as a visual test: does the reflection separate from a rock? does the shore become simpler? does the calm area occupy more of the frame?
Stop the explanation there. Size relationships, overlaps and perspective produced by a movement or focal length belong to the guide Choosing focal lengths and managing perspective.
Balance light, colour and the polarizer
It is tempting to apply a rule such as “the reflection is always darker than the real subject.” That is not a reliable reference. At the air–water interface, part of the light is reflected and another part is transmitted; the proportion depends in particular on angle and polarization. In a real photograph, this is combined with reflected sky, the colour of the water, what is visible beneath the surface and areas lit differently.
The reflection can therefore be globally darker than the subject it repeats, but an area of bright sky in the water can also become one of the brightest parts of the frame. Its colour can differ from the real subject because it receives and returns a different combination of light: blue sky light, clouds, warm light on a mountain, vegetation or the bottom visible through the water.
Expose for the whole image, not for “the reflection”
When bright sky, dark mountain and reflective water coexist, identify the areas you genuinely need and monitor important highlights across the whole frame. If the brightness range exceeds what a single exposure can retain, a perfectly static scene may suit bracketing; exposure choice, histogram and bracketing are detailed in Exposure in mountain photography.
Do not try to equalize both halves mechanically either. A difference in brightness or colour can make reality and reflection easier to distinguish. It becomes a problem only if it destroys the intended hierarchy or if an important area is irrecoverably clipped.
The polarizer can reveal the water… or remove the subject
A polarizing filter can reduce some surface reflections and reveal more rocks, algae or colour below the water. That is useful if the reflection is hiding a submerged foreground you want to show. But if the mirror is the subject, the same reduction can strip the lower half of its function.
Do not think in terms of “with or without a polarizer,” but in terms of degree. Rotate the filter while watching the surface, compare several positions and stop when the balance between reflection and transparency serves the frame. Maximum effect is not the goal.
Across a very wide field, the effect of the polarizer can vary within the image and create uneven water or sky. If one area of the reflection disappears while another stays strong, do not immediately assume the light changed: remove or rotate the filter to compare. Its operation, effective angles and general limitations are covered in Filters in mountain photography.
Use partial, rippled or abstract reflections
The most obvious images often show an entire peak and its double. Yet a much smaller reflection can be enough: a pool repeating a snowy ridge, a puddle containing only a patch of sky, a dark area repeating a warm colour. In those cases, the reflection acts as an echo rather than a second half.
Ripples open another route. When they distort the subject enough, stop asking “is the mountain recognizable?” and look instead at the distribution of lines, colours and contrasts. An agitated surface can create vertical bands, zigzags or blocks that become a subject in their own right.
You can even frame only the reflection. By removing the real subject and sometimes the sky, the image loses its immediate reference point and becomes more ambiguous. This works particularly well when the distortion is structured; if the water is simply confused, removing context does not magically create a composition.
Three useful versions to record in the field
- Symmetrical version: the double is complete and the axis is deliberate.
- Hierarchical version: give more room to reality or reflection depending on which part is stronger.
- Simplified version: tighten onto the area of water, repeated colour or texture that actually made you stop.
Comparing these versions later with a clear head is often more instructive than making dozens of tiny adjustments around a single frame.
Development should strengthen an existing relationship, not invent a mirror
Local adjustments to brightness, contrast or colour can help restore the hierarchy you perceived on location. They should not be used to manufacture absent symmetry or artificially make two areas identical when the light made them different. Detailed RAW processing belongs to the dedicated guide; here, the criterion remains compositional: does the development clarify the role of the reflection without making the scene incoherent?
Diagnose a reflection image that does not work
When a photograph feels “almost right,” do not change everything at once. Identify the dominant symptom, then correct the variable that corresponds to it.
| Symptom | Likely cause to test | Diagnostic question | Logical action |
|---|---|---|---|
| The reflection lacks strength | It has no clear role, occupies too little space or lacks structure. | If you hide the water, does the image genuinely lose anything? | Give the reflection more room, tighten onto the useful area or stop treating it as the subject. |
| The waterline is distracting | It is neither a deliberate axis nor a convincing hierarchical separation. | Why is it placed exactly there? | Embrace clearer symmetry or give distinctly more space to the stronger half. |
| The symmetry feels weak | An element breaks the balance without a function, or the edges contradict the central axis. | Which element prevents the two halves from reading as one structure? | Simplify, move a distraction, adjust the framing or abandon strict symmetry. |
| Reality and reflection compete | Two areas have similar visual weight but do not cooperate. | Where should the eye enter first? | Choose a dominant half through space, framing or, where relevant, polarizer adjustment. |
| The surface is too agitated | You are expecting a mirror while the water is producing texture. | Do the ripples genuinely destroy the idea, or could they become the idea? | Wait, find a calm area, simplify the frame or switch to a textured composition. |
| The polarizer emptied the water | Surface reflection was reduced beyond what the composition can support. | Has the bottom of the water become more important than the double? | Rotate the filter, compare without it and return to the level of reflection that serves the image. |
| The reflection is cropped awkwardly | An important shape touches the edge with no clear intention. | Does the crop look deliberate or simply too short? | Give it room or crop more decisively to create a genuine graphic decision. |
| Shore, stone or vegetation clutter the bottom | The foreground has become heavier than the subject–reflection relationship. | Does this element anchor the image or hide what makes it specific? | Simplify the edge, find a cleaner separation or embrace an asymmetrical composition. |
| The reflection looks too dark, too bright or too colourful | The difference may be real, or the overall exposure may not preserve the important tones. | Does the difference destroy the hierarchy, or does it add depth? | Check the overall exposure and correct with restraint, without seeking artificial equality. |
A six-question control method
- What is the main subject: reality, the reflection or their relationship?
- What kind of surface do I have: mirror, texture, partial reflection or near-abstraction?
- Does my waterline have a function: axis, separation or simple accident?
- Which elements break the relationship: shore, foreground, awkward contact, edge or bright area?
- Does the polarizer help this intention: or is it simply set to maximum?
- Am I waiting for different water: or am I rejecting an interesting composition because it is not a perfect mirror?
Key takeaways
- A reflection can be mirror-like, textured, partial or abstract; none of these states is automatically superior.
- Symmetry works when it is the idea of the image. A centred waterline is therefore never a universal recipe.
- Wind and ripples change the coherence of shapes; observe the surface actually inside the frame, not a rule about time of day or weather.
- Shores, foregrounds and edges should strengthen the subject–reflection relationship, not merely fill the frame.
- A reflection is not always darker or identical in colour to the real subject; judge the hierarchy and exposure of the whole scene.
- The polarizer is adjustable: it can reveal the bottom of the water or remove the mirror you were looking for.
- An imperfect reflection can become texture, an echo of colour or an abstract subject instead of being treated as a failure.
To compare the role of water in different artworks, explore our photo prints featuring reflections.