Photographing mountain wildlife
Photographing an ibex, chamois, marmot or high-altitude bird requires more than a long telephoto lens. In the field, you need to manage three things at once: read what the animal is doing, have the camera ready before the action starts, and know what kind of image you are looking for — portrait, behaviour, action or an animal placed within the landscape.
In the mountains, the terrain makes things even more complex. The light can shift from a dark slope to dazzling snow, wind can make a long telephoto difficult to stabilize, atmospheric turbulence can ruin the detail of a distant animal and, in winter, a disturbance that makes wildlife move can cost it precious energy.
The aim here is not to give you a single “mountain wildlife” setting to copy. You will find shutter-speed references, autofocus and exposure choices, methods for anticipating action, composing a herd or working in snow — and, each time, the reasons why those references must be adapted to the real subject.
The animal’s behaviour determines the distance and the moment.
Real movement matters more than fear of raising ISO.
A clean background, grass, a group or take-off do not call for the same AF area.
A photograph never takes priority over the animal, local rules or your safety.
Before the first frame: read the subject
Before discussing focal length or autofocus, you need to know what you are photographing. A marmot feeding in summer, an ibex resting on a rocky ledge, a chamois during the rut and a ptarmigan in winter create neither the same photographic problems nor the same disturbance risks.
Knowing the species’ rhythm avoids chasing the image
Useful preparation is not about memorizing a universal timetable, but about understanding a few simple things: where the animal feeds, when it tends to move most, which behaviours announce an action, and which periods require more restraint.
In the Alps, several examples show why shortcuts can be dangerous. Chamois may be more active early and late in the day when temperatures are high, but their rhythm varies with the season, weather and circumstances. Marmots are often more visible during cooler hours in summer and may stay in their burrows in hot weather. Ptarmigan, meanwhile, may rely on camouflage until the last moment: an animal not fleeing does not mean that approaching it is acceptable.
The right reflex is to prepare a hypothesis, then test it against the field. If the animal is not where you expected, do not immediately turn your search into a pursuit.
Look for signs before looking for an animal
In the mountains, tracks, paths, burrows, feeding areas, calls, silhouettes on a ridge or movements within a herd often provide more information than walking quickly toward the first animal you see.
Binoculars or a spotting scope have a real photographic purpose here: they let you assess the scene before moving the photographer. You can determine whether the subject is feeding, resting, heading toward a particular area, whether young are present, how many individuals there are and whether a likely route is emerging.
This observation phase also lets you choose a composition before the viewfinder takes over your attention. A photographer who already knows the scene is about “a tiny animal in a vast slope” does not need to move forward until the subject fills the frame.
Establish the reference behaviour
Before moving, spend a few minutes observing what the animal does without interacting with you. That activity becomes your reference.
An ibex grazing, ruminating or moving calmly gives you a behavioural baseline. If, after you move, it stops what it is doing, stares in your direction, raises its ears, changes course or walks away, your presence is already affecting its behaviour.
Vanoise National Park specifically recommends stopping the approach when ibex show signs of concern such as a fixed stare, raised ears or flight. This type of behavioural criterion is more useful than a generic distance applied to every species.
If the animal comes toward you
An ibex or another animal may sometimes approach on its own. The situation can feel reassuring because you did not move closer, but your responsibility to maintain space does not disappear. The National Park Service’s wildlife-viewing guidance is very clear on this principle: if an animal approaches, the visitor should move back to maintain a safe distance when the terrain allows it.
Photographically, do not try to “keep the same framing” by moving forward in turn. Zoom out, switch from portrait to an environmental frame and leave the animal a clear route. Do not position yourself between a young animal and an adult, in front of an obvious passage or where the animal has to detour around you.
Regulatory distances depend on the location and cannot be transferred from a U.S. park to the Alps. The useful principle remains the same: an animal moving toward you does not make a local rule or its need for space optional.
Wait rather than approach
If you have identified a crossing point, resting area or likely scene from an authorized, non-sensitive position, staying still can improve both the behaviour you observe and your images. You can prepare exposure, choose the background, set the AF area and wait for the subject to enter a composition you have already built.
A hide or fixed position is not automatically ethical, however: do not set up next to a nest, burrow, birth site or passage that human presence would block. The whole point of waiting is to reduce the photographer’s intervention, not move the pressure elsewhere.
Equipment: favour a kit you can actually use
The best kit is not the one with the longest possible focal length. It is the one that gives enough reach to respect distance, enough responsiveness to follow the subject and remains manageable for the terrain you have planned.
The camera body: responsiveness and ergonomics before megapixels
For wildlife, a few features have a direct effect on the success rate:
- reliable continuous autofocus;
- an AF area that is easy to change;
- animal or bird detection when it works well;
- burst rate and buffer sufficient for a short action;
- the ability to customize buttons or store configurations;
- good performance at high ISO;
- a viewfinder that makes it easy to follow a moving subject;
- battery life and weather resistance suited to the conditions.
Very high resolution is useful if you crop regularly, but it replaces neither correct focus nor sufficient shutter speed. The smaller the subject is in the file, the more a heavy crop reduces the pixels available and exposes noise, atmospheric turbulence and small sharpness errors.
Telephoto zoom
A zoom such as a 100–400 mm, 100–500 mm, 150–600 mm, 180–600 mm or equivalent offers particularly useful flexibility in the mountains. Without changing position, you can move from a tight portrait to an animal placed within the landscape. Above all, this flexibility avoids changing your position simply to change framing. If the animal nevertheless comes to a distance that is incompatible with local rules or the space it needs, zooming out is not enough: step back when the terrain allows it, leave a clear route or stop photographing.
Prime lens
A long prime can offer a brighter aperture, very strong autofocus performance and high optical quality, but it imposes the framing more strongly. If the animal approaches or several individuals enter the scene, you may find yourself too tight.
Teleconverter
A 1.4× teleconverter increases focal length by 40% and loses about one stop of light. A 2× doubles focal length and costs about two stops. With a smaller effective aperture, you then need to accept a higher ISO, a slower shutter speed or a combination of both to maintain similar file brightness — unless more light is available.
Autofocus compatibility varies with the camera/lens/teleconverter combination. Check the manual and test the system before the outing, especially if you intend to photograph fast action.
There is therefore no absolute hierarchy:
- zoom: flexibility and response to a changing scene;
- prime: brightness and maximum performance depending on the lens;
- shorter telephoto: excellent for showing the environment or a large herd;
- super-telephoto: useful for a small or distant subject without reducing physical distance.
Handheld, monopod or tripod?
Handheld
For a moving animal, handheld shooting gives the greatest framing freedom. It makes it easier to follow a chamois changing direction, a bird in flight or an ibex moving from one rock to another.
Monopod
A monopod becomes useful when the telephoto is heavy or the wait is long: it relieves the load without constraining movement as much as a tripod.
Tripod
A tripod is useful when the position remains stable, the lens is heavy, you are waiting for behaviour in a predictable area or the light requires long periods of framing. A gimbal head can make a large telephoto much more fluid.
The accessories that genuinely help
A coherent mountain kit can also include:
- compact binoculars;
- one or two spare batteries kept relatively warm;
- light rain protection and a lens cloth;
- a memory card capable of sustaining the camera’s burst rate;
- a lens hood;
- a compatible teleconverter if useful;
- protection or a cover that lets you put the equipment down without damaging it.
The aim is not to build a studio bag at altitude. Every accessory should solve a real problem.
Preconfigure the camera before the action starts
Many failed images are not caused by a bad camera, but by a camera still set up for landscape photography when the action starts.
An effective configuration: Manual + Auto ISO
On many modern cameras, Manual mode with Auto ISO is particularly practical for wildlife. You choose the two parameters that directly control the rendering:
- shutter speed, according to movement;
- aperture, according to depth of field and background rendering.
The camera then adjusts ISO to place the rendering around the brightness it metres, within the limits you have set. ISO does not change the amount of light captured: here that remains determined by shutter speed and aperture.
The benefit is concrete. If a stationary ibex starts running, you can quickly move from 1/500 s to 1/1600 s without having to recalculate ISO at the same time. If a group forms across several planes, you can stop down and let ISO compensate.
This mode is not compulsory. Shutter priority can be very effective if your first concern is never dropping below a chosen speed. Aperture priority can work for a calm portrait if you constantly monitor shutter speed. What matters is knowing which variable your automatic mode is allowed to change.
Metering and exposure compensation
With Manual + Auto ISO, the word “manual” can be misleading: you set shutter speed and aperture, but the camera continues to adjust ISO from its metering. On many recent models, exposure compensation lets you request a brighter or darker rendering in this configuration; check the exact behaviour of your camera.
There is no single metering method that is best for every scene. Matrix or evaluative metering is often practical when the subject crosses varied backgrounds; a tighter metering mode can help in some difficult contrasts if you know exactly what it is measuring. In any case, a large snowy slope, a dark animal against a bright sky or a lit subject on a dark background can push the automation toward a rendering that does not match your intention.
Use the histogram and highlight warnings as a check. If the background changes while the subject moves, pay particular attention to variations in ISO or brightness introduced by the automation. The aim is not to impose spot metering on every wildlife photograph, but to understand why the metering changes and correct it when it no longer serves the subject.
Set an ISO limit that matches your camera
An ISO limit copied from the internet does not mean much. Take the time to photograph a detailed scene at ISO 1600, 3200, 6400, 12,800 or the values relevant to your camera, then process the RAW files as you actually would.
Determine the point at which the loss of detail is no longer acceptable to you.
In the field, this limit becomes a guardrail, not a psychological barrier. A slightly noisy but sharp photograph is often far more valuable than a low-ISO file where the eye is blurred because shutter speed was too slow.
Burst shooting: short and anticipated
Burst shooting is useful for covering a micro-sequence: start, jump, interaction, wingbeat, head movement. It does not replace anticipation.
Maximum frame rate quickly creates many almost identical files, reduces your ability to listen to and observe the scene and can fill the buffer at the wrong moment. A short burst triggered just before the likely action is often more effective.
Some cameras offer pre-capture, recording images just before the shutter is fully pressed. This is useful for actions that are difficult to anticipate — take-off, a leap — but it remains a tool: it does not replace observation.
Shutter speed, aperture and ISO: build the settings around movement
Saying that “there is no universal shutter speed” is correct but not very useful. A photographer needs starting values, then needs to understand why they should be changed.
Here are field references to test, not prescriptions:
| Situation | Useful starting point | What may require a faster speed |
|---|---|---|
| Large mammal genuinely still | 1/500 to 1/800 s with a long telephoto handheld | small head movements, wind, very long focal length, unstable photographer |
| Animal walking, actively feeding or interacting calmly | 1/800 to 1/1250 s | sudden head movements, lively young animal, proximity |
| Running, jumping, brief fighting, fast movement | 1/1600 to 1/2500 s | lateral movement, very close action, flying snow |
| Bird in flight or fast wing movement | 1/2000 to 1/3200 s or faster | small agile bird, proximity, desire to freeze the wings |
| Creative panning | much slower | depends on speed and consistency of the pan |
These ranges are deliberately broad. A sitting marmot does not have the same needs as a chamois during the rut. A bearded vulture gliding steadily does not require the same speed as a small passerine changing direction.
Distinguish photographer blur from subject blur
With a telephoto lens, two movements add together:
- your camera moves;
- the animal moves.
A monopod or stabilization can correct the first. Only a sufficiently fast shutter speed can correct the second.
This distinction prevents a common mistake: seeing a soft image and immediately concluding that autofocus is bad.
Shutter speed can also become a creative tool
Not everything has to be frozen. A slow-speed pan can keep the head relatively readable while turning legs, wings and background into movement.
The success rate drops sharply, but the result can be much more expressive than another perfectly sharp image at 1/2500 s.
The right question is therefore not “what shutter speed for a chamois?” but “do I want to freeze this action or show its speed?”
Aperture: do not systematically work wide open
A wide aperture brings two obvious advantages: more light and a softer background. But at long focal lengths and short distances, depth of field can become so shallow that only the eye is sharp while the muzzle, horns or second eye are already outside the sharp zone.
Isolated portrait
For a portrait dominated by the eye and head, an aperture close to wide open can be appropriate if the plane of focus covers what you want to show.
Check the result at 100%. If the animal is three-quarter view or facing you, stopping down slightly can improve the readability of the head.
Animal in its environment
When the environment genuinely tells the story of the mountains, greater depth of field can be deliberate. You do not need every summit to be sharp, but the setting should remain readable enough not to turn into a simple blur of colour.
Several animals
A herd spread across several distances often needs more depth. If two important ibex are not on the same plane, a very wide aperture can leave one unnecessarily blurred.
You then have three options:
- stop down further;
- choose a clear main subject and accept the others outside the sharp zone;
- wait for a better alignment of the planes.
ISO: protect shutter speed and the photograph first
In low light, photographers often hesitate to raise ISO and end up losing sharpness.
The reasoning should start from the image:
- what shutter speed does the movement require?
- what depth of field is necessary?
- what ISO remains acceptable on your camera after processing?
If a chamois is walking in twilight and 1/1000 s is necessary, moving from ISO 800 to 3200 may be the best decision. Dropping to 1/250 s to keep ISO 800 may produce a technically cleaner file, but an unusable one if movement is blurred.
Conversely, if the subject lies down and becomes genuinely still, you can lower shutter speed, recover some ISO and improve quality. The scene needs to be reassessed continuously.
Autofocus: choose the area for the scene, not just the animal
Animal eye detection has made wildlife photography much easier, but it is not infallible.
AF-C, AF-S or manual focus
AF-C is the most versatile choice as soon as an animal may move: it continuously updates focus distance while autofocus remains active. It can even be useful on an apparently calm mammal, because a head movement of only a few centimetres is enough to move the eye outside a very shallow depth of field.
AF-S can be practical on a genuinely static subject when you want to lock a precise plane and recompose without the camera trying to follow something else. On some cameras, DMF or manual override after acquisition lets you refine a posed portrait.
Manual focus is mainly useful if the subject is static and autofocus repeatedly fails — fog, low contrast, foreground branches — or if you prepare a zone through which a predictable action should pass. For unpredictable running or take-off, trying to follow distance manually is rarely the best tool.
The names of the modes change between brands. Remember the function: continuous tracking for a changing distance; lock or manual refinement for a genuinely stable distance.
| Situation | Starting point | Why |
|---|---|---|
| Subject isolated on a clean background | Wide / automatic area | Few competing elements around the subject. |
| Grass, branches, rocks | Smaller area or targeted AF tracking | Reduce the elements the autofocus can jump to. |
| Several animals | Explicitly choose the protagonist | Avoid the camera selecting the wrong individual; also manage depth of field. |
| Predictable passage / obstacle | Prepare a passage area | Do not ask tracking to solve everything at the last second. |
Several animals: decide what needs to be sharp
A herd creates two different problems:
- the AF area can choose the wrong subject;
- depth of field may not cover the group.
If the image has a protagonist, select it explicitly. If the story is the group itself, place the focus point and aperture to cover the depth that genuinely matters.
Avoid overlaps that merge heads, horns or legs if they make the scene unreadable. Half a second of waiting can turn a mass of animals into a clear composition.
Anticipate a passage area
If an animal follows a predictable path, you do not have to ask the AF system to solve everything at the last second. You can prepare the point or area where the action should pass, frame wider and let the subject enter the space.
This method is particularly useful when an action moves behind a rock or the AF tracking is likely to lose the subject momentarily.
Anticipate and compose: produce more than a tight portrait
The best behaviour photographs often come from several minutes of observation for a fraction of a second of shooting.
Look for sequences, not isolated gestures
An animal does not move randomly from one state to another. Before running, taking off, fighting or interacting, there are often changes in posture, gaze or rhythm.
For a large ungulate, observe:
- body direction;
- gaze direction;
- tension in the posture;
- interaction with other individuals;
- movement toward a feeding or resting area.
For a bird:
- position before take-off;
- gaze toward a direction;
- restlessness;
- preparatory wing movements;
- arrival of another individual.
You cannot predict everything, but you can stop being systematically late.
Let the animal enter the image
When you identify a route, the best choice is often to remain still and let the animal come into the scene rather than following it.
This strategy also improves the photography: the subject behaves more naturally, you can prepare the background and framing, and you reduce sudden changes of position.
Constraints change with the type of subject
A large ungulate framed at a reasonable size is often easier to acquire than a small distant subject, but do not rely on size alone: contrast, posture, background and the camera’s algorithm can still make detection fail. In a tight frame, small head movements may also require a faster shutter speed than expected.
A small mammal such as a marmot can switch very quickly from complete stillness to lively movement. Leave a margin in shutter speed, especially when the head or paws may move suddenly.
A small mountain bird or a bird in flight can combine two difficulties: small size in the frame and very fast movement. The AF must acquire a less obvious subject, and shutter speed may need to rise sharply if you want to freeze wings or a change of direction.
These distinctions are more useful than a “setting for ibex / setting for chamois / setting for marmot” table, which would quickly become misleading.
In the field, mainly prepare for what genuinely changes from one subject to another:
| Type of subject | Main difficulty | Setting to prepare | Composition / field consideration |
|---|---|---|---|
| Large ungulate | alternation between stillness / head movement / sudden departure | safe but adjustable shutter speed, AF-C available, targeted area if rocks interfere | do not confuse apparent tolerance with lack of disturbance; show the terrain too |
| Small agile mammal | very rapid transition between pause and action | shutter-speed margin, short burst, subject/eye detection if reliable | watch burrows, grass and foreground elements that hide the subject |
| Perched bird | small subject, critical eye focus, unpredictable departure | precise AF, enough speed for small movements, optional pre-capture | do not provoke take-off; leave space in the likely direction |
| Bird in flight | rapid acquisition and tracking | AF-C, wide area or AF tracking depending on background, 1/2000 s and faster as a frequent starting point | keep sky or terrain for context without cutting off the route |
Keep these lines as references. A calm chamois may need less speed than a moving marmot, and a rocky background may call for a different AF area than a clean sky: real behaviour and the actual scene remain the priority.
Build three readings: portrait, medium shot, animal in the landscape
A telephoto lens easily makes you want to fill the frame. Yet one of the strongest characteristics of alpine wildlife is precisely its relationship to the scale of the mountains.
Portrait
The animal dominates the frame. Gaze, fur, horns, posture or detail become the story.
Medium shot
The animal remains clearly identifiable, but the rock, slope, snow or alpine pasture remains readable.
Animal in the landscape
The subject may be small: the mountain conveys scale, isolation or habitat.
Camera height
Lowering yourself to the subject’s level can increase the feeling of intimacy and visually push the background farther away. But in the mountains, you do not lie down on a slope or leave a sensitive trail to apply an aesthetic rule.
A slightly higher viewpoint can work very well if it shows the context better. An animal on a rocky ledge may even gain power from an angle that reveals the vertical nature of the terrain.
Space in front of the gaze or movement
Leaving more space in the direction of gaze or movement often helps the image read well. It is not a law, but it is an excellent diagnostic.
If an ibex is moving toward the right edge and its muzzle is almost touching the frame, the result can feel cramped. Zooming out slightly can solve the problem without moving a metre.
The background is often as important as the animal
Before pressing the shutter, inspect:
- lines crossing the head;
- very bright rocks behind the subject;
- branches or grass merging with the horns;
- the horizon cutting through the body;
- bright areas attracting more attention than the subject.
A wide aperture is not the only solution. Changing height slightly or waiting for the animal to take a few steps can make the background much cleaner.
Photographing a herd
In a group, the main problem is often visual confusion.
Look for:
- a main animal;
- an identifiable interaction;
- a repetition of silhouettes;
- enough separation between heads;
- a group that forms a deliberate mass rather than an accidental pile-up.
If you want to show the group as a group, a wider composition can be stronger than a frame that is too tight and visually stacks the silhouettes.
Two visual examples: show the animal without inventing what the image does not prove

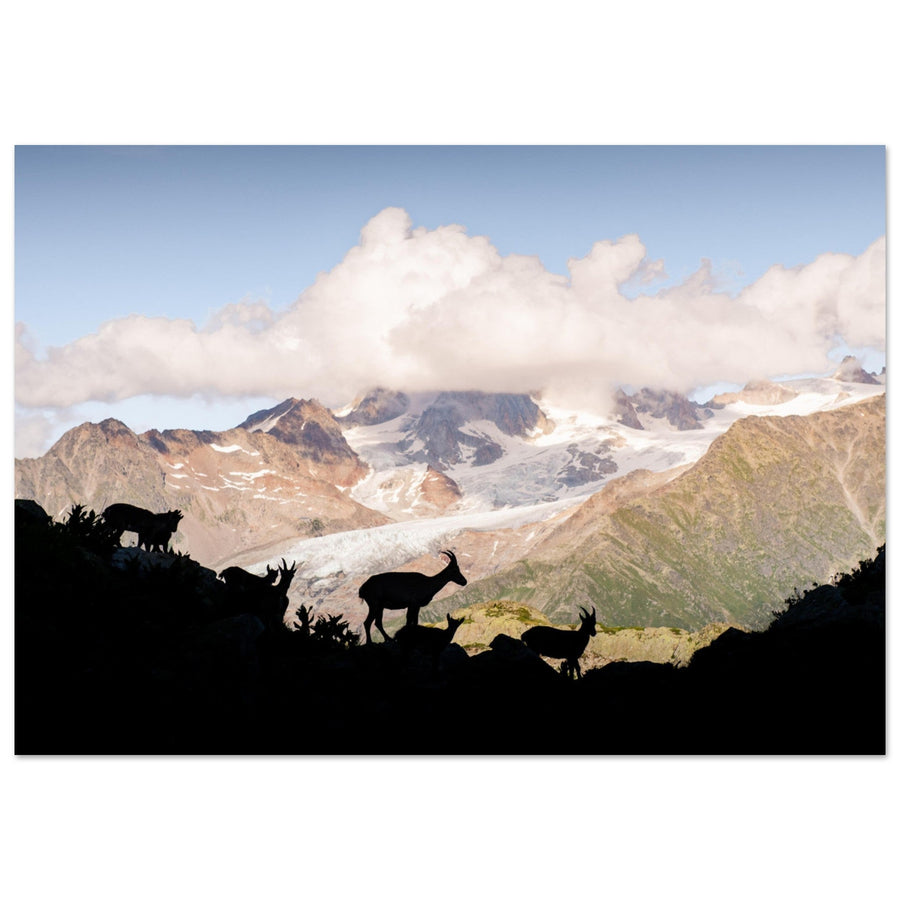
Keep the group in its habitat
The group remains readable while retaining a large share of the landscape. The image illustrates contextualization; it does not allow us to infer the photographer’s distance, focal length or settings.
Photograph: Muszynski Johann.

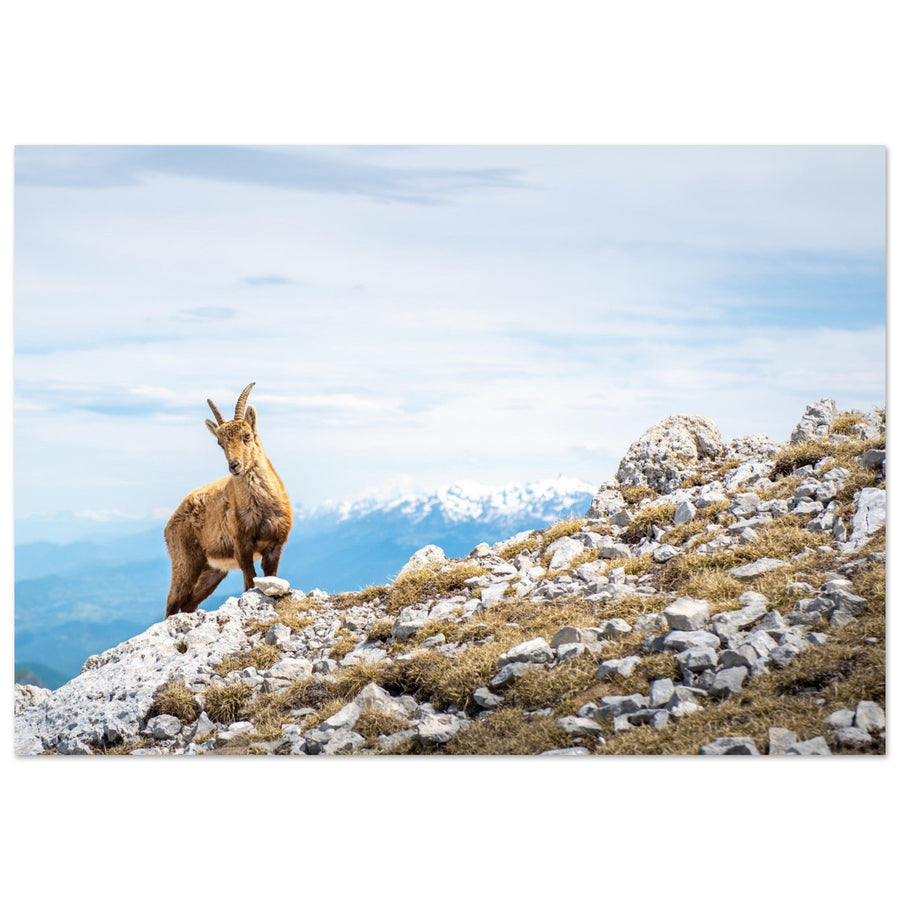
Use the landscape to provide scale
The ibex and the massif create an immediately readable scale relationship. Again, the image proves nothing about the approach, AF, shutter speed or focal length used.
Photograph: Pierre Thiaville.
To discover more scenes of Alpine wildlife, explore the mountain wildlife photographic prints.
Light, snow, mist: treat conditions as photographic choices
Side light
Side light can reveal fur texture and body relief. On an ibex, it can emphasise the horns and musculature. On structured snow, it also gives the surroundings volume.
The risk is a strong contrast between the lit side and the shaded side. Protect important highlights rather than mechanically opening every shadow.
Backlight
Backlight can create a bright rim around fur or produce a silhouette. First decide what you want.
If you want detail on the subject, expose enough to retain it and accept a very bright background if necessary. If silhouette is the intention, protect the shape and the highlights.
Backlight is not a problem to “correct” by default.
Diffuse light
An overcast sky reduces contrast, which can be very useful for a dark or light animal. But the scene can also become visually flat.
In that case, look for separation through colour, depth, background or a strong posture rather than artificially manufacturing contrast in post-processing.
| Condition | What changes | Useful decision |
|---|---|---|
| Dark animal on snow | Metering may render the scene too dark. | Check histogram and highlights; compensate only if there is room. No “snow = +1 EV” rule. |
| Rain / snow | Droplets and flakes become sharp points or streaks depending on shutter speed. | Choose the rendering that serves the atmosphere rather than freezing by reflex. |
| Mist | Lower contrast and autofocus may become less reliable. | Use a more targeted AF area on a contrasty part; accept a softer rendering if the scene is soft. |
| Atmospheric turbulence | Soft image despite correct shutter speed and AF at long distance. | Wait for more stable air, seek a cooler/shaded optical path or reduce the distance if it remains compatible with the animal. |
For more on exposure in snow: Photographing snow in the mountains.
Ethics, local rules and safety: know when to stop
Ethics is not a separate section from the rest of the technique. It determines which techniques are acceptable.
Sensitive periods require more restraint
Winter is particularly critical. Écrins National Park points out that every disturbance imposes additional energy expenditure when food is less available and reserves are precious.
During breeding, nesting, birth or rearing of young, the cost of disturbance can also be higher.
Increase your caution and check local and seasonal guidance.
Check the rules for the exact location
A practice allowed on one slope or for amateur use may be regulated differently elsewhere. Before a wildlife outing, check at least: quiet zones and temporarily closed sectors, restrictions linked to sensitive periods, access and dogs, drone regulations, rules specific to a species or site and, if the images are intended for professional or commercial use, whether a permit procedure exists for photography.
This last point is not theoretical: Écrins National Park still publishes named authorizations for certain professional or commercial shoots in the core area, and Vanoise also publishes decisions concerning professional photography. This article therefore cannot freeze a single legal rule: check the current official source corresponding to the location, date and intended use of the images.
Do not provoke the scene
A natural-looking image is no longer a natural scene if the behaviour was manufactured for the camera.
Avoid:
- food or bait to attract a predator;
- broadcast sounds, songs or calls to provoke a reaction;
- pursuit until the animal flees;
- blocking a route;
- moving vegetation, stones or other elements around a nest or burrow;
- pressure on a young animal or breeding area.
For birds, Audubon explicitly recommends avoiding playback of songs or calls, disturbance at nests, pursuit and drone use around subjects.
Drone: check before take-off
In Alpine parks, drone use may be prohibited or tightly controlled, and its impact on wildlife differs from that of a stationary photographer.
In the core area of Écrins National Park, powered overflight is prohibited below 1,000 m above the ground unless authorized. The Park also highlights the potential disturbance to wildlife: a drone can be perceived as an aerial threat and cause flight, stress or abandonment of an area.
Always check the current local rule before the outing.
Do not automatically share the spot
Ethics continues after the shutter is pressed.
For a rare species, a nest, burrow or fragile area, avoid routinely sharing precise coordinates or GPS metadata. Audubon notably recommends removing location data for some sensitive species.
The photographer’s safety matters too
A telephoto lens narrows the field of view and can absorb all your attention. In mountain terrain, that is a real risk.
Do not walk with your eye in the viewfinder. Before changing position, lower the camera and check:
- slope and exposure to falls;
- snow or ice;
- unstable rocks;
- other hikers;
- domestic livestock and guardian dogs;
- the animal’s route;
- your ability to return safely.
No image justifies running over uneven ground or crossing a dangerous area to keep the subject in the frame.
Official sources and rules to check before a sensitive outing
- Vanoise National Park — FaceBouq: observe ibex without disturbing them
- Écrins National Park — Wildlife in winter: surviving
- Écrins National Park — Core-area regulations
- Écrins National Park — Requesting authorization in the core area
- Audubon — Guide to Ethical Bird Photography
- National Park Service — Respect Wildlife (behavioural principles; do not transfer U.S. distance rules to the Alps)
Three scenarios for applying the decisions in the field
Calm ibex on a rocky slope
You spot the ibex from a distance with binoculars. It is grazing and shows no reaction to your presence.
Start without moving closer.
With a long telephoto handheld, a starting point around 1/500 to 1/800 s may be sufficient if it is genuinely still, but watch head movements. Use AF-C or AF-S/DMF depending on your camera and the way you work; if eye detection is stable, it can make portrait work easier.
Make an environmental image first. Only then, if your zoom allows it, tighten the frame.
If the animal stops grazing and stares in your direction for an extended period, do not treat that as an opportunity for a front-facing portrait: it is behavioural information telling you to stop the approach.
Chamois moving in low light
The chamois is walking quickly and occasionally changing direction.
Switch to a more protective shutter speed, for example 1/1000 to 1/1600 s as a starting point. Manual + Auto ISO lets you keep that speed and the chosen aperture while the light changes.
AF-C with AF tracking can work if the subject is well separated. If the chamois moves behind bushes or rocks, reduce the AF area or prepare a point where it should reappear.
Accept the rise in ISO. A sharp series at ISO 3200 will be more usable than a series at ISO 800 with head movement.
Mountain bird seen in winter
You spot a ptarmigan or another grouse on the ground.
The first problem is not shutter speed. It is distance and disturbance.
Do not try to make the bird fly to obtain an action photograph. Alpine sources recommend observing and photographing from a distance, particularly in winter.
If you can make an image from your current position, do it without advancing. If the subject is very small in the frame, accept an environmental image or give up.
Not fleeing is not an invitation: some species rely precisely on camouflage until the last moment.
Diagnose a failed photograph: change one variable at a time
When an image is soft or weak, do not change five settings at once.
| Symptom | Likely cause | Test / correction |
|---|---|---|
| Whole subject doubled or blurred | shutter speed too slow / camera movement | increase shutter speed, improve support or stabilization |
| Body sharp but head/eye blurred | subject movement | increase shutter speed |
| Background sharp, animal blurred | AF jumped to the background | reduce AF area, reacquire the subject, check detection |
| Eye sharp but muzzle/horns outside the sharp zone | depth of field too shallow | stop down slightly or change angle |
| Several animals, only one sharp | insufficient depth / different planes | stop down, rethink the focus point or wait for better alignment |
| Subject very dark on snow | exposure driven by the large bright area | check histogram/highlights and compensate if there is room |
| Camera confirms focus but the eye remains soft | misleading AF confirmation / low contrast / wrong critical area | magnify the image, check the eye rather than the AF box, refocus on a contrasty detail or reduce the AF area |
| Soft image at very long distance despite good shutter speed | atmospheric turbulence | check for heat shimmer, wait for more stable air or shorten the optical path |
| Background attracts more attention than the animal | composition / background contrast | change angle/height slightly or wait for the subject to move |
| Hundreds of almost identical images | burst shooting without anticipation | shorten bursts, observe behaviour sequences |
| Animal leaves after a few frames | possible pressure / disturbance | increase distance or end the session |
This diagnostic is more useful than a “perfect” setting because it lets you understand why an image failed and which variable to change next time.