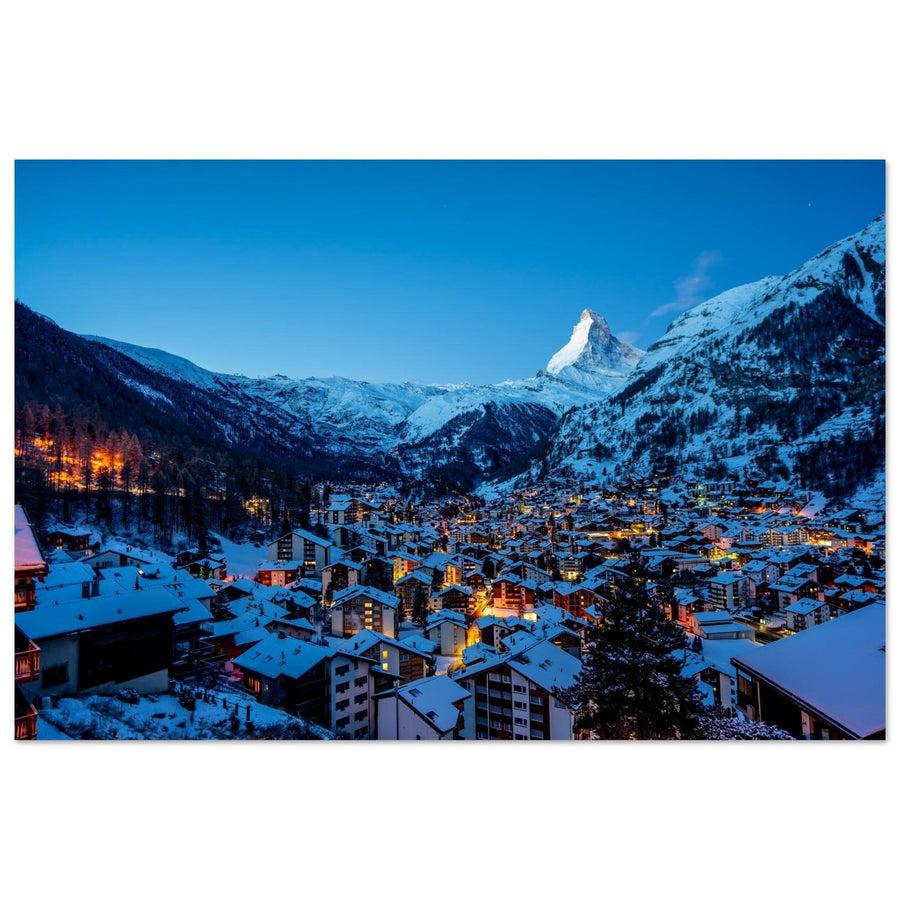
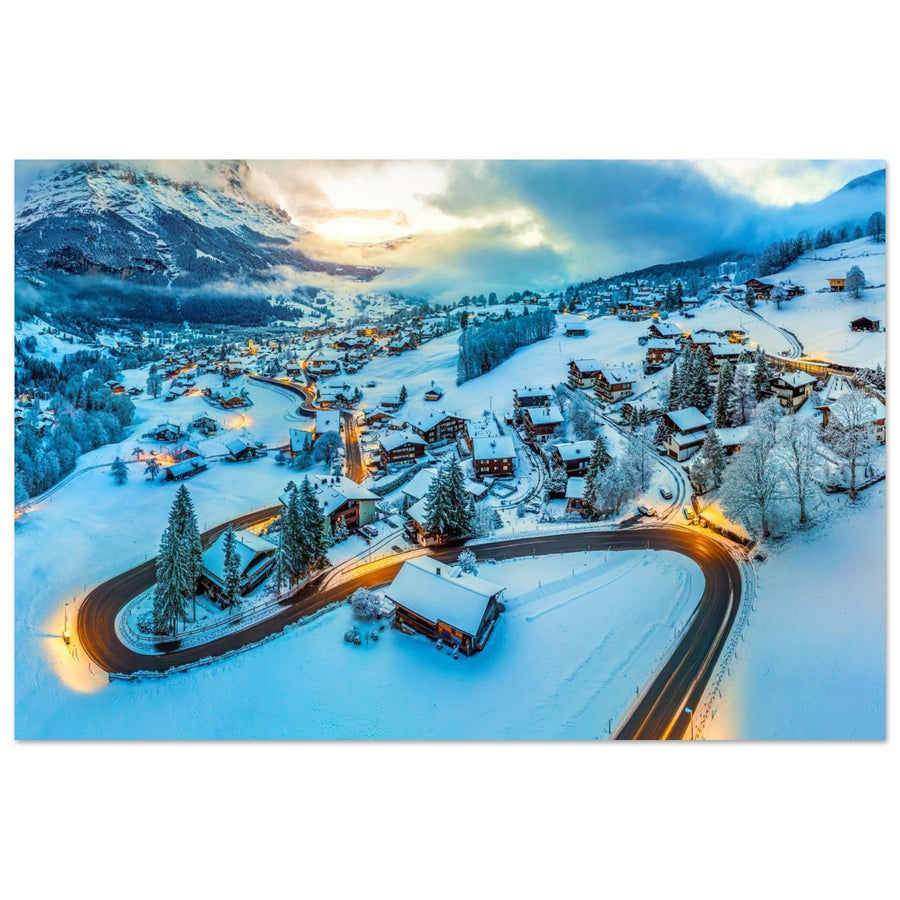
Light | Photographing blue hour
“Blue hour” is neither an hour in the literal sense nor an official astronomical phase. It is a photographic convention describing part of twilight when direct sunlight no longer structures — or does not yet structure — most of the scene, while the sky still retains enough diffuse light to give the landscape a presence that is often cool and sometimes bluish.
In the mountains, this window becomes particularly interesting when the sky, the terrain and any artificial lights respond to one another through a readable balance of brightness and colour. The right moment is therefore not the one an app labels “blue hour”, but the one when the subject remains readable, the sky still plays a role and points of light do not dominate by accident.
In the morning, this balance shifts toward more natural light; in the evening, it shifts toward night. This page teaches you to read that movement, adapt framing and exposure, then recognize when the image genuinely moves beyond blue hour.
Civil, nautical and astronomical twilight are formally defined; blue hour is not.
An app gives a solar reference. Terrain, clouds, snow, mist and existing lights determine the light you actually see.
The relationship between sky, landscape and artificial lights changes continuously. A setting or frame that worked five minutes earlier may no longer serve the image.
A few stars do not yet make an astro photograph. The handover to night photography comes when residual sky light stops structuring the image or when the stars become the subject.
1. Recognize a genuinely useful blue hour
Twilight is a formal astronomical phenomenon. Civil, nautical and astronomical twilight are notably distinguished according to the position of the centre of the Sun below the horizon. Blue hour belongs to another vocabulary: that of photographers and planning tools.
Some planners choose a precise range to provide times. PhotoPills, for example, uses a solar elevation approximately between −4° and −6°. This choice is useful for displaying a window in an app, but it is not a universal definition of blue hour. Other conventions may use other limits.
This distinction avoids two mistakes: believing blue hour always lasts the same amount of time, and concluding that a scene should look “blue” simply because the clock shows the right range. The speed at which the Sun crosses those angles varies with latitude and season; visible light also depends on the atmosphere, clouds, terrain and the surfaces present.
An operational definition for the mountain photographer
For this page, the window becomes interesting when three conditions come together:
- the sky still contains significant diffuse light and visibly contributes to the scene;
- the terrain still has a useful shape, tonal presence or silhouette, even though it no longer receives direct Sun;
- the relationship between sky, terrain and any artificial lights produces the hierarchy you want to photograph.
This definition is deliberately visual. A very high summit may still receive direct light while the photographer already stands under a twilight sky. If that direct light on the face becomes the main engine of the image, the scene moves closer to sunrise, sunset or golden-light logic. If the image mainly depends on diffuse sky light, silhouettes, reflective surfaces and points of light, you are within the skill covered by this page.
2. Morning and evening: the same family of light, opposite evolution
Blue hour can be photographed before sunrise as well as after sunset. The general mechanism of diffuse light is comparable, but the direction of change is opposite — and that changes how you work.
| Element | Morning | Evening | Photographic decision |
|---|---|---|---|
| Sky | It progressively gains brightness. | It progressively loses brightness. | Watch for the point when it stops dominating — or begins to dominate — the terrain. |
| Terrain | It generally becomes more readable through diffuse light before any direct light arrives. | It progressively loses detail and may end as a silhouette. | Decide how much detail the image genuinely needs. |
| Artificial lights | At comparable power, their visual weight decreases as natural light increases. | At comparable power, their visual weight increases as the sky and terrain darken. | Choose the moment when they remain accents rather than dominant patches. |
| Exposure | With comparable framing and movement needs, exposure times may shorten or ISO may come down depending on your choices. | With comparable framing and movement needs, exposure times may lengthen or ISO may rise depending on your choices. | Recheck rather than keeping the configuration from the first frame. |
In the morning, this phase can then join the sunrise sequence. In the evening, it can extend the sunset sequence before moving into night. The dedicated guides own those full events; here, we stay with the window in which cool diffuse light still gives the image its main character.
As an exercise, photographing the same place during this phase in the morning and then in the evening can be instructive: not to prove one direction is better, but to compare how the same frame gains or loses natural light and how existing lights change in visual weight.
Do not look for a single instant
The “best” balance may last across several frames or disappear very quickly. Instead of waiting for a theoretical minute, observe the relationships: is the sky moving away from the terrain or closer to it? Are artificial lights gaining too much weight? Does the silhouette become stronger as detail disappears?
When a frame works, keep a few genuinely spaced variations across the transition. Comparing those images afterwards teaches you far more than making twenty identical frames: you can see when the sky–terrain–lights relationship became most coherent for your subject.
3. Sky and terrain: decide how much information the landscape should still carry
When direct Sun no longer lights the main face, the terrain does not automatically become black. Light scattered by the sky and light reflected from nearby surfaces continue to illuminate it. In the mountains, the question is therefore not “is there still Sun?”, but what remains readable when the sky becomes the dominant source?
Astronomical twilight is calculated relative to a geometric horizon, but terrain creates its own mask. A ridge can remove direct Sun from a valley or face while other summits still receive it. This local geometry changes the visible state of the landscape without redefining “blue hour” on its own: here it mainly helps explain why sky and terrain can appear to belong to two very different light levels.
Descriptive terrain
Keep enough detail when the structure of a wall, glacier or valley is necessary to understand the image.
Deliberate silhouette
Let the terrain remain dark when a ridge or summit has a strong enough shape to read without internal detail.
Reduced terrain
If the landscape no longer has enough structure but the sky remains interesting, reduce its share of the frame rather than artificially brightening a weak mass.
Snow changes this choice significantly because it reflects more light toward the camera than dark rock. It may therefore remain highly readable while a rocky slope is already turning into silhouette. A cool cast on snow is not automatically a flaw: under a dominant blue sky, that colour may correspond to the light the snow is receiving. Neutralizing it completely can remove the atmosphere; exaggerating it can make the image caricatural.
A large area of bright snow can also become the true subject by accident. If it attracts all the attention, check whether that hierarchy serves the image or whether you have simply kept too much luminous surface in the frame.
When directional shadows fade away
Weak diffuse light does not always produce long shadows capable of modelling the terrain. Depth then has to come from other relationships: silhouette against a brighter sky, successive layers with decreasing contrast, reflection, snow, architecture or differences in luminance.
These are applications of composition, not a new grammar. The principles of masses, lines, balance and hierarchy remain those of the guide Composition in mountain photography.
4. Artificial lights: accents, second subject or visual noise
A refuge, village, road or ski lift can become very prominent during blue hour because its brightness remains relatively stable while natural light evolves. A tiny source can therefore attract far more attention than it would during the day.
Before shooting, choose its role:
- accent: a few windows or a headlamp provide scale and presence without displacing the main subject;
- second subject: the refuge or village explicitly interacts with the terrain;
- main subject: the image becomes primarily a scene of architecture, a resort or night lighting — which may be perfectly valid but changes the intention.
The fact that a light is warm in a cool environment is not enough to make it useful. A sprawling village, a very bright road or a headlamp in the wrong place can fragment the frame. If the source helps neither scale, depth nor the visual story, compose to reduce or exclude it.
In the morning their weight decreases; in the evening it increases
This evolution gives you a real timing lever. In the evening, if a refuge has already become far too dominant, a view made a few minutes earlier may show a more balanced relationship. In the morning, the reverse can happen: waiting for more diffuse light can place the architecture back into context.
A headlamp can play the same role at a smaller scale. It can be a useful human point, but it is not a compulsory ingredient of blue hour. If it blows out the area around it or becomes the only visible element, it no longer serves the relationship with the landscape.
5. Colour: preserve a relationship, do not impose a “blue hour” Kelvin value
There is no universal colour temperature specific to blue hour. Sky light, clouds, terrain, snow, the Moon if present and artificial lighting can all contribute different colours within the same frame.
White balance is therefore a rendering choice. It should preserve a credible relationship between the sources and serve the atmosphere you want.
| What you see | What it may mean | Decision |
|---|---|---|
| Naturally cool sky and snow | Diffuse skylight genuinely dominates. | Do not neutralize automatically: check whether that coolness matches the visible atmosphere. |
| Very warm refuge in a cool scene | Two different-coloured sources coexist. | Preserve their opposition if it structures the image; one white balance cannot necessarily make both areas neutral. |
| The whole scene turns electric blue | The rendering may have been cooled beyond the light that was actually present. | Return to a more credible relationship rather than trying to “prove” blue hour through saturation. |
| Everything becomes beige or neutral | The correction may have removed the cool cast that was part of the scene. | Reintroduce only what the light justifies, without imposing a universal Kelvin value. |
General RAW processing, local masks and colour consistency across a series belong to the guide Developing mountain photos from RAW files. Here, the decision is simpler: identify the sources that genuinely make up the scene before trying to correct them.
6. Exposure: your first setting quickly becomes historical
The aperture–shutter speed–ISO triangle does not change during blue hour. What changes quickly is the quantity of natural light and therefore the balance between the components of the frame. An exposure that works at the beginning of the window may become insufficient a few minutes later in the evening, or too generous in the morning.
The answer is not to choose a “blue hour setting”. The answer is to recheck the file when the lighting relationship has changed.
A simple checking sequence
- Choose aperture and depth of field according to the scene.
- Decide which shutter speed is compatible with the movement present and with your support.
- Adjust ISO to obtain the required exposure.
- Check important highlights, especially lamps, windows, snow or a bright horizon.
- When sky, terrain or lights have visibly changed in weight, run the check again.
Manual mode can be practical because it preserves your choices between frames, but it is not compulsory. Aperture priority or another semi-automatic mode remains usable if you monitor compensation, ISO and shutter-speed limits. The full theory remains in Exposure in mountain photography.
Tripod: useful when your shutter speed requires it
A tripod becomes relevant when the exposure time required for the file you want exceeds what you can hold cleanly handheld, or when you need a strictly constant frame. It is not a condition for accessing blue hour. With stabilization, a suitable aperture and a higher ISO, a handheld photograph can remain perfectly valid if it serves the image.
Conversely, a tripod does not freeze the subject. Branches, water, clouds, people, snowflakes or grass can still move during the exposure. Choose shutter speed according to how you want those elements rendered, not only according to camera stability.
When to consider bracketing
Bracketing can help when a real difference between sky, terrain and artificial sources exceeds the rendering you want from a single exposure. It is not automatic insurance: clouds, water, branches, people or other movements can make the frames harder to merge.
Before stacking, ask whether a better-balanced single exposure is enough. General bracketing remains an exposure technique, not a compulsory blue-hour step.
7. When blue hour stops being the right way to think
The end of civil twilight, when the Sun conventionally reaches 6° below the horizon, is a useful astronomical reference. It is not an editorial switch that automatically turns a blue-hour photograph into a night photograph. Some photographic blue-hour conventions stop precisely around that limit; others are broader.
To decide when to hand over, look instead at what carries the image.
| State of the scene | Dominant reading | Guide to use |
|---|---|---|
| The twilight sky still structures the frame | Sky–terrain–lights relationship. | Stay within blue hour. |
| A few stars appear but remain secondary | The landscape and diffuse sky remain the subject. | Blue hour is still relevant. |
| Residual sky contributes almost nothing | The scene mainly depends on silhouettes and night lighting. | You are in a more general night-time intention; settings remain covered by the transversal technical guides. |
| Stars or the Milky Way become the subject | Celestial planning, apparent movement, night focusing and sky signal. | Photographing the Milky Way in the mountains. |
In the evening, this handover happens progressively toward night. In the morning, the movement is reversed: a night or astro scene can pass back through a window where diffuse sky light regains enough weight for the sky–terrain relationship to become the main problem again, before the sunrise sequence takes over.
The Moon can also change the balance if it becomes a visible source or illuminates part of the terrain. Here, simply observe the weight it takes within the frame; its position, phase and use in astronomical photography belong to the dedicated night guide.
Clouds, veil and mist: only their lighting consequences
Clouds can preserve a gradient, pick up warm colour near the horizon or instead make the sky more uniform. Veil or mist can reduce terrain contrast and increase diffusion. These effects modify blue hour, but their formation, forecasting and specialist use belong to the weather guides.
If fog, snow or a sea of clouds becomes the main subject, change guides. This page keeps only the question: how does this condition change the lighting relationship I am currently photographing?
8. Diagnosis: why is blue hour not working?
A “bad blue hour” is not necessarily a settings problem. Most often, the relationship between the elements has simply moved beyond — or never reached — the useful window for your intention.
| Symptom | Likely reading | Decision to test |
|---|---|---|
| The app says blue hour but the scene looks ordinary | The time convention is correct, but the sky, terrain or weather does not create a strong visual relationship. | Judge the real scene; do not manufacture blue or expect quality guaranteed by the label. |
| The sky is beautiful but the terrain is dead | The landscape has lost too much detail without gaining a strong silhouette. | Tighten the frame, look for a simpler shape, integrate a point of light or accept that the useful window has passed. |
| The terrain is readable but the sky adds nothing | The light is diffuse but the sky has too little colour, structure or role. | Give the sky less space or build the image around the terrain; “blue hour” is not itself a subject. |
| The sky is too bright for the desired effect | The sky–terrain relationship has not yet reached your balance in the evening, or has already passed it in the morning. | Wait in the direction of the transition that moves toward your intention, if the other constraints allow it. |
| The scene has become too dark | In the evening, the sky no longer supports the landscape enough; in the morning, you may simply be too early. | Embrace night/silhouette, change the frame or wait for returning light in the morning. |
| Artificial lights consume the whole image | Their relative visual weight has become too high. | In the evening, return to an earlier frame or reduce their weight in the composition; in the morning, wait for the sky to balance them better. |
| The colour looks artificial | An overly cool white balance, excessive neutralization or several differently coloured sources are in conflict. | Identify the real sources and preserve their relationship; continue colour processing in the RAW guide. |
| The balance passed before you really photographed it | The relationship between sky, terrain and lights evolved faster than your decision or setup. | Compare frames made before and after, identify which element gained or lost weight and, next time, prepare that frame earlier rather than looking for a universal minute. |
| Exposure was correct and then no longer is | The relationship between natural light, terrain and lamps changed. | Make a fresh test file and check again instead of defending the previous setting. |
| The framing worked ten minutes earlier | A formerly secondary mass — sky, silhouette or artificial light — gained visual weight. | Recompose for the current state instead of keeping a frame that no longer matches the scene. |
| You still call it “blue hour” but only the stars matter | The twilight sky no longer carries the image. | Move to night logic or the Milky Way guide if astro becomes the subject. |