Où photographier le Valais hors Zermatt ? Aletsch, Saas-Fee et Grand Combin - AluArtMountains

Where to photograph Valais outside Zermatt? Aletsch, Saas-Fee, and Grand Combin

Updated July 29, 2026

Valais is more than just the Matterhorn. Beyond Zermatt, the canton offers a variety of photographic landscapes: the immense curve of the Aletsch Glacier, the high peaks and glaciers of Saastal, the villages and resorts of the Val de Bagnes, and the Grand Combin massif towering over the Corbassière Glacier.

This diversity means choosing one area rather than trying to cover everything in a single trip. The Aletsch Arena is ideal for glacial panoramas accessible by cable car. Saas-Fee and Saas-Grund allow for focusing on overlapping peaks, moraines, and ice details. Verbier offers a more inhabited mountain, particularly interesting when covered in snow and during the blue hour. The Panossière and Corbassière area is wilder and requires thorough hiking preparation.

This guide deliberately focuses on Valais excluding Zermatt. For views of the Matterhorn, Riffelsee, Stellisee, and the cog railway, consult our dedicated guide: where to photograph Zermatt, the Matterhorn, and Gornergrat. The entire content will then be linked to our upcoming pillar page on the most beautiful photo spots in the Swiss Alps and the parent page of photo destinations in the Alps.

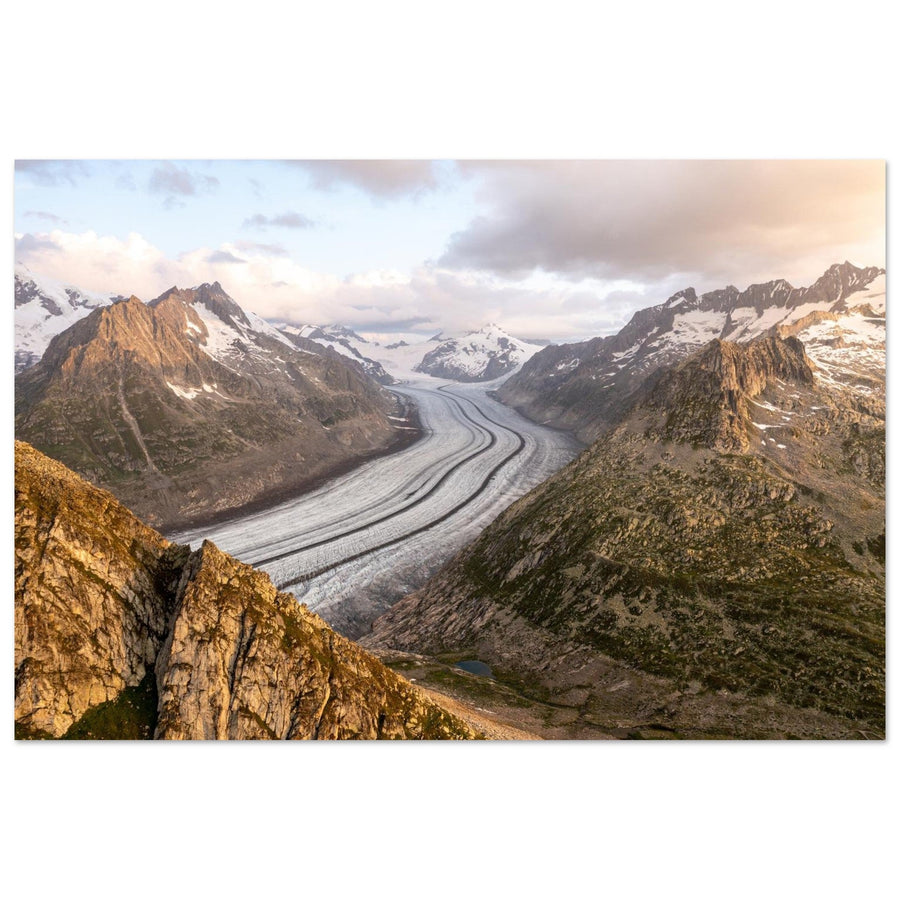
Photo print of the Aletsch Glacier at sunrise from Eggishorn in Valais
From Eggishorn, the central moraines and curves of the Aletsch Glacier draw the eye towards the peaks still illuminated by the first light. Photography by DjemoGraphic. Discover this Aletsch Glacier photo print.

The Essentials in 30 Seconds

  • Best area for a grand glacial panorama: Eggishorn, Bettmerhorn, or Moosfluh above the Aletsch Glacier.
  • Best area for peaks over 4,000 meters: Hohsaas, Kreuzboden, and the heights of Saastal.
  • Best area for inhabited mountain landscapes: Verbier and Val de Bagnes during blue hour or after snowfall.
  • Best wild area: Corbassière Glacier, Panossière hut, and Col des Otanes.
  • Priority focal lengths: 24–70 mm for structuring valleys and glaciers; 70–200 mm for isolating seracs, ridges, and villages.
  • Essential tip: In the grand Valais landscapes, look for a clear leading line rather than a panorama showing all the peaks at once.

Table of Contents

Why photograph Valais beyond Zermatt?

Valais boasts a wide variety of landscapes within a relatively compact territory, but the side valleys and altitude differences make travel longer than it appears on a map. The Aletsch Glacier belongs to the Bernese Alps and overlooks the Rhône Valley from the north. Saastal plunges into the high peaks of the Valais Alps. Further west, the Val de Bagnes leads to the Grand Combin and the grand glacial landscapes of Corbassière.

This geography produces four distinct visual styles:

  • Aletsch: curves, moraines, scale, and repetition of glacial lines;
  • Saastal: superposition of peaks, hanging glaciers, and high-altitude landscapes;
  • Verbier: chalets, lights, snow, and contrast between resort and relief;
  • Grand Combin: glacier, moraines, refuge, and sense of isolation.

The main advantage of Valais is being able to move from a very accessible landscape to a more challenging terrain without completely changing regions. The main risk is treating all areas the same way. A photograph of the Aletsch Glacier benefits from showing the continuity and curves of the ice. A Corbassière image, on the other hand, can rely on rupture, texture, and the presence of a moraine or a hut.

Which Valais sector to choose for a photo trip?

Sector Main Subject Photographic Access Preferred Light Difficulty
Aletsch Arena Aletsch Glacier, moraines, panorama Lifts then short walks or high-altitude trails Sunrise, side light, post-storm Easy to medium depending on viewpoint
Hohsaas and Kreuzboden Triftgletscher, Weissmies, Lagginhorn, Fletschhorn Lifts from Saas-Grund Morning, fragmented clouds, cold light Easy to medium
Saas-Fee and Längfluh Glaciers, car-free village and Saastal peaks Village then lifts or trails Morning, late afternoon, blue hour Easy to medium
Verbier Chalets, resort, snow and lights Road, local transport and nearby viewpoints Twilight, blue hour, fresh snow Easy
Panossière and Corbassière Grand Combin, glacier, moraine, refuge Hike from Val de Bagnes Morning, late afternoon, post-front weather Medium to demanding

Organizing transport, lifts, and light

In Valais, lifts allow quick access to high altitudes, but they don't guarantee the best light. A viewpoint accessible by cable car at 9 AM might have lost its first colors long ago. Conversely, a sunset might occur after the last return to the valley.

Preparation must therefore begin with three schedules:

  1. the actual time of sunrise or sunset at the chosen viewpoint;
  2. the first and last available transport on the exact date;
  3. the walking time, considering terrain, altitude, and equipment.

Schedules change according to the season, maintenance work, and conditions. Check them the day before and then the morning of your outing. In the Aletsch Arena, also check the status of facilities and trails. In Saastal, different lifts do not always follow the same calendar. For Panossière, the question is no longer just about the schedule: the condition of the path, snowfields, and high-mountain weather become priorities.

Aletsch Glacier: Eggishorn, Bettmerhorn, Moosfluh and Hohfluh

The great Aletsch Glacier stretches for about twenty kilometers and forms the heart of the Jungfrau-Aletsch Swiss Alps World Heritage site. Its size, however, doesn't automatically translate into a photograph. From high viewpoints, one must organize an immense mass of ice, moraines, and peaks.

Eggishorn: understanding the entirety of the glacier

Eggishorn offers the most comprehensive view. From the viewpoint, the curve of the glacier ascends towards Konkordiaplatz while the great peaks close the horizon. This is the most suitable sector for a documentary image showing the full scale of the landscape.

A wide-angle lens helps maintain context, but it quickly reduces the glacier to a narrow shape. A focal length between 35 and 70 mm often provides a better balance. Place a dark rocky area at the bottom of the image to create an entry point and highlight the ice. However, avoid an overly massive foreground that would obscure the lower part of the glacier.

At sunrise, the peaks can receive warm light while the glacier remains blue and cold. This transition works best if the exposure protects the highlights. Deep shadows don't necessarily need to be fully opened: they convey a sense of altitude and early morning.

Bettmerhorn: curves and depth

Bettmerhorn offers a more oblique view of the glacier. The curves become more prominent, and the central moraines create natural leading lines. This is a good area to work with a 70–200 mm lens and isolate a succession of folds, a zone of seracs, or a relationship between the ice and the peaks.

Don't just look for the widest view. A photograph tightly focused on two moraine lines can convey the power of the glacier more than a panorama showing the entire massif. Wait for a patch of light to separate a portion of ice from the rest of the landscape.

Moosfluh and Hohfluh: the curve in the foreground

Moosfluh and Hohfluh provide a more direct relationship with the curves of the Aletsch. From Hohfluh, the glacier is seen with the Valais peaks in the background. These viewpoints are particularly suitable for horizontal compositions and telephoto lenses.

When the sky is uniform, focus on textures: alternation of clear ice, dark moraines, crevasses, and rocks. In black and white, monitor the separation between these materials. Too much contrast quickly turns moraines into black bands without detail.

Photographing the Aletsch without trivializing its scale

  • Include a silhouette only if it remains discreet and respects authorized areas.
  • Use moraines as leading lines rather than just simple details.
  • Avoid a sky occupying half the image when it contains no structure.
  • Try a vertical framing following the curve of the glacier towards the peaks.
  • Keep a rocky or vegetated reference to give scale.

For technique, supplement this section with our guide on depth and lines in mountain photography and the one dedicated to settings and histogram.

Saas-Fee, Saas-Grund, Hohsaas and Triftgletscher

Saastal is surrounded by a large number of peaks over 4,000 meters. This density produces spectacular, but sometimes difficult to simplify, landscapes. The choice of viewpoint is therefore essential: Hohsaas opens onto the Weissmies and the Triftgletscher, Kreuzboden allows for lower and more vegetated framings, while Saas-Fee and Längfluh show a different relationship between village and glaciers.

Hohsaas: Weissmies, Lagginhorn and Fletschhorn

From Hohsaas, high peaks follow one another around the Triftgletscher. With a wide-angle lens, this abundance can make the image flat. Instead, use the shape of the glacier or a moraine to create a progression towards the Weissmies. With a telephoto lens, isolate a ridge, a band of seracs, or the alternation between snow and rock.

Clouds are particularly useful in this area. A fragmented layer can obscure certain peaks and simplify the landscape. Wait for a clear patch to illuminate a single area rather than hoping for a perfectly clear sky. Images produced after a disturbance are often deeper than panoramas under a uniform blue.

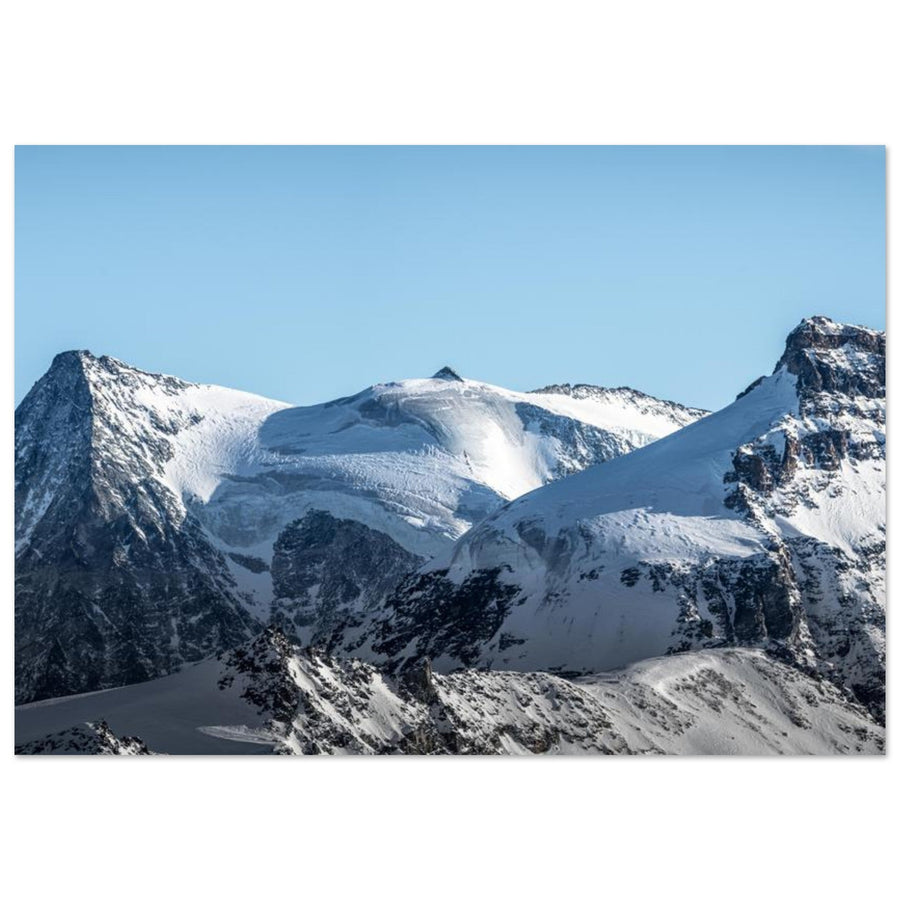
Photo print of the Triftgletscher below the Weissmies between the Lagginhorn and the Fletschhorn in Valais
The Triftgletscher opens the composition before the Weissmies, Lagginhorn and Fletschhorn, in the axis of the Saastal. Photography by Pierre Thiaville. View this Saastal photo print.

Kreuzboden: integrating lake, vegetation and relief

Kreuzboden is located lower down and allows for less mineral images. The small lake, slopes and vegetation provide useful foregrounds. The risk is multiplying elements: shoreline, reflection, flowers, path, lifts and peaks can compete.

Choose a single foreground. For a reflection, lower your viewpoint and check the space between the real mountain and its image in the water. For a framing with vegetation, use a clump or a curve of terrain rather than a complete carpet occupying the entire bottom of the image.

Saas-Fee and Längfluh: glaciers above the village

Saas-Fee is a car-free village surrounded by glaciers and high peaks. From areas accessible by lifts, glacial tongues and moraines take up more space. The contrast between the village, forests and high mountains allows for telling the story of altitude transition.

During blue hour, look for a point where the village lights remain grouped. Too wide a framing turns buildings into a multitude of scattered light points without hierarchy. With a telephoto lens, the planes get closer and the mountain seems to dominate the valley more.

Do not confuse hiking with glacier travel

Some routes in Saastal involve challenging alpine trails or approach glaciers. A visually close access does not mean it is possible to move freely on the ice. Any glacier excursion requires the right equipment, skills and, where relevant, the supervision of a guide. For a classic photo shoot, the viewpoints from the trails and lifts already offer great diversity.

Verbier and Val de Bagnes: snow, chalets and blue hour

Verbier brings a different perspective to this guide. The main subject is no longer just high mountains, but the relationship between a resort, the slopes of Val de Bagnes, and the surrounding terrain. This human presence works particularly well in winter, when snow simplifies roads and buildings.

Photographing Verbier at dusk

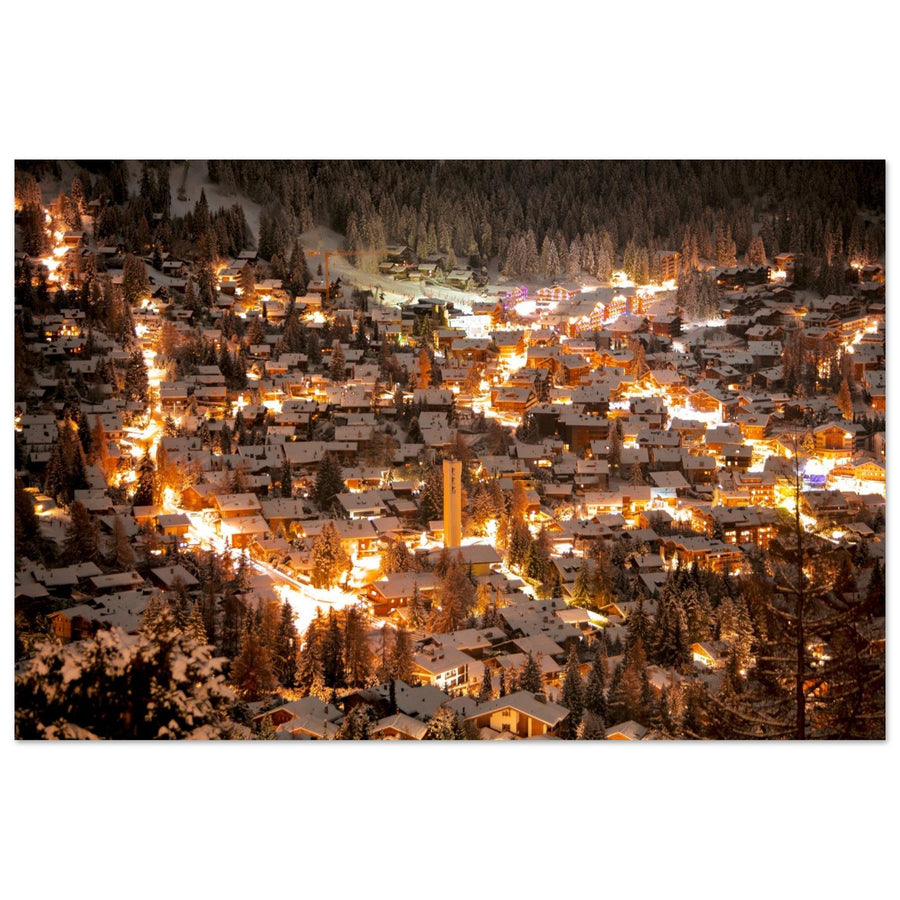
Set up before sunset to locate the lines of chalets and avoid buildings that obstruct the view of the mountains. The best window often occurs when the sky still retains some blue and lights begin to come on. A few minutes later, the light points become dominant and the mountains disappear.

Expose to preserve the brightest lamps and windows. Slight underexposure maintains the evening ambiance. A tripod allows you to stay at low ISO, but monitor for wind and vibrations. If vehicles cross the scene, their lights can create an interesting line, provided they don't overexpose the bottom of the image.

Photo print of Verbier under snow at dusk in Valais
The warm lights of the chalets stand out against the blue tones of dusk and snow. Photography by SennaRelax. Discover this Verbier photo print.

Giving structure to the resort

  • Use a road or a slope line to guide the eye.
  • Avoid placing all lights in the center of the frame.
  • Choose a group of chalets rather than too wide an urban view.
  • Keep the relief sufficiently clear to maintain the alpine identity.
  • Wait for recent snow when possible, before surfaces become fragmented.

The guide on blue hour photography in the mountains details light metering, tripod use, and artificial lighting management.

Val de Bagnes and more open landscapes

Leaving the confined views of Verbier, the Val de Bagnes allows villages and roads to be placed in a broader landscape. Slopes, dams, and secondary valleys can create strong leading lines. A telephoto lens helps to bring villages closer to the mountains, while a horizontal frame works better when the curves of the terrain dominate.

Grand Combin, Corbassière glacier and Panossière hut

The Grand Combin area is the most challenging in this guide. The Corbassière glacier develops beneath the massif in a landscape of moraines, ice, and rock faces. From the surroundings of the Panossière hut and the Col des Otanes, the compositions become wilder and more mineral.

Building an image around the glacier

The glacier must become a line, not just a white surface. Observe its curve, the direction of the crevasses, and how the moraines lead towards the summits. With a wide-angle lens, a nearby moraine can enhance depth. With a telephoto lens, the planes converge and the seracs take on a graphic dimension.

Side lighting reveals the ice structure better than front lighting in the middle of the day. When the sky is overcast, the glacier retains fine details and cool tones. In these conditions, look for a clear separation between ice, rock, and clouds rather than spectacular contrast.

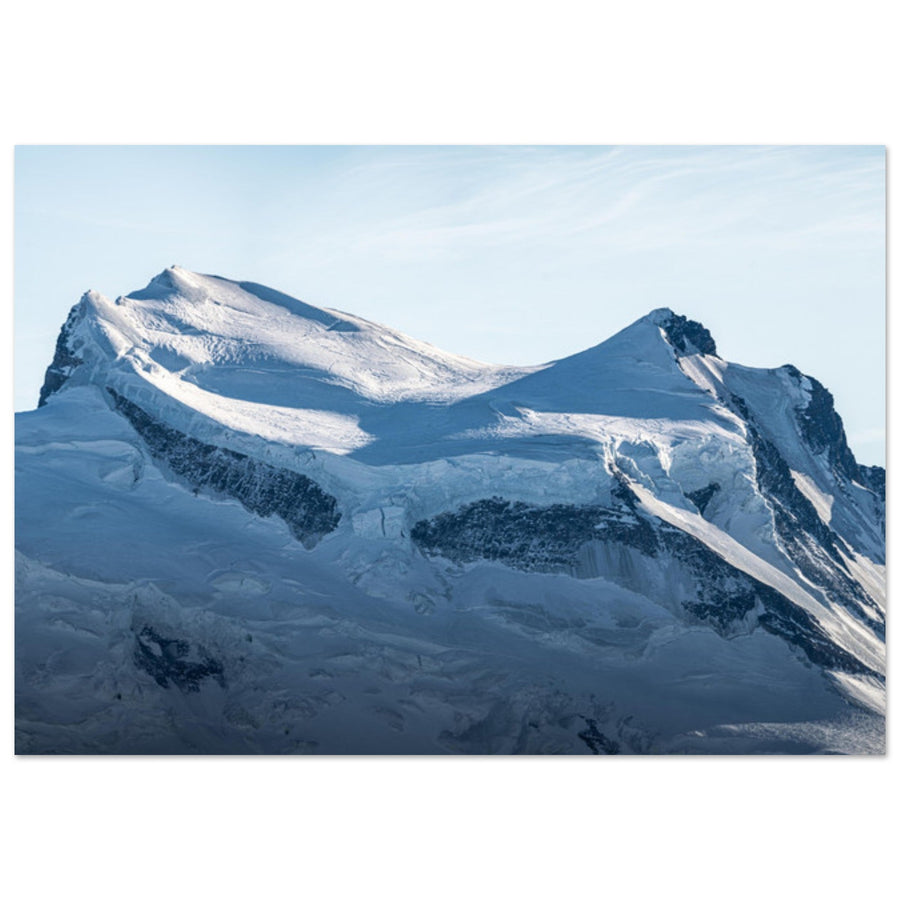
Photo print of Grand Combin dominating the Corbassière glacier in Val de Bagnes
The curve of the Corbassière glacier guides the eye towards the different peaks of the Grand Combin massif. Photography by Pierre Thiaville. View this Grand Combin photo print.

Panossière and Col des Otanes

The hike to the Panossière hut offers several levels of interpretation: bisse, slopes, moraine, glacier, and the Grand Combin massif. Higher up, the Col des Otanes provides a more dominant viewpoint. Do not systematically keep the entire valley in the frame. A succession of three well-separated planes is often more effective than an undifferentiated panorama.

The Corbassière footbridge adds a strong architectural element above the moraine. It can serve as a line or provide scale, but it should not become a mere backdrop. Respect traffic, do not block access with the tripod, and do not seek a composition by placing yourself in an exposed area.

Refuge, silhouette and human presence

The Panossière hut can be integrated as an anchoring point. With a telephoto lens, it provides the scale of the massif. A hiker's silhouette works in the same way, provided it is not staged at the edge of a dangerous area. The best human presences are often small and naturally integrated into the movement.

How to photograph the glaciers of Valais?

Preserving highlights

Snow and ice often occupy a large part of the frame. Check the histogram and overexposure alert. A bright area can remain very light, but it must retain texture when it represents the main subject. Do not underexpose excessively for fear of blowing out some reflections: the glacier would become gray and heavy.

Show scale

A glacier photographed without reference can look like a simple strip of snow. Use a moraine, a hut, a path, a tree, or a distant silhouette. The element must remain identifiable without attracting all the attention.

Exploiting moraines

Central and lateral moraines are very strong leading lines. They reveal the glacier's movement and structure compositions. With a telephoto lens, they become almost abstract. With a wide-angle lens, they lead towards the summits.

Working under an overcast sky

Grey skies can be favorable to glacial details. Contrasts are softer, shadows less harsh, and the blues of the ice easier to retain. Reduce the sky's prominence if it lacks structure and focus on textures.

Black and white

Black and white suits glaciers when the light already creates a separation between ice, rock, and clouds. It should not be used to mask an uninteresting sky. Work on local values and maintain intermediate grays in the ice.

Which season to choose for photographing Valais?

Winter

Winter simplifies villages and resorts, enhances the contrast of trains, chalets, and forests, but reduces access to certain trails. Verbier is particularly interesting during the blue hour. In the Aletsch Arena and Saastal, winter facilities allow access to high points, subject to resort rules and conditions.

Late spring and early summer

Snow remains on the peaks while the valleys regain their colours. This transition adds depth to images of Saastal. However, high-altitude trails may still have snow patches, and some facilities may not yet be operational.

Summer

Summer facilitates hikes to Panossière and high viewpoints. Midday light becomes harsh: plan for early starts, waiting until late in the day, or compositions focused on textures. Storms can create beautiful atmospheres, but they require a significant safety margin.

Autumn

Autumn brings lower light and warm colors to the forests of Saastal. Days shorten and lifts may reduce their operation. Check schedules before planning a program around an inaccessible viewpoint.

To prepare for morning light, consult our guide on how to photograph mountains at sunrise.

Compositions, focal lengths and settings

24–70 mm: the most versatile range

It allows framing the Aletsch glacier without excessively reducing it, preserving the Saastal context, and photographing the landscapes of Val de Bagnes. Between 35 and 70 mm, proportions remain natural and relief lines become more legible.

70–200 mm: simplifying Valais

The telephoto lens is essential in very dense landscapes. It isolates moraines, brings peaks closer, concentrates Verbier's lights, and allows working on the relationship between a refuge and a massif. Also use it to wait for a ray of light on a specific area.

16–35 mm: only with a strong foreground

The ultra-wide-angle works by a lake, on a moraine, or near a refuge. Without a foreground, it pushes the summits away and creates many empty areas. Get closer to the main element and check for distortions at the edge of the frame.

Initial settings

  • Landscape on tripod: ISO 100, f/8 to f/11, shutter speed according to light.
  • Handheld telephoto: shutter speed faster than the inverse of the focal length, more so in windy conditions.
  • Blue hour: low ISO, tripod, and monitoring of the strongest lights.
  • Moving clouds: shutter speed adapted to the desired effect, without automating long exposure.
  • Glacier: controlled exposure on bright areas and regular histogram checks.

To improve sharpness in these very deep landscapes, also read how to get perfectly sharp mountain photos.

Three photo itineraries in Valais outside Zermatt

Itinerary 1 — Aletsch Arena in two days

  • Day 1: reconnaissance from Bettmerhorn or Moosfluh, telephoto work on curves and moraines.
  • End of day: wider framing if transportation allows return after the best light.
  • Day 2: Eggishorn for the global view, then focal length change according to clouds.

This program is suitable for a first discovery. It allows comparing an oblique view and a more global view without multiplying valley changes.

Itinerary 2 — Saastal and Verbier in three days

  • Day 1: Hohsaas and Triftgletscher, with priority to morning light.
  • Day 2: Kreuzboden or Längfluh, then Saas-Fee at blue hour.
  • Day 3: travel to Verbier and twilight session after scouting.

This route combines high mountains and inhabited landscape. It remains dense: allow a margin for weather and connections.

Itinerary 3 — Grand Combin and Corbassière

  • Ascent towards Panossière with scouting along the bisse and the moraine.
  • End of day around the hut if accommodation and conditions permit.
  • Early morning departure to a suitable viewpoint, possibly towards the Col des Otanes depending on the itinerary and weather.
  • Descent with ample time before storms or reduced visibility.

This program is not a simple tourist excursion. It requires hiking preparation, appropriate equipment, and the ability to turn back.

What equipment to bring to Valais?

  • 24–70 mm: main lens for most landscapes.
  • 70–200 mm: highly recommended for peaks, glaciers, and villages.
  • Stable tripod: useful at sunrise, blue hour, and for precise framing.
  • Polarizing filter: to be used carefully on ice and lakes, without unevenly darkening the sky.
  • Extra batteries: cold and long waits reduce battery life.
  • Rain protection and cloth: snow, condensation, and rapid weather changes.
  • Appropriate footwear: essential even when the main access is by lift.
  • Warm and windproof clothing: the difference between valley and viewpoint can be significant.
  • Offline map and external battery: particularly useful in Val de Bagnes.

The best compromise remains a camera body, a 24–70 mm lens, and a 70–200 mm lens. For Panossière, prioritize safety and autonomy rather than a bag full of rarely used lenses.

Safety, glaciers, trails and drone regulations

The accessibility of lifts should not obscure the altitude. Wind, fog, and temperature changes can make a short outing challenging. Check the status of facilities, trails, and weather before each departure.

Never travel on a glacier without the appropriate skills and equipment. Crevasses can be masked by snow, and visual proximity from a viewpoint does not mean access is safe. Glacier tours must be undertaken with appropriate supervision when the terrain requires it.

In the Corbassière sector, allow for extra time and take into account snowfields, exposed passages, and guard dogs indicated on certain routes. A photograph never justifies leaving a safe trail or setting up in a rockfall zone.

Drone in Valais

In Switzerland, national, cantonal, and local restrictions may apply. Areas evolve and must be checked before each flight on the official map. The presence of an airfield, heliport, nature reserve, or wildlife protection area may impose a ban or specific authorization.

Also respect the general rules of the open category, direct visual line of sight, authorized height, and protection of people. In frequented landscapes, a technically possible flight may still be unsuitable due to noise, wildlife, or visitor density.

Valais photo prints outside Zermatt

The landscapes of Valais lend themselves to several types of wall decoration. The curves of the Aletsch Glacier work well in large horizontal formats. The Trift Glacier and the peaks of Saastal offer a more mineral image. Verbier provides a wintery and bright atmosphere, while the Grand Combin suits interiors looking for a more rugged landscape.

The photographs presented are offered as photo prints on matte Dibond aluminum, printed to order. Each work retains its attribution to the photographer indicated on its page.

Our selection for a grand glacial landscape

From Eggishorn, the moraine lines of the Aletsch Glacier give immediate depth to the landscape. The morning light separates the warm peaks from the still-cold valleys.

View the Aletsch Glacier photo print

To complete the photographic journey, continue with the guide to Zermatt and the Matterhorn, then with the future guide to the Bernese Oberland. The future page Photographing the Swiss Alps will allow you to compare the three regions.

Back to blog