Où photographier le col d’Izoard et la Casse Déserte ? - AluArtMountains

Where to photograph the Col d'Izoard and the Casse Déserte?

Published on July 30, 2026

The Col d'Izoard is one of the most recognizable passes in the Hautes-Alpes. At an altitude of 2,360 meters, it connects the Briançonnais region to the Queyras via a road that successively crosses larch forests, open slopes, and then the mineral landscape of the Casse Déserte. This variety allows for the creation of a complete photographic series without requiring long approaches.

The challenge isn't finding a spectacular landscape. Instead, it's about choosing a precise subject within a very busy environment: the hairpin bends of the road, a rocky pinnacle, the boundary between larches and scree, Lake Souliers, or the silhouette of Pic de Rochebrune. Lateral light or a few clouds are often enough to add relief to slopes that appear flatter under direct sunlight.

This guide compares the main areas around Izoard to prepare for an outing based on the season, light, and desired hiking level. It complements the page dedicated to photo destinations in the Alps and the selection of Queyras photo prints.

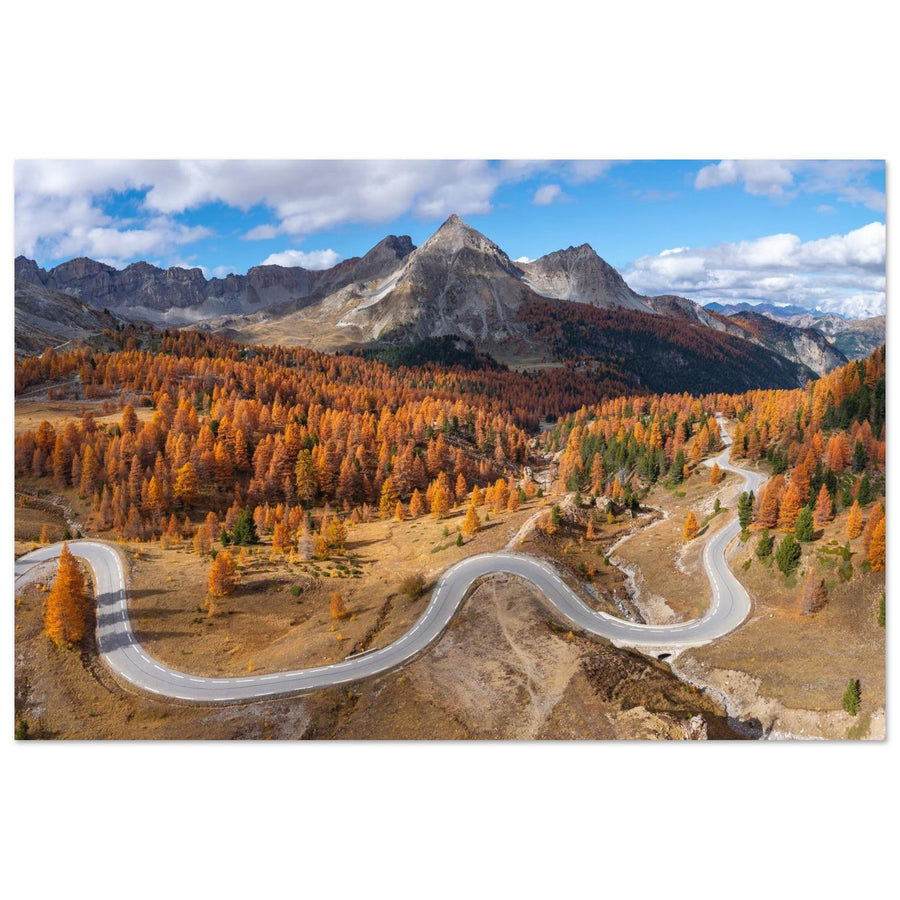
Photo print of Casse Déserte at Col d’Izoard with its rocky pinnacles in autumn
The pinnacles of Casse Déserte emerge from the scree under the autumn colors. Photography by Christophe Cappelli. Discover this Casse Déserte photo print.

The Essentials in 30 Seconds

  • Iconic Landscape: the Casse Déserte and its rocky pinnacles on the Queyras side of the pass.
  • Best Graphic Subject: the hairpin bends of the D902 between larches, scree, and open slopes.
  • Best Short Hike: Lake Souliers, perched at approximately 2,490 meters under the ridges and Pic de Rochebrune.
  • Most Colorful Season: autumn, when golden larches contrast with gray rocks and the first snow.
  • Most Useful Focal Lengths: 24–70 mm for contextualizing the road; 70–200 mm for isolating pinnacles, hairpin bends, and ridge details.
  • Point of Caution: seasonal high-altitude road, changing weather, traffic, and limited parking in some areas.

Why Photograph the Col d'Izoard and the Casse Déserte?

The photographic interest of Izoard primarily comes from the rapid transition between several landscapes. On the Arvieux side, the road climbs through larch forests and alpine pastures. Higher up, vegetation becomes sparse, curves become more distinct, and mineral reliefs take over. Finally, the Casse Déserte stands out from the rest of the route with its light scree and rocky spires.

This succession offers a true narrative. A first image can show the road in the forest, a second can isolate a hairpin bend beneath the slopes, then a third can focus on a rocky pinnacle or the silhouette of Rochebrune. The area is therefore better suited for a coherent series than for seeking a single, mandatory viewpoint.

The contrast is particularly strong in autumn. The golden larches take on yellow and orange hues while the scree remains almost monochromatic. After a light snowfall, white highlights the terrain's curves and further separates the planes. In summer, the interest lies more in the shadows, clouds, and the opposition between alpine pastures and high mountains.

The road also constitutes a subject in itself. It provides a human scale, guides the eye, and helps give direction to a vast landscape. However, care must be taken that it does not arbitrarily cut the image: its curve should lead towards the main relief or naturally close the frame.

Col d'Izoard, Casse Déserte, or Lake Souliers: Which Area to Choose?

Area Main Subjects Interesting Light Useful Focal Lengths Point of Attention
Road from Arvieux Larches, hairpin bends, alpine pastures, and Rochebrune Morning, late afternoon, autumn 24–70 mm, 70–200 mm Traffic and parking
Casse Déserte Pinnacles, scree, road, and lunar reliefs Lateral light, clouds, first snow 35–70 mm, 70–200 mm Avoid overly wide and flat compositions
Pass summit Road, refuge, ridges, and views towards both slopes Dawn, low light, after a disturbance 24–70 mm, 70–200 mm Wind and constructed elements in the frame
Lake Souliers Round lake, alpine pastures, ridges, and Rochebrune Calm morning, late afternoon, autumn 16–35 mm, 24–70 mm Wind, crowds, and hiking
Ridges and details Rochebrune, strata, shadows, and snow Sunset, stormy sky, clearings 70–200 mm and above Mist and excessive plane compression

Access and Preparation for a Photo Outing to Izoard

The D902 reaches the pass from Cervières and the Briançonnais to the north, or from Arvieux and the Queyras to the south. The Casse Déserte is located on the Queyras side. This high-altitude road is seasonal: it closes when winter conditions no longer allow traffic and may be subject to temporary restrictions, works, or cycling events.

Before you go, check the pass's opening status and road conditions with the departmental road information service. Good weather in the valley does not guarantee sufficient visibility at the pass. Wind, fog, and a rapid drop in temperature can change your outing in a few minutes.

Choosing Your Starting Point

  • From Arvieux: the best choice for progressively photographing the larches, the hairpin bends, and then the Casse Déserte.
  • From Cervières: a different, more direct approach to the pass summit, useful when the light favors the Briançonnais side.
  • For Lake Souliers: only use authorized starting points and parking, then follow the marked trail.

Arrive Early Without Obstructing Traffic

In summer, the pass attracts cars, motorcycles, and cyclists. Arriving early facilitates composition and reduces the risk of having to improvise a dangerous stop. Never park on a bend or a narrow section to get a shot. A successful road image can usually be prepared from an authorized spot or after a few minutes' walk.

1. Photographing the Casse Déserte

The Casse Déserte is the most spectacular subject in the area, but also the easiest to treat too descriptively. The rocky pinnacles stand out strongly against the scree, while the road provides a clear line through this almost monochrome landscape. The first instinct is often to include everything. However, a longer focal length produces stronger images by isolating two or three forms.

Using Pinnacles as Visual Rhythm

Look for the repetition of the spires rather than just one rock. Three forms of different sizes create progression and give an impression of depth. With a 70–200 mm lens, it becomes possible to remove empty areas and visually bring the pinnacles closer to the slope behind them.

Associating the Road with the Relief

The road works when it leads towards the subject or skirts a rocky mass. Avoid placing it exactly in the middle of the image. A low curve can serve as a foreground, while a more distant section provides a second line and reinforces the scale of the site.

Working with Clouds

A perfectly blue sky simplifies the scene but can also accentuate its dry appearance. Cloud shadows add volume to the scree and reveal successive layers. Expose for the light areas of the rock and wait for a clearing to hit the main pinnacle rather than excessively increasing the shadows later.

2. Photographing the Col d'Izoard Road in the Larches

On the Arvieux side, the road crosses a larch forest before reaching the mineral slopes. This is where autumn offers the most striking contrasts. The golden trees form a colorful mass around the roadway, while the gray peaks remain cooler in the background.

From a sufficiently elevated viewpoint, the hairpin bends become a succession of curves. A horizontal composition tells the story of the road's journey through the landscape. A vertical composition is often more effective when a single bend leads to a summit or a lit area.

Avoiding the Simple Aerial View Effect

A top-down view is not automatically a composition. Look for a clear relationship between the curves, trees, and relief. The road can start from a corner, cross the forest, then disappear behind a slope. When all sections of the roadway are visible without hierarchy, the eye doesn't know where to rest.

Integrating a Vehicle or Cyclist

A human element provides scale, but it must remain secondary. Prepare the frame before its passage and use a sufficiently fast shutter speed to maintain a sharp silhouette. Always stay away from the roadway and never ask someone to stop in a dangerous area.

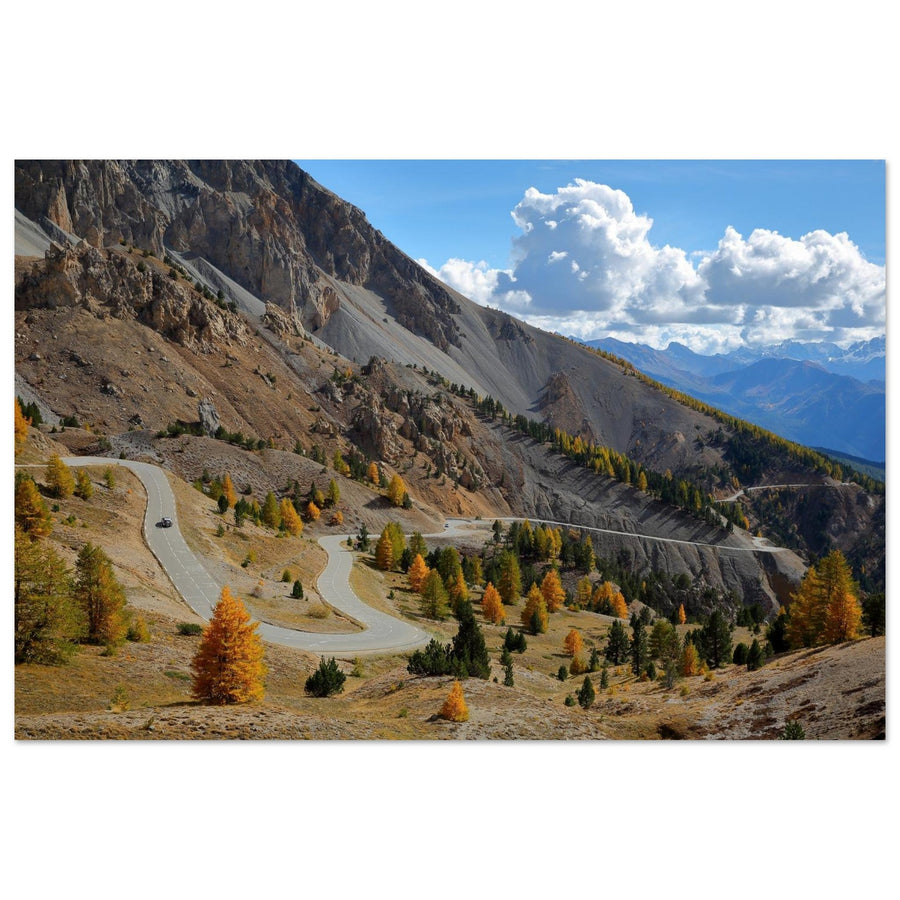
Photo print of the Col d’Izoard road winding through the golden larches of the Queyras
The D902 forms a gentle line through the autumn larches on the Queyras side of Izoard. Photography by Francois Roux. See this photo print of the Izoard road.

3. Photographing the Summit of Col d'Izoard

At the summit of the pass, views open up to both sides. The landscape is wider, but also more complex: road, refuge, parking, signs, and visitors can quickly compete with the mountain. A medium focal length allows you to select a coherent fragment rather than accumulating all elements.

Giving Direction to the Panorama

Use a ridge, a roadside, or a succession of slopes to guide the eye. If the sky is uniform, reduce its prominence. When a cloud front arrives, the sky can, on the contrary, become the second subject and balance the dark mass of the mountains.

Photographing After the First Snowfall

A thin layer of snow reveals the terrain's lines without completely obscuring the larches and rocks. This is often more interesting than uniform snow cover. White areas reflect light strongly: monitor the histogram and retain texture in the brightest parts.

Using the Refuge with Moderation

The Napoleon refuge can provide scale to the landscape, but it should not become an accidental element cut off by the frame. Either it clearly participates in the composition, or it's better to exclude it. A longer focal length helps to isolate the building against a slope or associate it with the road.

4. Photographing Lake Souliers

Lake Souliers is located at approximately 2,490 meters altitude, above the Izoard sector. Its almost circular outline contrasts with the angular ridges surrounding it. The shortest marked trail is about 4.8 kilometers round trip from the official start, with an altitude gain that should still be taken seriously.

The lake should not be approached solely as a mirror. Wind can eliminate reflections, and light can make the surface very dark. In this case, use its shape as a graphic element amidst the alpine pastures, or place it at the bottom of the frame to lead towards the ridges.

Choosing the Right Shooting Height

At the water's edge, a wide-angle lens accentuates the foreground but can visually reduce the mountains. A few extra meters in height make the lake's shape more readable. A 24–70 mm lens allows for a balance between the water's surface and the relief.

Photographing Autumn Colors

The ochre hues of the alpine pastures create a softer atmosphere than the Casse Déserte. Look for an area of colorful vegetation or a light-colored rock to structure the foreground. Low light emphasizes the terrain's undulations and prevents the lake's surroundings from becoming a uniform mass.

Respecting Herds and Wildlife

The area is traversed by herds during the season. Keep your distance, calmly bypass the animals, and follow local guidelines when protection dogs are present. A long focal length allows you to photograph the pastoral atmosphere without getting too close.

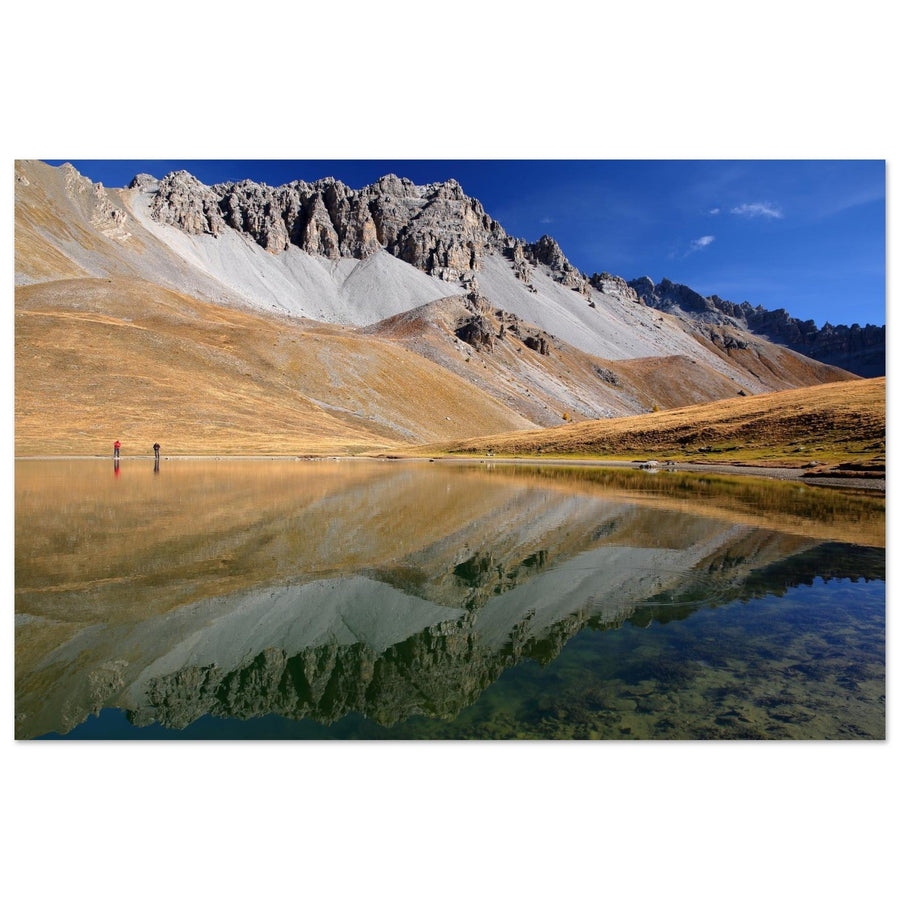
Photo print of Lake Souliers surrounded by ochre alpine pastures in autumn in the Queyras
Lake Souliers forms a calm spot amidst the autumn alpine pastures, under the Queyras ridges. Photography by Christophe Cappelli. Discover this photo print of Lake Souliers.

5. Isolating Pic de Rochebrune and the Queyras Ridges

Pic de Rochebrune dominates several views around Izoard and Lake Souliers. Its silhouette works particularly well with a telephoto lens, especially when light hits a ridge or clouds obscure part of the summit. It is not necessary to show the entire mountain for it to be identifiable.

Waiting for Localized Light

In the late afternoon, the rock may receive warm light while the lower slopes are already in shadow. Expose for the summit and accept denser dark areas. This difference in luminosity gives more strength than a uniformly lit image.

Using Compression of Planes

A 100-200mm lens visually brings crests closer. This compression is useful if several lines echo each other, but it can also make the landscape look cluttered. Separate planes by light, color, or a sharp variation in texture.

Composing with little sky

When the sky is empty, the mountain benefits from occupying a large part of the frame. Conversely, structured clouds can extend the lines of the summit. A vertical frame works well when light descends along a ridge or when a gap forms above the peak.

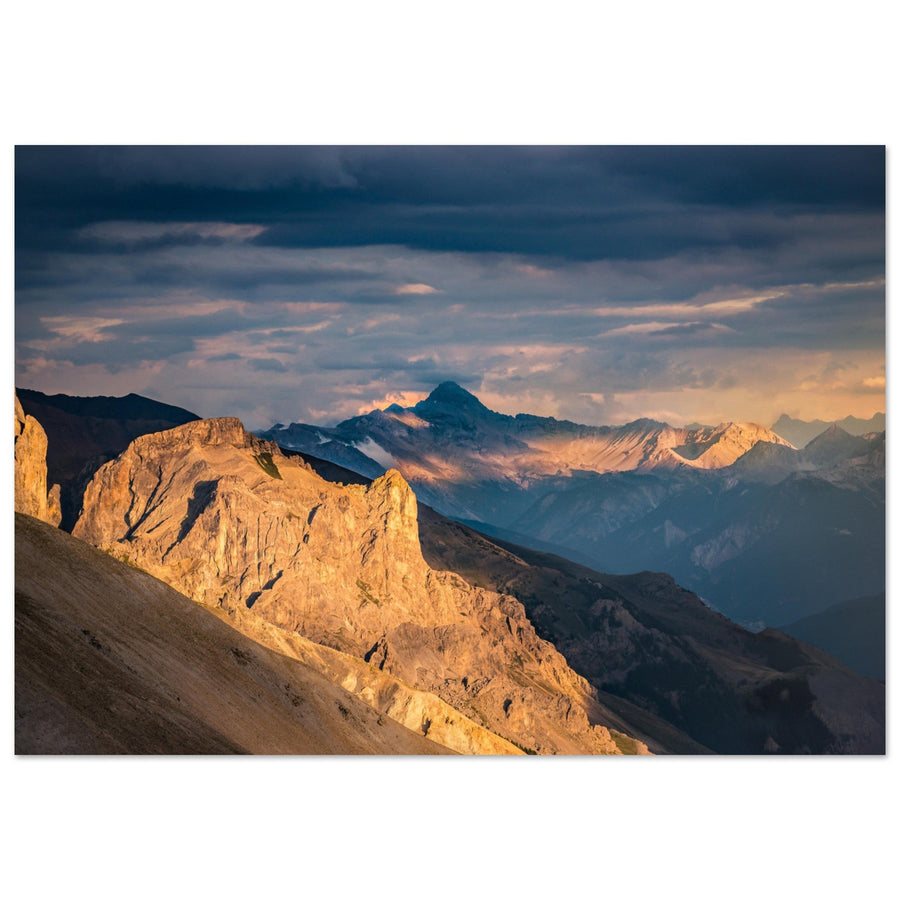
Photo print of Pic de Rochebrune illuminated at sunset in the Queyras massif
The last light isolates Pic de Rochebrune above the darker reliefs of Queyras. Photography by Pierre Thiaville. View this photo print of Pic de Rochebrune.

Sunrise, sunset or stormy sky: which light to choose?

Morning for calmer landscapes

The start of the day generally reduces traffic and makes it easier to work around the road. The light can remain cold in shaded areas while the ridges begin to receive sunlight. This difference in color temperature adds depth, provided that the hues are not completely neutralized during development.

Late afternoon for Rochebrune and reliefs

Sunset is particularly suited to tight shots of summits. Warm light may touch only a ridge for a few minutes. Prepare several compositions before the light arrives: a wide shot at 24–70mm and a tighter shot with a telephoto lens.

Clouds to sculpt the Casse Déserte

Scree slopes reveal their volumes better when shadows move. An alternation of clearings and cloudy periods is often more productive than a perfectly clear sky. However, avoid staying exposed on ridges if the risk of thunderstorms increases.

The wind at Lac de Souliers

A light wind favors reflections, but don't base the entire outing on a perfectly smooth surface. Ripples on the water can create an interesting texture. The lake remains a good subject thanks to its shape and its position in the alpine pastures.

Which season to choose for photographing the Izoard?

Late spring and early summer

After the road reopens, snowfields may still highlight the reliefs. The greener vegetation of the Arvieux side contrasts with the mineral slopes. Conditions remain variable and some hikes may still have snow.

Summer

Access is generally easiest, but crowds increase. Favor the early hours of the day, late afternoon, or more changeable weather. Harsh midday light accentuates contrasts without always giving volume to the scree.

Autumn

This is the richest period for connecting the different faces of the area. Golden larches, ochre alpine pastures, grey rock, and a possible first snowfall produce a very complete palette. Days shorten and the pass can close quickly after prolonged deterioration.

Winter

The pass road is no longer a classic road access. Any approach becomes a winter outing to prepare according to snow cover, avalanche risk, and authorized routes. A general photo guide does not replace local information or the skills required for snow-covered mountains.

Composition and focal lengths around the Izoard

16–35 mm: to be used with a real foreground

The ultra-wide-angle works at the edge of the lake or when the road starts close to the camera. Without a strong foreground, it distances the pinnacles and reduces the presence of Rochebrune. Check the edges of the frame: signs, vehicles, and road fragments can easily enter it.

24–70 mm: the most versatile focal length

This range allows showing the relationship between road, forest, and mountain without exaggerating distances. Around 50 to 70 mm, the reliefs gain presence while retaining sufficient context.

70–200 mm: isolate and simplify

The telephoto lens is particularly effective in the Casse Déserte. It allows selecting the pinnacles, superimposing the switchbacks, or photographing localized light on Rochebrune. Monitor atmospheric haze, which can reduce contrast on distant planes.

Vertical or horizontal?

The horizontal format is suitable for road curves and successions of ridges. Vertical reinforces a line climbing towards a summit, a lake placed in the foreground, or a break in the light. Photographing both orientations avoids discovering upon return that an important framing is missing from the series.

Three photo itineraries around the Col d’Izoard

Itinerary 1: short discovery of the Casse Déserte

  1. Climb from Arvieux to observe the first switchbacks and larches.
  2. Stop only at authorized locations around the Casse Déserte.
  3. Work a wide view with the road, then a tight shot of the pinnacles.
  4. Finish at the top of the pass to compare the two sides.

This itinerary prioritizes accessibility and allows varying focal lengths without long hikes. It remains dependent on road opening and traffic.

Itinerary 2: autumn series on the Izoard road

  1. Start early on the Arvieux side.
  2. Photograph the road curves in the larches with a medium focal length.
  3. Gradually climb towards the forest line.
  4. Compare the warm colors of the vegetation with the colder scree.
  5. Wait for side light on the Casse Déserte or Rochebrune.

Coherence comes from the transition of colors. No need to multiply viewpoints if three images clearly tell the story of the transition from forest to high mountains.

Itinerary 3: Lac de Souliers and ridge details

  1. Check the weather, trail conditions, and authorized parking.
  2. Reach the lake via the marked trail.
  3. Start with a wide view, then gain a few meters in height to reveal its shape.
  4. Use the telephoto lens on Rochebrune and the ridges.
  5. Descend before visibility or light deteriorates.

This option requires more walking and autonomy, but complements the road images well with a calmer, more pastoral atmosphere.

Recommended equipment and settings

  • 24–70 mm: main lens for the road, the Casse Déserte, and contextualized landscapes.
  • 70–200 mm: essential for isolating pinnacles, Rochebrune, switchbacks, and plays of light.
  • Wide-angle: useful at Lac de Souliers or for a very close road curve.
  • Lens hood and cloth: wind, dust, and sudden precipitation can dirty the lens.
  • Tripod: useful at dawn, dusk, or for a stable series, but not mandatory in broad daylight.
  • Warm clothing: even in summer, temperature and wind can change quickly at 2,360 meters.

Starting settings

For a classic landscape, start around f/8, ISO 100 to 200, and adjust the shutter speed according to the wind. With a telephoto lens, increase the shutter speed if gusts make framing unstable. For a cyclist or vehicle integrated into the scene, favor a sufficiently fast shutter speed rather than excessive aperture closure.

On snow or light rock, watch out for highlights. Slight underexposure is easier to correct than a white area with no detail. Bracketing can be useful when the sky remains very bright above a dark valley, but it does not replace well-chosen light.

Safety, traffic, and regulations

The Col d'Izoard remains a high mountain environment despite its road access. Check the pass's opening, the weather, and any restrictions on the day of your departure. Never set up on the roadway, behind a guardrail, or on a blind curve.

  • Only use authorized parking areas and spots.
  • Stay on marked trails in fragile areas.
  • Bring water, sun protection, a warm layer, and navigation tools.
  • Respect herds and guidelines regarding guard dogs.
  • Give up on a ridge or the lake if a storm, fog, or wind makes progress uncertain.

Drone in the Queyras Regional Natural Park

Drone flight is strictly regulated by national regulations and local rules designed to protect wildlife, herds, lakes, refuges, and other users. Consult the official map of restrictions and applicable decrees before any takeoff. The absence of a sign on site does not mean that flight is authorized.

Photographing the road without creating danger

Prepare your composition from a safe location and wait for a vehicle or cyclist to pass. Do not cross the road for a shot when visibility is insufficient. A long focal length often allows you to achieve the same compression from a more distant location.

Discover Izoard and Queyras as photo prints

The landscapes of Izoard are particularly well suited for printing on matte aluminum Dibond. The curves of the road remain precise, the details of the Casse Déserte retain their relief, and the hues of the larches easily integrate into contemporary decor or a mountain-inspired interior.

The collection brings together several interpretations of the area: the mineral relief of the Casse Déserte, the road through the larches, Lac de Souliers, and the evening light on Rochebrune. Each photo print is made to order, and the matte support limits reflections while offering excellent flatness.

Discover all photo prints of Queyras.

FAQ: Col d'Izoard and Casse Déserte

What is the best time to photograph the Col d'Izoard?

Summer offers the easiest access, but autumn is often the most interesting for combining golden larches with the scree of the Casse Déserte. In spring and late autumn, it is imperative to check the road's opening and trail conditions.

Where to photograph the Casse Déserte?

The clearest views are on the Queyras side of the pass, from authorized locations and paths. Look for a composition that combines the rocky pinnacles, scree, and possibly a curve in the road, without parking in a bend or encroaching on the roadway.

Is the Col d'Izoard road open all year round?

No. The road is seasonal and generally closes during the winter period. Dates vary depending on snow cover, roadworks, and safety conditions: check departmental road information on the day of your outing.

How to access Lac de Souliers?

The lake can be reached on foot via a marked trail from an authorized starting point near the Izoard area. The duration and conditions depend on the starting point, snow cover, and trail condition; check the itinerary before departing.

Should I prioritize sunrise or sunset?

Morning is well suited for calm atmospheres, larches, and Lac de Souliers when the wind is light. Late afternoon is often more favorable for tight shots of Rochebrune, shadows in the Casse Déserte, and side lighting on the ridges.

Can I fly a drone around the Col d'Izoard?

Flight depends on air regulations, any local decrees, and rules for the protection of wildlife and other users. Check the official map of restrictions and applicable rules at the exact takeoff point before each flight.

Back to blog