Écrins | Photographier la Barre des Écrins - AluArtMountains

Écrins | Photographing the Barre des Écrins

Updated on August 18, 2026

At 4,102 m, the Barre des Écrins is the highest point in the massif. For a photographer, however, this information is not enough to create an image: in a landscape where ridges, glaciers and rock faces overlap, the summit can become surprisingly discreet if the frame tries to show everything.

The question is therefore not simply to "see" the Barre, but to give it a clear place. It can be isolated as a summit, connected to the glacial system of which it is a part, or placed within a succession of moraines and ridges that give it scale. In all cases, the hierarchy must remain legible: if the eye first gets lost in the glacier or in the neighboring reliefs, the subject has changed.

The Glacier Blanc originates on the northern slopes of the Barre des Écrins. This geographical relationship is essential to understanding the landscape, but it does not transform the ice into the main subject. Here, the glacier serves the reading of the summit; when photographing glacial material for itself, the intention becomes different.

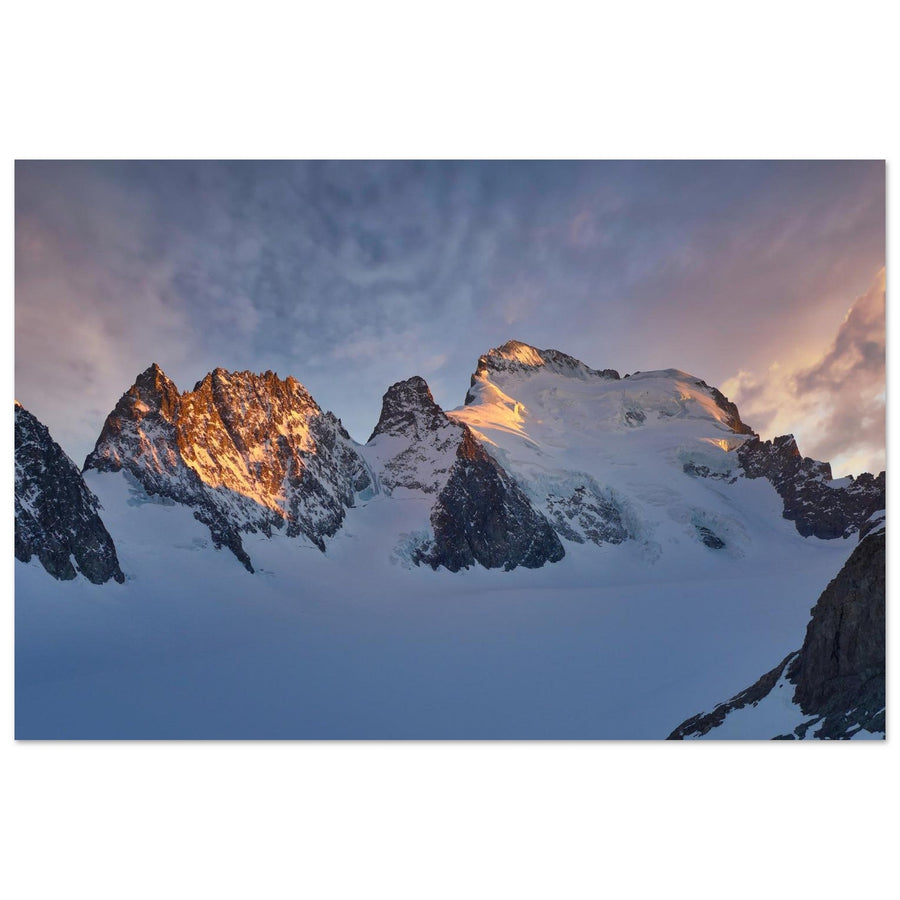
Header photo: Daniel Trixl — Barre des Écrins at sunrise.

Reading time: 13 min

Key takeaways in 30 seconds

  • The Barre is a summit subject: it must remain identifiable and sufficiently present in the frame.
  • The Glacier Blanc, moraines, and ridges can provide depth and scale, but should not take priority.
  • The Glacier Noir sector is officially documented as offering panoramas towards the high peaks, including the Barre, with a level of commitment that should never be underestimated.
  • A longer focal length is often useful when competing peaks obscure the view.
  • A standard focal length is appropriate if the glacial landscape genuinely contributes to the composition without reducing the Barre to a detail.
  • Light is handled according to the visibility of the summit, the separation of the ridges, and actual conditions; no "best sunrise" or "best sunset" is established.
  • Approaches to Pré de Madame Carle and the glaciers require recent checks of the road, trails, footbridges, snow cover, and weather.

Understanding what you are photographing

The Barre does not have the same visual function as a glacier. A glacier fills a surface, shows a material, and reveals the evolution of a landscape. A summit acts more as an anchor point: the image should lead towards it.

This difference helps decide even before choosing the focal length. If your attention first goes to the seracs, fractures, moraines, or the texture of the ice, the Barre probably becomes a background. If, on the contrary, these elements lead the eye to a clearly identifiable silhouette, they serve the subject.

In a very busy environment, the best decision is often to subtract rather than add. A secondary ridge can be useful if it leads to the summit; three superimposed ridges, on the other hand, can make it disappear. A moraine can provide a diagonal; a foreground without direction only clutters the frame.

Pré de Madame Carle: entering the landscape without showing everything

Pré de Madame Carle is documented as a gateway to the Park, at the foot of the major reliefs in the sector. It is also a place where glacial history remains legible: the Glacier Blanc and Glacier Noir once met there.

For the Barre, this sector should be approached as a context, not as a promise of an identical view from every point. Valley lines, torrents, moraines, and rock faces provide the scale of the high mountains, but the actual visibility of the summit depends on the position and relief.

If the Barre is small in the frame, do not necessarily try to keep the entire valley. A longer focal length can reduce the number of planes and give more weight to the summit. If a moraine or a water line naturally leads to the high peaks, it can, on the contrary, justify a wider composition.

The important point is to decide what the foreground brings: depth, scale, or direction. If it performs none of these functions, it is probably too much.

Glacier Noir and moraines: a more mineral interpretation

Destination Écrins documents panoramas of the high peaks, including the Barre des Écrins, from the Glacier Noir sector. Another official resource explicitly mentions a panorama including several summits in the sector, including the Barre, from a moraine route.

This information is photographically interesting because it confirms a visual relationship between the Barre and a very mineral landscape. Moraines, ridges, and slopes can serve as lines of depth and place the summit in a high mountain atmosphere.

It should never be interpreted as an invitation to seek a framing at the cost of a more committing itinerary. Moraine and high mountain routes require an accurate reading of the level, conditions, and official warnings. A documented view is not an access recommendation.

If you are working from an area suitable for your level, seek simplicity: a moraine as a diagonal, a dark ridge below the summit, or a succession of well-separated reliefs. The more the planes merge, the more the Barre loses its status as an anchor point.

Connecting the Barre to the Glacier Blanc without inverting the hierarchy

The Glacier Blanc begins to form on the northern slopes of the Barre. This relationship allows for images where ice and summit belong to the same interpretation.

In a wide composition, the glacier can occupy a significant portion of the bottom of the frame, provided the Barre remains the destination point. A ridge, a moraine, or an ice line can help guide the eye.

With a telephoto lens, it becomes possible to reduce the landscape to a few shapes: a portion of glacier, a ridge, and the summit. This simplification is often more effective than a panorama when neighboring reliefs overlap.

If the texture of the glacier becomes more interesting than the silhouette of the Barre, do not artificially try to maintain the summit as the subject. The landscape then offers another photograph, centered on the ice rather than on the highest point.

Isolating the summit

The primary way to give the Barre presence is to control its size within the frame. A distant summit in the middle of a grand panorama can be geographically important while remaining visually secondary.

A longer focal length visually brings planes closer, reduces competing summits, and limits the amount of sky. It is particularly useful when several ridges have similar dimensions and the silhouette of the Barre gets lost in the overall view.

However, compression requires monitoring overlaps. An intermediate ridge can obscure part of the mountain or create a confusing line. Move a few meters when the terrain allows, or slightly adjust the framing to regain legible separation.

Conversely, a wider view remains relevant when landscape elements clearly establish the summit's scale. Width is not the problem; the lack of hierarchy is.

Composing with ridges, moraine, and ice

Several elements can serve the Barre without becoming competing subjects.

A moraine can function as a diagonal leading towards the summit. A glacier tongue can create material continuity between the bottom and top of the frame. A dark ridge can separate two planes and increase the legibility of the Barre. A small human presence can give scale if it remains truly secondary.

However, avoid accumulation. In a high mountain landscape, each element already possesses a lot of texture. Three moraines, several summits, and a highly structured sky can be enough to saturate the image.

A good composition does not seek to prove the immensity of the massif by showing everything. It chooses a few forms that explain why the Barre is the focal point.

Focal lengths: simplifying or contextualizing

A 70–200 mm range is particularly useful when the Barre lacks presence, when ridges multiply, or when light only affects part of the relief. It allows for construction with fewer elements.

A 24–70 mm range is more suitable when the glacier, moraine, or valley needs to remain sufficiently present to explain the landscape. The summit must then retain sufficient size so as not to become a mere detail.

Wide-angle is not prohibited, but it requires a highly structuring foreground. Without a clear line or scale element, it quickly distances the Barre and increases the amount of unnecessary information.

These choices are compositional tools. They are neither mandatory focal lengths nor characteristics inherent to the location.

Light and weather: seeking separation, not a promise

Daniel Trixl's photograph shows the Barre des Écrins at sunrise. This scene does not allow for the conclusion that sunrise is the best time, nor for inferring the exact viewpoint or light orientation.

In the field, observe the separation of planes instead. A clear spell can detach the summit from neighboring ridges. An overcast sky can reduce contrasts and bring out textures. Clouds can isolate the Barre or, conversely, completely obscure it.

When only part of the summit is visible, a tighter crop can turn this constraint into a detail shot. When clouds erase the silhouette, wait for a change if conditions remain safe, or change your intention.

The sky does not need to be spectacular. If it adds nothing, reduce its prominence. If clouds structure the mountain, use them as an additional plane rather than just a backdrop.

Compositions to prepare

Isolated Barre — large summit in the frame, little sky, reduced secondary reliefs.

Barre and moraine — a mineral diagonal leads towards the summit without occupying the entire image.

Barre and glacier — the ice provides depth, but the silhouette remains the destination of the gaze.

Successive planes — several ridges are kept only if they are clearly separated.

Localized light — a tighter crop utilizes a visible or lit area of the summit.

Scale — a human presence or a landscape element remains tiny and secondary to show the dimension of the relief.

When the scene doesn't work

Barre too small: increase the focal length or look for a frame where secondary planes occupy less space.

Confusing ridges: slightly change your position or framing to regain a legible silhouette.

Glacier too dominant: embrace an image centered on the ice rather than forcing the Barre as the subject.

Summit in the clouds: wait for a clearing if conditions are stable, crop the frame, or abandon that intention.

Sky too prominent: lower the horizon in the frame or switch to a longer focal length.

Foreground without direction: remove it.

Uncertain access: change your plan and check official sources; never compensate for a closure or poor conditions with an improvised itinerary.

Access, commitment, and regulations

Access and conditions to check

Photographing the Barre does not mean undertaking its ascent. The summit can be observed from officially documented hiking or viewpoint areas without the page becoming an alpinism guide.

Approaches to Pré de Madame Carle, Glacier Blanc, and Glacier Noir remain mountain outings. Road opening, trail conditions, footbridges, snow cover, floods, and the consequences of storms can change rapidly. Check recent information before you go.

Moraine or high mountain itineraries should never be simplified for the sake of a photograph. The level of commitment described by official sources takes precedence over any image considerations.

In the heart of the Écrins National Park, also check the regulations applicable to the exact itinerary. Beautiful light does not justify an improvised glacial progression or a technical passage beyond your skill level.

Works and collections

This work places the Barre at the center of the composition. Its title documents a photograph taken at sunrise, but does not allow generalizing this moment to all viewpoints.

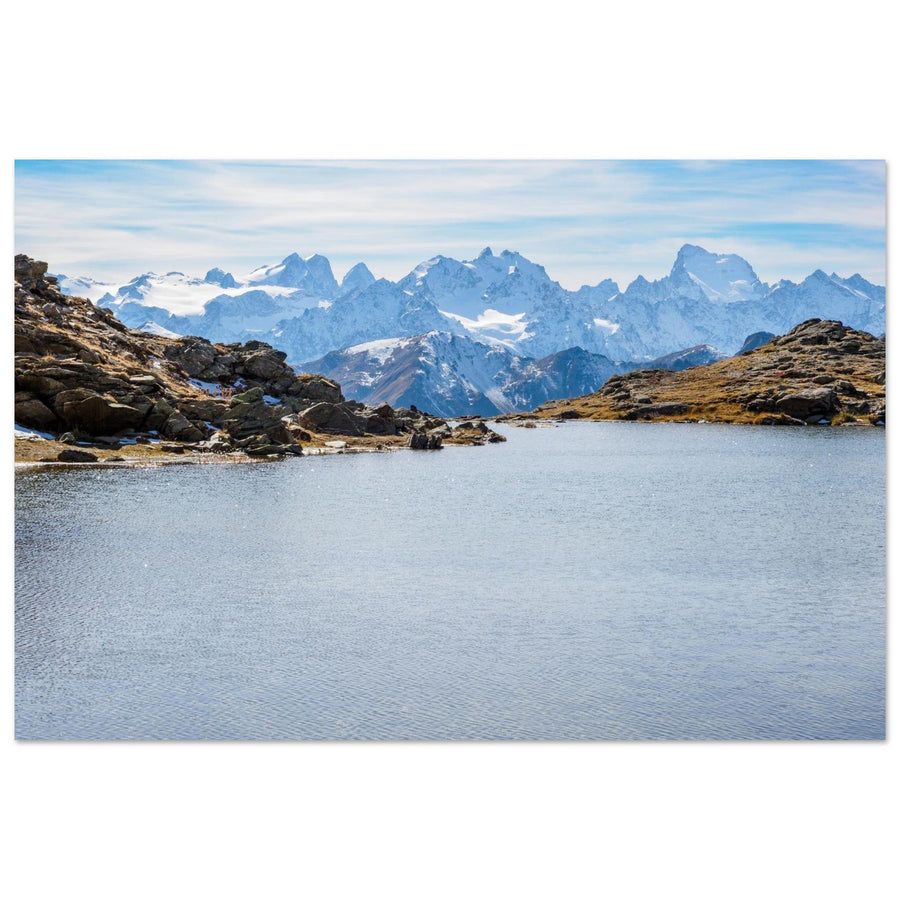
This photograph documents a visual relationship between the Barre and the Rouies plateau. It illustrates an interpretation of the summit integrated into a high mountain environment without the plateau dominating.

Discover photo prints of the Écrins massif

Official sources

Frequently asked questions

Can you photograph the Barre des Écrins without climbing it?

Yes. Official hiking and observation areas offer panoramic views of the high peaks, including the Barre. The choice of a viewpoint must be compatible with your skill level and the conditions of the day.

How do you know if the subject is the Barre or the Glacier Blanc?

Look at what really catches the eye. If the silhouette of the summit organizes the composition and the ice leads to it, the Barre remains the subject. If the textures, moraines, and glacial material become the main interest, the photograph speaks more about the Glacier Blanc.

How do you keep the Barre legible in a landscape filled with peaks?

Reduce the number of competing ridges, use a longer focal length when helpful, and look for a clear separation between planes. A simpler image often gives the summit more presence.

What elements can give scale?

A moraine, an ice tongue, an intermediate ridge, or a very small human presence can work. They must remain secondary and guide the eye rather than stop it.

Should you prioritize sunrise or sunset?

No universal schedule is established. A work by Daniel Trixl documents a sunrise, but the photographic choice mainly depends on the viewpoint, the visibility of the summit, the clouds, and the actual separation between the reliefs.

What should you check before heading to Pré de Madame Carle or the glaciers?

Road opening, condition of trails and footbridges, snow cover, weather, and any official alerts. This information changes and must be checked at the time of your outing.

To prepare for what's next

Prioritizing the Barre des Écrins

Build the image around the summit: ridges, moraines, and glaciers can add depth, but the Barre must remain the focal point.

About the author

Pierre Thiaville has been photographing mountains since 2017. He founded AluArtMountains in 2024. The photographs presented here are by Daniel Trixl and Pierre Thiaville, as indicated under each work.

Discover Pierre Thiaville and his photographic work →